Sharp LC19DV24U LC-19DV24U Operation Manual - Page 19

programs, Labeling, channels

Page 19 highlights

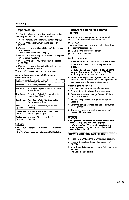
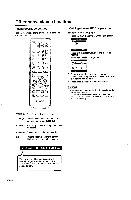
Watching TV View mode for 4:3 programs 1 Press VIEW MODE. • The View mode menu displays. • The menu lists the view mode options selectable for the type of video signal currently being received. 2 Press 0-3 to select each view mode directly while the View mode menu is still on the screen. • Each time VIEW MODE is pressed, View Mode item toggles. • You can also select View Mode item by pressing A/y. • You can sequentially select a view mode that has its own aspect ratio. Vtaorlded• ail.,..r . Labeling channels To create channel labels 1 Select a channel you want to label. 2 Press TV MENU, then press Alv to select "Channel", then press ow or ENTER. Press A/v to select "Ch Label", then press ► or ENTER. The Ch Label menu will appear. 3 Press to select a channel you want to label, then press v. Oh ;Abel MUNI 4WD.' asIrstch 04:141•41 Side Bar: Suitable for viewing conventional 4:3 programs in their normal format. S.Stretch (Smart stretch): Suitable for stretching 4:3 programs to fill the screen. O n n Zoom: Suitable for viewing wide-screen 2.35:1 anamorphic DVDs in full screen. Stretch: This mode is useful for 1.78:1 DVDs. When viewing 1.85:1 DVDs, stretch mode will still show very thin black bands at the top and bottom of the screen. • You can enter to the same menu screen from "Picture" menu. • You cannot select "Side Bar and "S.Stretch" when a 720p or 1080i signal is being input. 4 Press repeatedly until the character you want appears in the first space. r.The characters rotation as follows: 0 •••9 4-sA•••2 41-s- • .00 14. -

  • 1
  • 2
  • 3
  • 4
  • 5
  • 6
  • 7
  • 8
  • 9
  • 10
  • 11
  • 12
  • 13
  • 14
  • 15
  • 16
  • 17
  • 18
  • 19
  • 20
  • 21
  • 22
  • 23
  • 24
  • 25
  • 26
  • 27
  • 28
  • 29
  • 30
  • 31
  • 32
  • 33
  • 34
  • 35
  • 36
  • 37
  • 38
  • 39
  • 40
  • 41
  • 42
  • 43
  • 44
  • 45
  • 46
  • 47
  • 48
  • 49
  • 50
  • 51
  • 52
  • 53
  • 54
  • 55
  • 56
  • 57
  • 58
  • 59
  • 60
  • 61
  • 62
  • 63
  • 64
  • 65
  • 66
  • 67
  • 68
  • 69
  • 70
  • 71
  • 72
  • 73
  • 74
  • 75
  • 76
  • 77
  • 78
  • 79
  • 80
  • 81
  • 82
  • 83
  • 84
  • 85
  • 86
  • 87
  • 88
  • 89
  • 90
  • 91
  • 92
  • 93
  • 94
  • 95
  • 96
  • 97
  • 98
  • 99
  • 100
  • 101
  • 102
  • 103
  • 104
  • 105
  • 106

Watching
TV
View
mode
for
4:3
programs
Labeling
channels
1
Press
VIEW
MODE.
To
create
channel
labels
The
View
mode
menu
displays.
1
Select
a
channel
you
want
to
label.
The
menu
lists
the
view
mode
options
selectable
for
the
type
of
video
signal
currently
being
received.
2
Press
TV
MENU,
then
press
Alv
to
select
2
Press
0-3
to
select
each
view
mode
directly
while
"Channel",
then
press
ow
or
ENTER.
the
View
mode
menu
is
still
on
the
screen.
Press
A/v
to
select
"Ch
Label",
then
press
or
Each
time
VIEW
MODE
is
pressed,
View
Mode
item
ENTER.
The
Ch
Label
menu
will
appear.
toggles.
3
Press
to
select
a
channel
you
want
to
label,
You
can
also
select
View
Mode
item
by
pressing
A/y.
then
press
v.
You
can
sequentially
select
a
view
mode
that
has
its
own
aspect
ratio.
Oh
;Abel
Vtaorlded•
MUNI
4WD.'
ail.,..r
.
asIrstch
4
Press
repeatedly
until
the
character
you
want
04:141•41
appears
in
the
first
space.
n
O
n
Side
Bar:
Suitable
for
viewing
conventional
4:3
programs
in
their
normal
format.
S.Stretch
(Smart
stretch):
Suitable
for
stretching
4:3
programs
to
fill
the
screen.
Zoom:
Suitable
for
viewing
wide-screen
2.35:1
anamorphic
DVDs
in
full
screen.
Stretch:
This
mode
is
useful
for
1.78:1
DVDs.
When
viewing
1.85:1
DVDs,
stretch
mode
will
still
show
very
thin
black
bands
at
the
top
and
bottom
of
the
screen.
You
can
enter
to
the
same
menu
screen
from
"Picture"
menu.
You
cannot
select
"Side
Bar
and
"S.Stretch"
when
a
720p
or
1080i
signal
is
being
input.
View
mode
for
HD
programs
Stretch
mode
is
available
for
HD
programs.
Suitable
for
viewing
wide-screen
1.78:1
aspect
-ratio
programs.
When
viewing
1.85:1
programs,
the
stretch
mode
will
still
show
very
thin
black
bands
at
the
top
and
bottom
of
the
screen.
The
characters
rotation
as
follows:
r
.
0
•••9
4-sA•••2
41-s-
.00
14
.-
<-1
s
SPACE
<
If
the
character
which
you
desire
appears,
press
ENTER.
Repeat
this
step
to
enter
the
rest
of
the
characters.
When
you
finish
inputting
the
label
name,
press
ENTER.
5
Press
EXIT
to
return
to
the
normal
screen.
6
Repeat
steps
1-5
for
other
channels.
You
can
assign
a
label
to
each
channel.
To
erase
channel
labels
1
Select
a
channel
with
a
label
which
you
want
to
remove.
2
Press
TV
MENU,
then
press
A/v
to
select
"Channel",
then
press
o.
or
ENTER.
Press
A/v
to
select
"Ch
Label",
then
press
or
ENTER
to
display
the
Ch
Label
menu.
3
Press
A/v
to
select
"Label
Clear".
Press
IP-.
4
Press
EXIT
to
return
to
the
normal
screen.
5
Repeat
steps
1-4
to
erase
other
channel
labels.
CEO
-
17