Sharp PN-Y556 SHARP Content Distributor Operation Manual - Page 17
Adding or editing a scheduled distribution
 |
View all Sharp PN-Y556 manuals
Add to My Manuals
Save this manual to your list of manuals |
Page 17 highlights
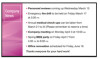
Adding or editing a scheduled distribution n Adding a scheduled distribution 1. In the content list management screen, select the content list that you want to schedule for distribution. 2. Click . The dialog box below appears. 3. Specify the scheduled distribution settings. Set the items below. Select panel Select the panels to which the content will be distributed. To distribute to all panels, select "All". Schedule name Specify the schedule to be set. Only schedules that have not been set will appear. Content list The content list name to be distributed appears. This cannot be changed when the scheduled distribution is being set from the content list management screen. Day of week Select the day of week on which the content will be distributed. Time Select the time at which the content will be distributed. 4. Click "OK". 5. The screen for activating scheduled distribution mode appears. Click "OK" or "Cancel". • Click "OK" to activate scheduled distribution mode and start scheduled distribution. While in scheduled distribution mode, you cannot activate the "Content" tab or "Panel" tab, or add a scheduled distribution. • Click "Cancel" to not activate scheduled distribution mode and continue working in the software. TIPS • A maximum of up to 7 scheduled distributions can be set. To add a scheduled distribution when 7 have already been set, delete a previously set scheduled distribution. • When scheduled distributions are set on the same day of week and time, the scheduled distribution that appears at the top of the scheduled distribution information area will be distributed first. Remaining scheduled distributions will be distributed when the previous scheduled distribution is completed. • If the time for a scheduled distribution arrives while a previous scheduled distribution is still in progress, the scheduled distribution will start after the current scheduled distribution is completed. • Distribution will not be possible if there is insufficient free space in the USB flash drive or SD memory card. In addition to space for the content, working space is also required. Make sure that the free space is sufficiently larger than the content to be distributed. 17 E
-
 1
1 -
2
-
3
-
4
-
5
-
6
-
7
-
8
-
9
-
10
-
11
-
 12
12 -
 13
13 -
 14
14 -
 15
15 -
 16
16 -
 17
17 -
 18
18 -
 19
19 -
 20
20 -
 21
21 -
 22
22 -
23
-
24
-
25
 |
 |
