Sharp VL-NZ50U Operation Manual - Page 26
Setting the Date
 |
UPC - 074000352957
View all Sharp VL-NZ50U manuals
Add to My Manuals
Save this manual to your list of manuals |
Page 26 highlights
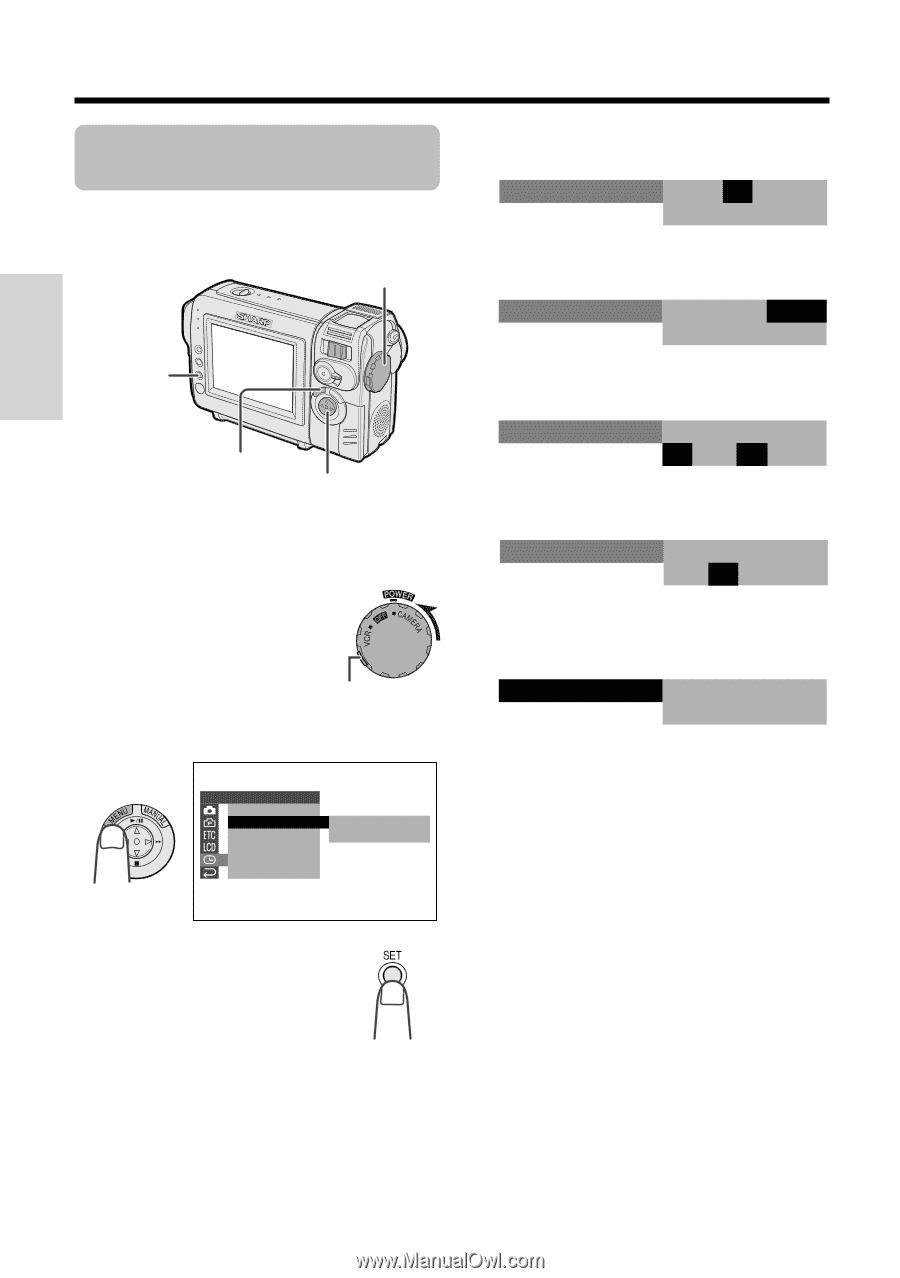
Preparation Preparation Setting the Date and Time Example: Setting the date to June 2, 2003 (JUN. 2. 2003) and the time to 10:30 am (10:30 AM). Power switch SET button MENU button Operation button Note: • Before performing the steps below, make sure that the lithium battery has been installed (see page 11). 1 Hold down the Lock button and set the Power switch to CAMERA. Lock button 2 Press the MENU button until the menu screen appears. CLOCK SET D I SPLAY SE T T I NG 12H/ 24H RE TURN J AN. 1. 2 0 0 2 1 2 : 0 0 AM 4 Press l or m to select "JUN" (month), then press the SET button. SE T T I NG JUN. 1. 2002 1 2 : 0 0 AM 5 Press l or m to select "2" (day), then press the SET button. SE T T I NG JUN. 2. 2002 1 2 : 0 0 AM 6 Press l or m to select "2003" (year), then press the SET button. SE T T I NG JUN. 2. 2003 1 2 : 0 0 AM 7 Press l or m to select "10 AM" (hour), then press the SET button. SE T T I NG JUN. 2. 2003 1 0 : 0 0 AM 8 Press l or m to select "30" (minute), then press the SET button. • The internal clock now starts operating. SE T T I NG JUN. 2. 2003 1 0 : 3 0 AM 9 Press the MENU button to turn off the menu screen. Note: • If the date and time have been set, the SETTING 1 screen (T) appears in step 2. Select "SETTING" in the CLOCK SET screen (P) using the Operation button and SET button. 3 Press the SET button. 13
-
 1
1 -
2
-
3
-
4
-
5
-
6
-
7
-
8
-
9
-
10
-
11
-
12
-
13
-
14
-
15
-
16
-
17
-
18
-
19
-
20
-
 21
21 -
 22
22 -
 23
23 -
 24
24 -
 25
25 -
 26
26 -
 27
27 -
 28
28 -
 29
29 -
 30
30 -
 31
31 -
32
-
33
-
34
-
35
-
36
-
37
-
38
-
39
-
40
-
41
-
42
-
43
-
44
-
45
-
46
-
47
-
48
-
49
-
50
-
51
-
52
-
53
-
54
-
55
-
56
-
57
-
58
-
59
-
60
-
61
-
62
-
63
-
64
-
65
-
66
-
67
-
68
-
69
-
70
-
71
-
72
-
73
-
74
-
75
-
76
-
77
-
78
-
79
-
80
-
81
-
82
-
83
-
84
 |
 |