Sharp VL-NZ50U Operation Manual - Page 59
To pause audio dubbing, To cancel audio dubbing
 |
UPC - 074000352957
View all Sharp VL-NZ50U manuals
Add to My Manuals
Save this manual to your list of manuals |
Page 59 highlights
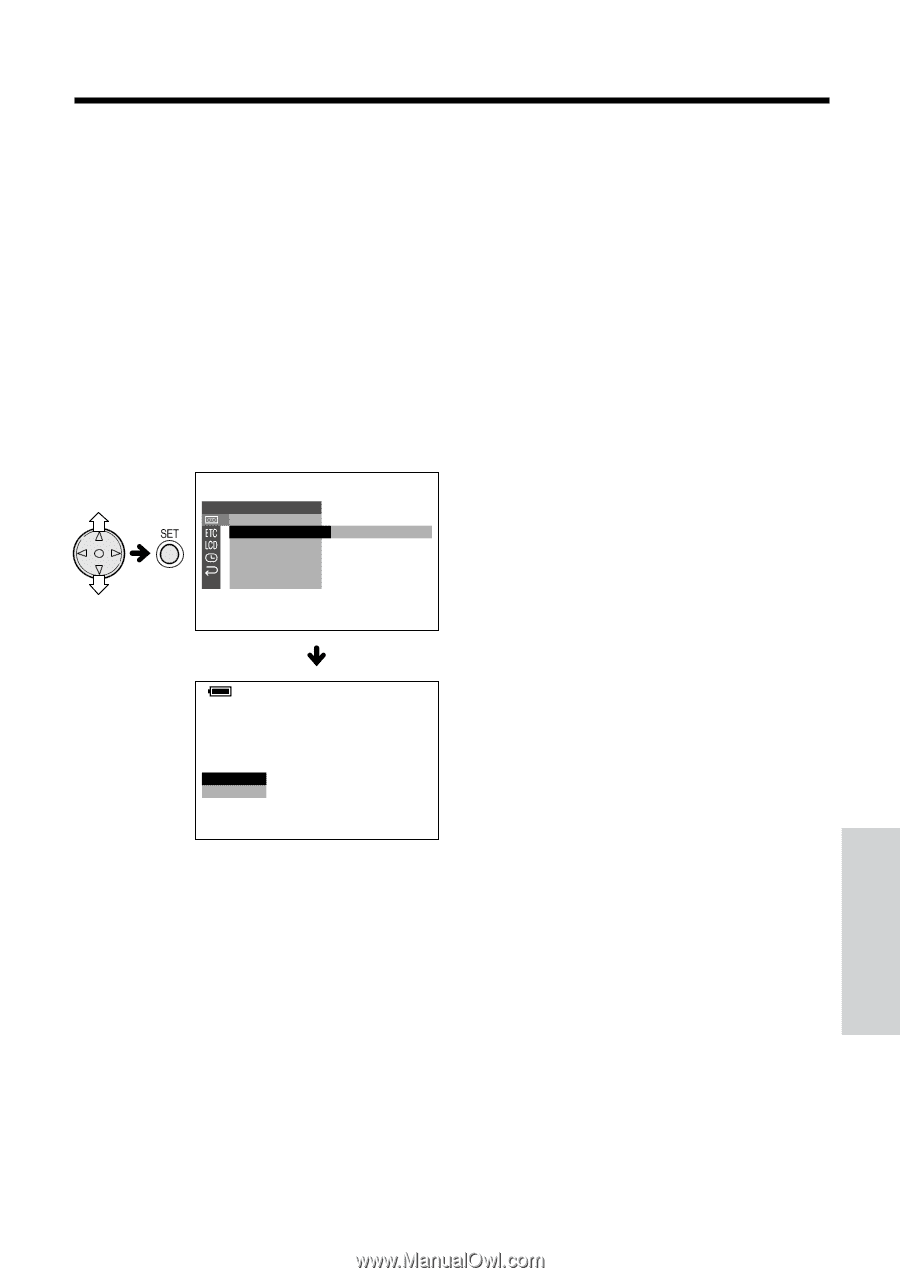
Audio Dubbing 1 Play back the recorded Mini DV cassette and locate the tape position where you wish to start audio dubbing. 2 Press m to pause playback. 3 Press the MENU button until the menu screen appears. 4 Press l or m on the operation button to select V, then press the SET button. 5 Press l or m to select "AUDIO DUB", then press the SET button. • The audio dubbing screen appears. PLAYBACK SE T P I C. E F F ECT AUD I O DUB E XECUT E AUD I O RE T URN AUD I O DUB START STOP AUDIO1+ 2 To pause audio dubbing Press the SET button. To resume audio dubbing, press the SET button again. To cancel audio dubbing Press the MENU button. The audio dubbing screen disappears. If you wish to change the dubbed audio or dub additional scenes 1 Press the MENU button to turn off the audio dubbing screen. 2 Repeat steps 1 to 6 above. Notes: • It is recommended that you use Audio Dubbing only with recordings made with this camcorder. Use of recordings made with other digital video equipment may result in poor audio quality. • Audio dubbing will automatically pause if the original audio changes from 12-bit mode to 16bit mode or vice versa. Press the SET button to resume operation. • Audio dubbing will automatically stop if a portion recorded in LP mode or an unrecorded portion of the tape is encountered. • You can play back the dubbed audio and the original audio together or separately (see page 47). 6 Press the SET button to begin audio dubbing. Record your narration. Advanced Features 46
-
 1
1 -
2
-
3
-
4
-
5
-
6
-
7
-
8
-
9
-
10
-
11
-
12
-
13
-
14
-
15
-
16
-
17
-
18
-
19
-
20
-
21
-
22
-
23
-
24
-
25
-
26
-
27
-
28
-
29
-
30
-
31
-
32
-
33
-
34
-
35
-
36
-
37
-
38
-
39
-
40
-
41
-
42
-
43
-
44
-
45
-
46
-
47
-
48
-
49
-
50
-
51
-
52
-
53
-
 54
54 -
 55
55 -
 56
56 -
 57
57 -
 58
58 -
 59
59 -
 60
60 -
 61
61 -
 62
62 -
 63
63 -
 64
64 -
65
-
66
-
67
-
68
-
69
-
70
-
71
-
72
-
73
-
74
-
75
-
76
-
77
-
78
-
79
-
80
-
81
-
82
-
83
-
84
 |
 |