Singer CG-590 Commercial Grade Instruction Manual - Page 13
Attaching Purchased Piping
 |
View all Singer CG-590 Commercial Grade manuals
Add to My Manuals
Save this manual to your list of manuals |
Page 13 highlights
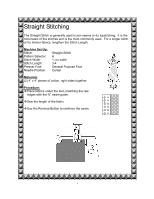
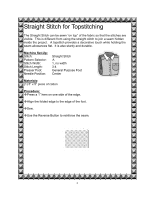
Attaching Purchased Piping Attach pre-packaged piping to make a bold finish on home decorating projects, crafts or garments. Machine Set-up: Stitch: Pattern Selector: Stitch Width: Stitch Length: Presser Foot: Needle Position: Straight Stitch A 1, no width 3-4 Zipper Foot Center Materials: (2) 3" x 6" pieces of home décor fabric 7" pre-packaged piping Procedure: Place fabric right sides together. Place piping between the fabrics, matching the piping's raw edge with the fabric's raw edges. Piping Raw Edges Stitching Line Raw Edge of Fabric On the wrong side of the fabric, sew a straight stitch close to the piping. Note: The Zipper Foot can be attached right or left, allowing for the piping to be inserted from either side. 6
-
 1
1 -
2
-
3
-
4
-
5
-
6
-
7
-
 8
8 -
 9
9 -
 10
10 -
 11
11 -
 12
12 -
 13
13 -
 14
14 -
 15
15 -
 16
16 -
 17
17 -
 18
18 -
19
-
20
-
21
-
22
-
23
-
24
-
25
-
26
-
27
-
28
-
29
-
30
-
31
-
32
-
33
-
34
-
35
-
36
-
37
-
38
-
39
-
40
-
41
-
42
-
43
-
44
-
45
-
46
-
47
-
48
-
49
-
50
-
51
-
52
-
53
-
54
-
55
-
56
-
57
-
58
 |
 |
6
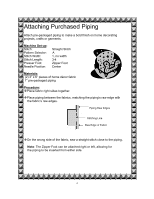
Attaching Purchased Piping
Attach pre-packaged piping to make a bold finish on home decorating
projects, crafts or garments.
Machine Set-up
:
Stitch:
Straight Stitch
Pattern Selector:
A
Stitch Width:
1, no width
Stitch Length:
3-4
Presser Foot:
Zipper Foot
Needle Position:
Center
Materials
:
(2) 3” x 6” pieces of home décor fabric
7” pre-packaged piping
Procedure
:
±
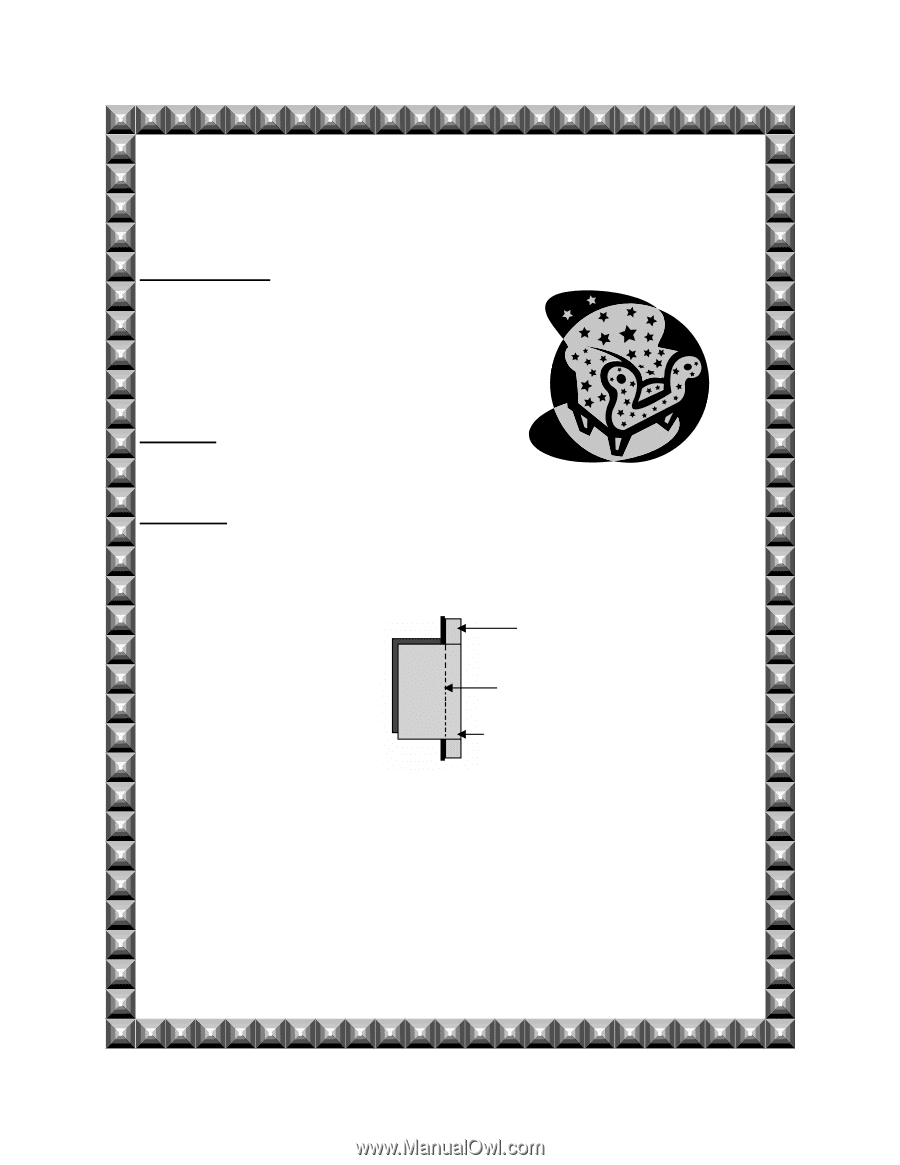
Place fabric right sides together.
±
Place piping between the fabrics, matching the piping’s raw edge with
the fabric’s raw edges.
±
On the wrong side of the fabric, sew a straight stitch close to the piping.
Note
: The Zipper Foot can be attached right or left, allowing for
the piping to be inserted from either side.
Stitching Line
Piping Raw Edges
Raw Edge of Fabric