Singer S10 I STUDIO Instruction Manual - Page 20
Set 4. Thread selection, Set 5. Formatting the memory, Set 6. Touch pad position adjustment
 |
View all Singer S10 I STUDIO manuals
Add to My Manuals
Save this manual to your list of manuals |
Page 20 highlights
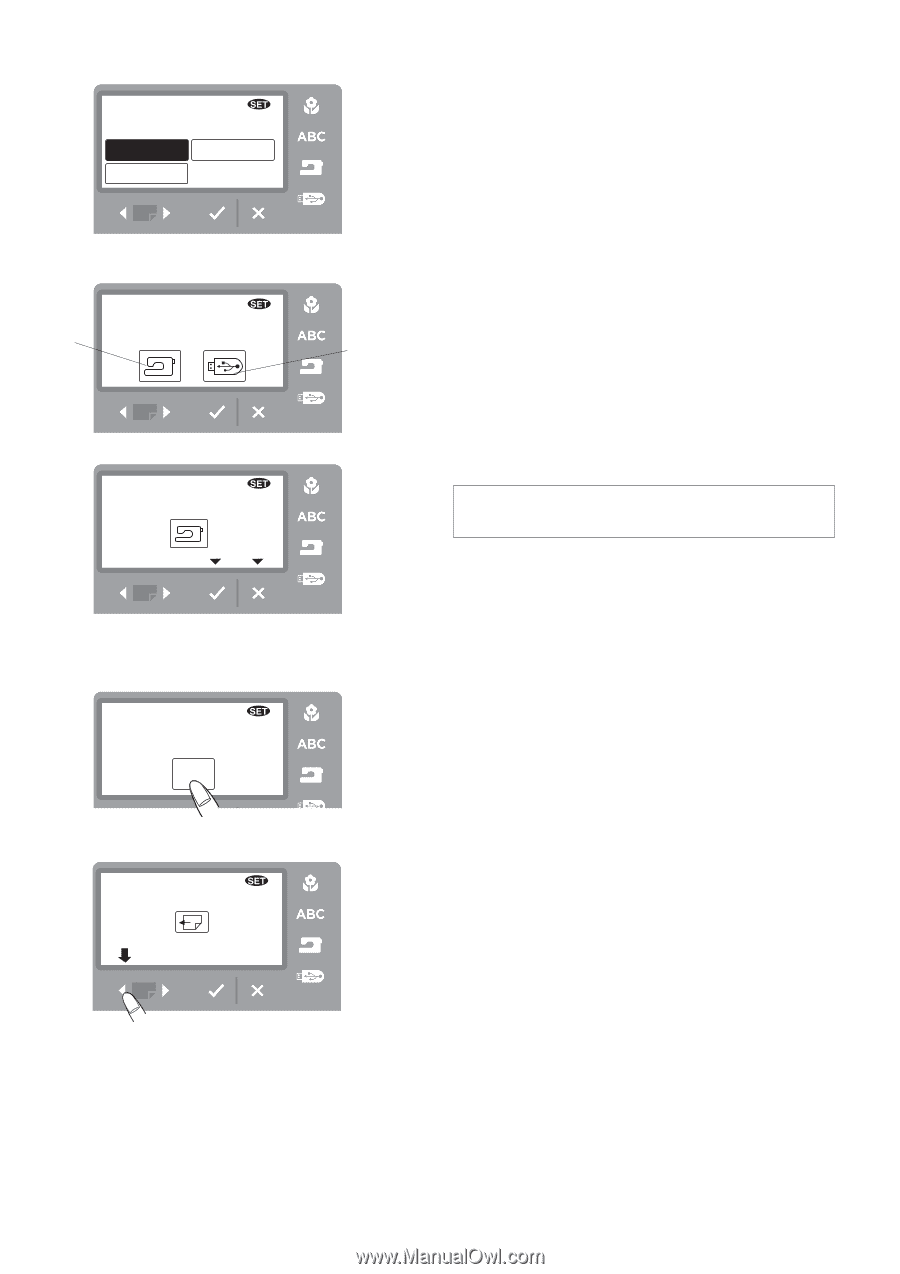
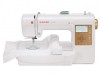
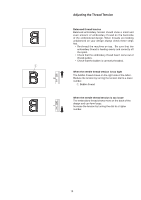
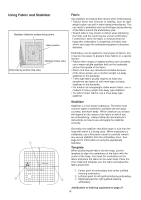
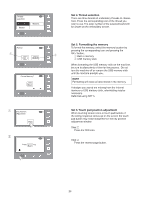
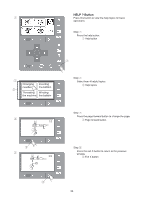
Thread selection Robison-Anton Mettler 4 Madeira Set 4. Thread selection There are three brands of embroidery threads to choose from. Press the corresponding icon of the thread you wish to use. The color number of the selected brand will be shown on the embroidery screen. Format q 5 w Format Memory? 5 z Key Position 6 Adjustment YES x 6 Press key Set 5. Formatting the memory To format the memory, select the memory location by pressing the corresponding icon and pressing the OK √ button. q Built-in memory w USB memory stick When formatting the USB memory stick on the machine, be sure to allow plenty of time for the process. Do not turn the machine off or remove the USB memory stick until the machine prompts you. NOTE Formatting will erase all data stored in the memory. If designs you stored are missing from the internal memory or USB memory stick, reformatting may be necessary. Reformat using SET 5. Set 6. Touch pad position adjustment When touching screen icons or touch pad buttons, if the wrong response comes up on the screen the touch pad button may need realignment in the key position adjustment window. Step z Press the YES icon. Step x Press the reverse page button. 20
-
 1
1 -
2
-
3
-
4
-
5
-
6
-
7
-
8
-
9
-
10
-
11
-
12
-
13
-
14
-
 15
15 -
 16
16 -
 17
17 -
 18
18 -
 19
19 -
 20
20 -
 21
21 -
 22
22 -
 23
23 -
 24
24 -
 25
25 -
26
-
27
-
28
-
29
-
30
-
31
-
32
-
33
-
34
-
35
-
36
-
37
-
38
-
39
-
40
-
41
-
42
-
43
-
44
-
45
-
46
-
47
-
48
-
49
-
50
-
51
-
52
-
53
-
54
-
55
-
56
 |
 |