Singer S10 I STUDIO Instruction Manual - Page 9
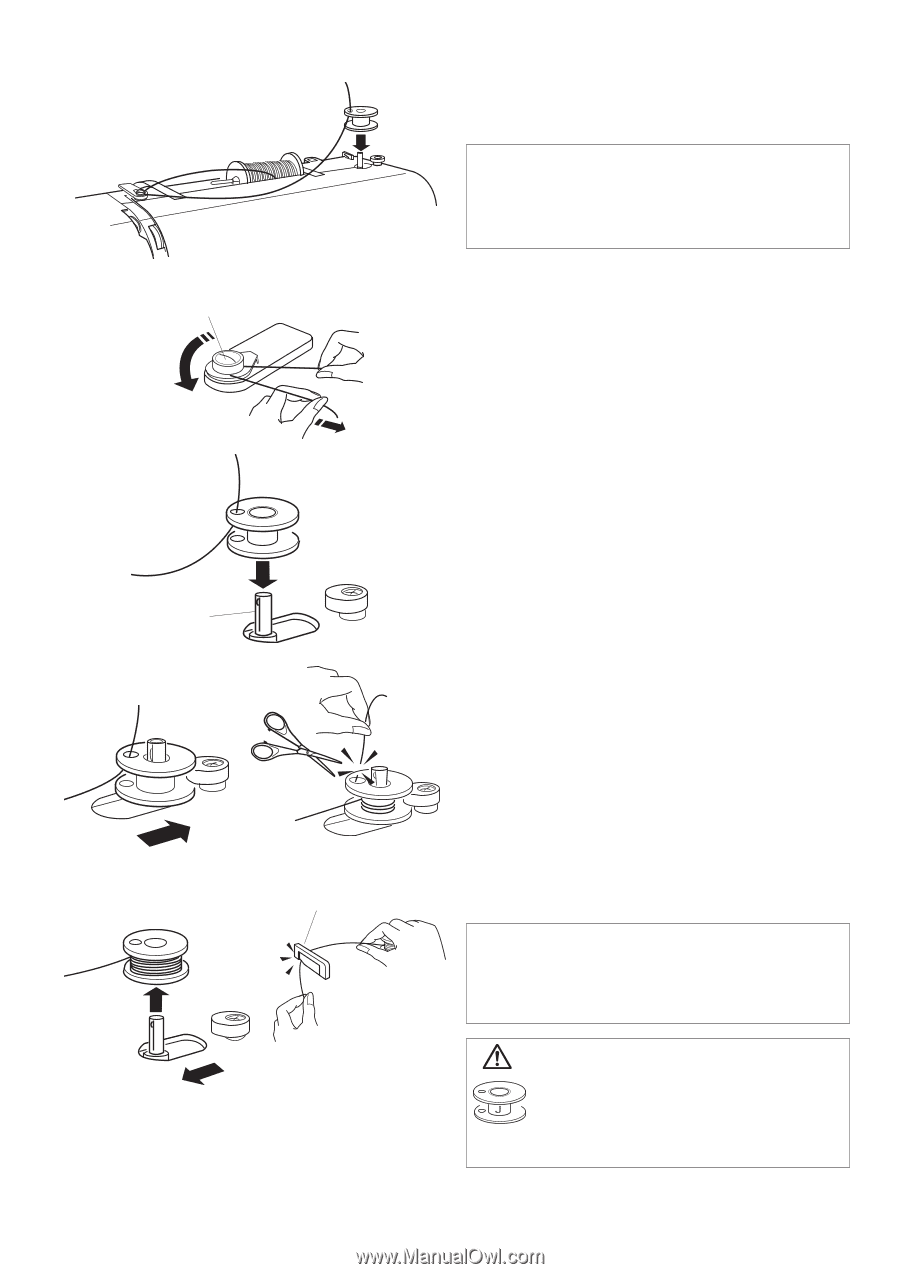
Winding the Bobbin, CAUTION
 |
View all Singer S10 I STUDIO manuals
Add to My Manuals
Save this manual to your list of manuals |
Page 9 highlights
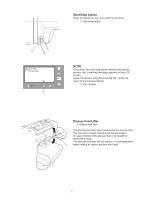
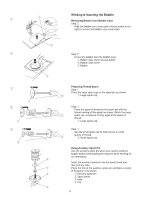
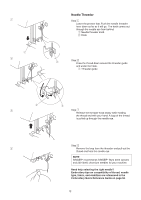
q z x w c v e Winding the Bobbin NOTE For best results, use bobbinfill thread in the bobbin for embroidery. Bobbinfill thread is lighter in weight than all-purpose thread, making the design less dense on the back side of the fabric. Step z Guide the thread around the bobbin winder thread guide while holding the thread with both hands. q Bobbin winder thread guide Step x Thread through the hole in the bobbin from the inside to the outside. Put the bobbin on the bobbin winder spindle. w Bobbin winder spindle Step c Push the spindle to the right. Press the start/stop button while holding the end of the thread. Stop the machine after the bobbin is wound a few layers. Cut the thread close to the hole on top of the bobbin. Step v Press the start/stop button again and continue filling the bobbin. When the bobbin is fully wound it will stop filling the bobbin. Press the start/stop button to stop the machine motor. Return the bobbin winder spindle to the left. Remove the bobbin and cut the thread with the bobbin thread cutter. e Bobbin thread cutter NOTE Do not move the bobbin winder spindle while the machine is running. For safety purposes, the motor will stop automatically after running for two minutes after bobbin has been filled. CAUTION Use only SINGER® Class 15 bobbins in your machine. Using improperly sized bobbins or pre-wound bobbins may cause stitching problems. Improper bobbins can damage your bobbin case and machine. 9
-
 1
1 -
2
-
3
-
 4
4 -
 5
5 -
 6
6 -
 7
7 -
 8
8 -
 9
9 -
 10
10 -
 11
11 -
 12
12 -
 13
13 -
 14
14 -
15
-
16
-
17
-
18
-
19
-
20
-
21
-
22
-
23
-
24
-
25
-
26
-
27
-
28
-
29
-
30
-
31
-
32
-
33
-
34
-
35
-
36
-
37
-
38
-
39
-
40
-
41
-
42
-
43
-
44
-
45
-
46
-
47
-
48
-
49
-
50
-
51
-
52
-
53
-
54
-
55
-
56
 |
 |