Sony BRC300 Operating Instructions - Page 35
Sony BRC300 Manual
 |
View all Sony BRC300 manuals
Add to My Manuals
Save this manual to your list of manuals |
Page 35 highlights
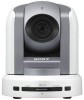
Operation Using the RM-BR300 Remote Control Unit Before operating, check that the camera, the RM-BR300 Remote Control Unit and peripheral devices are properly installed and connected. For details, see "Installation" (page 42) and "Connections" (page 46). To turn on/off the camera using the RMBR300 Remote Control Unit As long as the camera is connected to an AC outlet, you can turn the camera on or off with the POWER button on the Remote Control Unit. While holding down the POWER button, press the CAMERA button corresponding to the camera whose power you want to turn on/off. When you turn the power off using the Remote Control Unit, the POWER lamp turns off and the STANDBY lamp lights on the camera. Turning on the Power STANDBY lights. 1 2 RESET VALUE LOCK PANEL LIGHT RESET BLACK LIGHT PANEL LIGHT To illuminate the panel of the Remote Control Unit Operation Using the RM-BR300 Remote Control Unit PAN-TILT RESET ONE PUSH AWB MENU - R BRIGHT + PRESET MODE POSITION SHIFT 1 9 STD 2 10 REV 3 11 4 12 5 13 6 14 7 15 8 16 - B + L/R DIRECTION CAMERA AUTO FOCUS AUTO MANUAL POWER 1 2 3 4 5 6 7 Press the PANEL LIGHT button. All the POSITION buttons and CAMERA buttons light. To turn off the illumination, press the PANEL LIGHT button again. NEAR FAR ONE PUSH AF POWER CAMERA PANEL LIGHT 1 Connect the camera to an AC outlet using the supplied AC power adaptor and power cord. The power is turned on and the POWER lamp lights. The camera will automatically pan and tilt and be reset to the position stored in POSITION 1 (Pan/tilt reset action). Press the ON/OFF switch on the RM-BR300 Remote Control Unit to turn it on. The CAMERA button representing the camera whose power was turned off last lights. (CAMERA 1 button lights by default.) Turn on the peripheral devices. Operating Multiple Cameras Before operating, you must assign the camera addresses to the connected cameras as follows. Then you can switch the camera to be controlled simply by pressing the corresponding CAMERA button. 2 To assign camera addresses automatically 1 Make sure that the camera address selectors on the bottom of each camera are set to "0." For setting the camera address selectors, see page 16. 3 Note Be sure to turn on the power of the camera before the power of the Remote Control Unit. Otherwise, the Remote Control Unit cannot recognize the connected camera. 2 Turn on the power of all the connected cameras and the RM-BR300 Remote Control Unit. Turning on the Power 35
-
 1
1 -
2
-
3
-
4
-
5
-
6
-
7
-
8
-
9
-
10
-
11
-
12
-
13
-
14
-
15
-
16
-
17
-
18
-
19
-
20
-
21
-
22
-
23
-
24
-
25
-
26
-
27
-
28
-
29
-
 30
30 -
 31
31 -
 32
32 -
 33
33 -
 34
34 -
 35
35 -
 36
36 -
 37
37 -
 38
38 -
 39
39 -
 40
40 -
41
-
42
-
43
-
44
-
45
-
46
-
47
-
48
-
49
-
50
-
51
-
52
-
53
-
54
-
55
-
56
-
57
-
58
-
59
-
60
-
61
-
62
-
63
-
64
-
65
-
66
-
67
-
68
 |
 |
