Sony CDPCX455 Primary User Manual - Page 10
Disc-2, Caution - cd
 |
UPC - 272426017034
View all Sony CDPCX455 manuals
Add to My Manuals
Save this manual to your list of manuals |
Page 10 highlights
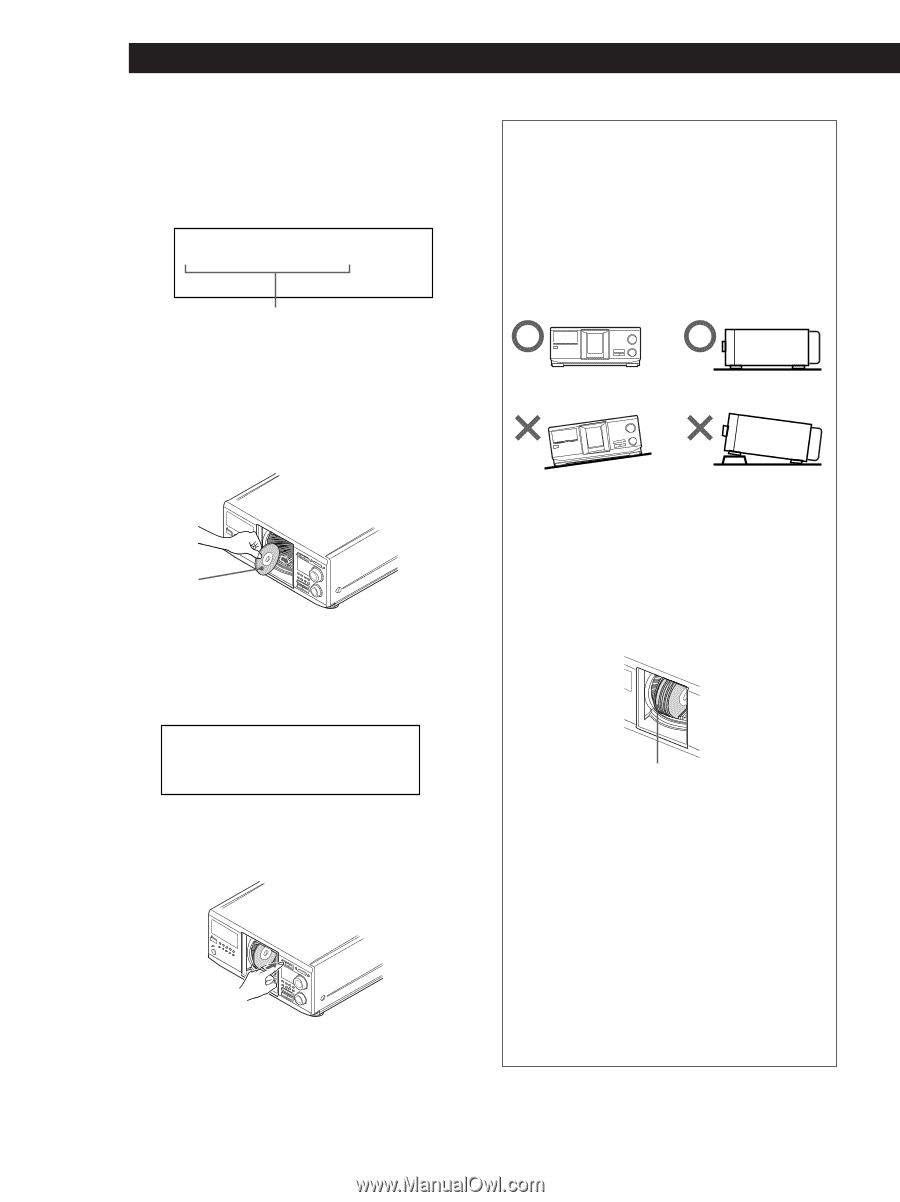
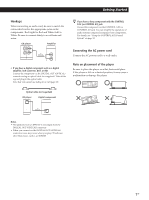
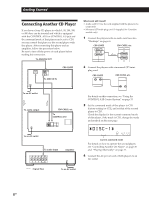
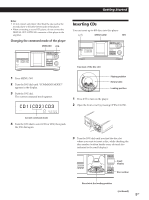
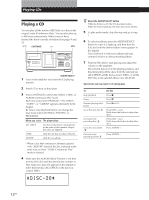
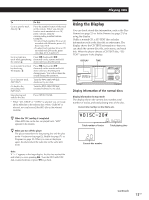
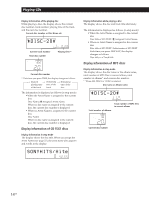
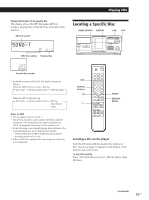
Getting Started The disc number at the loading position appears in the display. If the disc has a Disc Name (see page 23), the Disc Name appears instead of the disc number. As you turn the JOG dial, the disc number or the Disc Name changes. 2nd NEXT DISC ART. HIT TRACK GROUP ART. MIN STEP SEC *DISC-20***** ALL 1 DISCS SHUFFLE REPEAT 1 GROUP PROGRAM 1 2 3 X-FADE DELETE MULTI CD TEXT NO DELAY CD1 CD2 CD3 Disc number or the Disc Name You can classify discs by using the Artist Name function. This feature lets you easily find the disc you want to play. For details, see "Classifying Discs According to Artist Name (Artist File)" on page 27. 4 Insert a disc with the label side facing right. With the label side facing right After inserting the disc, you can enter the original disc title to replace the disc number (see "Labeling discs (Disc Name)" on page 23) so you can locate it easily whenever you want to play it. 2nd NEXT DISC ART. HIT TRACK GROUP ART. MIN STEP SEC SONYHITS***** ALL 1 DISCS SHUFFLE REPEAT 1 GROUP PROGRAM 1 2 3 X-FADE DELETE MULTI CD TEXT NO DELAY CD1 CD2 CD3 5 Repeat steps 3 and 4 to insert more discs. 6 Close the front cover by pressing OPEN/CLOSE. The rotary table turns and the disc slot at the loading position is set to the playing position. Always keep the front cover closed except when inserting or removing discs. CAUTION • Do not insert an 8 cm (3-inch) CD adaptor. The player cannot play an 8 cm CD. Do not insert an 8 cm (3-inch) CD or an 8 cm (3-inch) CD adaptor (CSA-8). It may damage the player and disc. • Do not move the player after inserting discs. • Be sure to place the player in a flat, horizontal position. Do not place the player in a slanted position. • Do not move the player and avoid any physical shock after inserting discs. • When transporting the player, remove all discs from the player. • Make sure to insert the disc at a right angle to the rotary table. If the disc is not inserted into the slot completely (ex. when you press A), reinsert the disc at a right angle to the rotary table (or press A again). Disc that is not fully inserted • Do not attach seals or stickers, etc. to CDs. If seals or stickers, etc. are attached to a CD, the player may not operate properly and the player or the disc may be damaged. Notes • If you drop a disc into the player and/or the CD does not go into the slot correctly, consult your nearest Sony dealer. • Make sure the rotary table comes to a complete stop before inserting or removing discs. • The front cover closes automatically when you press H. Be careful not to put your hand into the player after pressing H, otherwise your hand may be caught in the front cover. 10US
-
 1
1 -
2
-
3
-
4
-
 5
5 -
 6
6 -
 7
7 -
 8
8 -
 9
9 -
 10
10 -
 11
11 -
 12
12 -
 13
13 -
 14
14 -
 15
15 -
16
-
17
-
18
-
19
-
20
-
21
-
22
-
23
-
24
-
25
-
26
-
27
-
28
-
29
-
30
-
31
-
32
-
33
-
34
-
35
-
36
-
37
-
38
-
39
-
40
 |
 |