Sony DCR-HC30 Computer Applications Guide - Page 35
Additional information, Troubleshooting
 |
UPC - 027242644588
View all Sony DCR-HC30 manuals
Add to My Manuals
Save this manual to your list of manuals |
Page 35 highlights
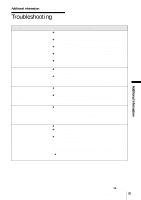
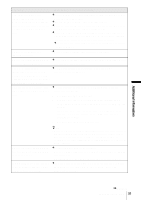
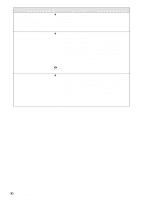
Additional information Troubleshooting Symptom Cause and/or Corrective Actions The computer does not recognize your camcorder. cDisconnect the cable from the computer and camcorder, then connect it again firmly. cFor the model that is supplied with the Handycam Station, set the USB ON/OFF switch to ON. cFor the model that is supplied with the Handycam Station, connect the Handycam Station to the camcorder firmly. cDisconnect the USB device other than the keyboard, the mouse, and the camcorder from the computer. cDisconnect the cable from the computer and camcorder, restart the computer, then connect them again correctly (p. 11, 13, 28). You cannot view the pictures the camcorder is seeing on the computer. cDisconnect the cable from the computer, turn on the camcorder, then connect it again. cSlide the POWER switch repeatedly to select the CAMERATAPE mode, set [USB STREAM] in the menu settings of your camcorder to on. You cannot view the pictures recorded on a tape on the computer. cDisconnect the cable from the computer, turn on the camcorder, then connect it again. cSlide the POWER switch repeatedly to select the PLAY/EDIT mode, set [USB STREAM] in the menu settings of your camcorder to on. You cannot view the pictures recorded on a tape on the Macintosh computer. (only the models with a Memory Stick slot) cTo copy pictures recorded on a tape to your Macintosh computer, copy the pictures to a "Memory Stick" in your camcorder first, then copy the pictures recorded on the "Memory Stick" to your computer. You cannot view the pictures recorded on a "Memory Stick" on the computer. (only the models with a Memory Stick slot) cInsert the "Memory Stick" firmly. cYou cannot use an i.LINK cable. Connect the camcorder and the computer using the USB cable. cSlide the POWER switch repeatedly to select the PLAY/EDIT mode, set [STD-USB] in the menu settings of your camcorder to on. • The computer does not recognize the "Memory Stick" during camcorder operation such as tape playback or editing. cFinish camcorder operation before connecting the camcorder to the computer. Additional information ,continued Additional information 35
-
 1
1 -
2
-
3
-
4
-
5
-
6
-
7
-
8
-
9
-
10
-
11
-
12
-
13
-
14
-
15
-
16
-
17
-
18
-
19
-
20
-
21
-
22
-
23
-
24
-
25
-
26
-
27
-
28
-
29
-
 30
30 -
 31
31 -
 32
32 -
 33
33 -
 34
34 -
 35
35 -
 36
36 -
 37
37 -
 38
38 -
 39
39 -
 40
40 -
41
-
42
-
43
-
44
 |
 |