Sony DCR-HC85 Camera Operations Guide - Page 79
DEMO MODE, PRINT, Touch [ON], then touch, Touch, Press PHOTO fully.
 |
View all Sony DCR-HC85 manuals
Add to My Manuals
Save this manual to your list of manuals |
Page 79 highlights
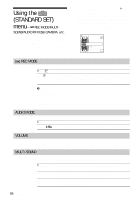
3 Touch [ON], then touch . GOFF ON ( ) To deactivate interval recording. To record still images on a "Memory Stick Duo" in the selected interval. 4 Touch . flashes. 5 Press PHOTO fully. stops flashing and the interval photo recording starts. To cancel interval photo recording, select [OFF] in step 3. DEMO MODE When you remove both the cassette and "Memory Stick Duo" from your camcorder, and select the CAMERA-TAPE mode, you can view the demonstration in about 10 minutes. GON OFF Select to see an overview of the functions available such as when you are using this camcorder for the first time. Select when you do not intend to use the DEMO MODE. b Note • You cannot view the demonstration when the NIGHTSHOT PLUS switch is set to ON. z Tip • The demonstration will be suspended in situations such as those described below. - When you touch the screen during the demonstration. (The demonstration starts again in about 10 minutes.) - When a cassette or "Memory Stick Duo" is inserted. - When a mode other than CAMERA-TAPE is selected. • If [A.SHUT OFF] is set to [5min] when the camcorder is used on the battery pack, the power will be turned off after approximately 5 minutes (p. 88). PRINT See page 110 for details. Using the Menu Using the Menu 79
-
 1
1 -
2
-
3
-
4
-
5
-
6
-
7
-
8
-
9
-
10
-
11
-
12
-
13
-
14
-
15
-
16
-
17
-
18
-
19
-
20
-
21
-
22
-
23
-
24
-
25
-
26
-
27
-
28
-
29
-
30
-
31
-
32
-
33
-
34
-
35
-
36
-
37
-
38
-
39
-
40
-
41
-
42
-
43
-
44
-
45
-
46
-
47
-
48
-
49
-
50
-
51
-
52
-
53
-
54
-
55
-
56
-
57
-
58
-
59
-
60
-
61
-
62
-
63
-
64
-
65
-
66
-
67
-
68
-
69
-
70
-
71
-
72
-
73
-
 74
74 -
 75
75 -
 76
76 -
 77
77 -
 78
78 -
 79
79 -
 80
80 -
 81
81 -
 82
82 -
 83
83 -
 84
84 -
85
-
86
-
87
-
88
-
89
-
90
-
91
-
92
-
93
-
94
-
95
-
96
-
97
-
98
-
99
-
100
-
101
-
102
-
103
-
104
-
105
-
106
-
107
-
108
-
109
-
110
-
111
-
112
-
113
-
114
-
115
-
116
-
117
-
118
-
119
-
120
-
121
-
122
-
123
-
124
-
125
-
126
-
127
-
128
-
129
-
130
-
131
-
132
-
133
-
134
-
135
-
136
-
137
-
138
-
139
-
140
-
141
-
142
-
143
-
144
-
145
-
146
-
147
-
148
-
149
-
150
-
151
-
152
 |
 |