Sony DCRHC38 Operating Guide - Page 62
Video head, LCD screen
 |
UPC - 027242701809
View all Sony DCRHC38 manuals
Add to My Manuals
Save this manual to your list of manuals |
Page 62 highlights
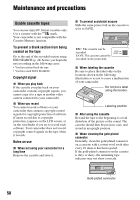
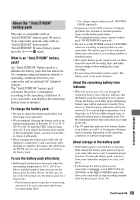
Maintenance and precautions (Continued) malfunction. Do not close the cassette lid until the cassette is ejected. x Note on moisture condensation Moisture may condense when you bring your camcorder from a cold place into a warm place (or vice versa) or when you use your camcorder in a humid place as shown below. • When you bring your camcorder from a ski slope into a place warmed up by a heating device. • When you bring your camcorder from an air conditioned car or room into a hot place outside. • When you use your camcorder after a squall or a shower. • When you use your camcorder in a hot and humid place. x How to avoid moisture condensation When you bring your camcorder from a cold place into a warm place, put your camcorder in a plastic bag and seal it tightly. Remove the bag when the air temperature inside the plastic bag has reached the surrounding temperature (after about one hour). Video head • If the video heads are dirty, video or sound distortion may be apparent. • If the following problem occurs, clean the video heads for 10 seconds with the Sony DVM12CLD cleaning cassette (optional). - Mosaic-pattern noise appears on the playback picture or the screen is displayed in blue. Sony dealer or local authorized Sony service facility to have the video heads replaced. LCD screen • Do not exert excessive pressure on the LCD screen, as it may cause damage. • If your camcorder is used in a cold place, a residual image may appear on the LCD screen. This is not a malfunction. • While using your camcorder, the back of the LCD screen may heat up. This is not a malfunction. x To clean the LCD screen If fingerprints or dust make the LCD screen dirty, it is recommended you use a soft cloth to clean it. When you use the LCD Cleaning Kit (optional), do not apply the cleaning liquid directly to the LCD screen. Use cleaning paper moistened with the liquid. x On adjustment of the touch panel (CALIBRATION) The buttons on the touch panel may not work correctly. If this happens, follow the procedure below. It is recommended you connect your camcorder to the wall outlet using the supplied AC Adaptor during the operation. 1 Turn off the power, then slide the POWER switch repeatedly to turn on the PLAY/ EDIT lamp while pressing DISP/BATT INFO on your camcorder, and keep pressing down DISP/BATT INFO for about 5 seconds. 2 Touch the "×" displayed on the screen with the corner of the "Memory Stick" or the like. - Playback pictures do not move. - Playback pictures do not appear or the sound breaks off. - [x Dirty video head. Use a cleaning cassette.] appears on the screen during recording/playback. • The video heads will wear after long use. If you cannot obtain a clear image even after using a cleaning cassette (optional), it might be because the video heads are worn. Please contact your 62 The position of the "×" changes. If you did not press the right spot, start from step 2 again.
-
 1
1 -
2
-
3
-
4
-
5
-
6
-
7
-
8
-
9
-
10
-
11
-
12
-
13
-
14
-
15
-
16
-
17
-
18
-
19
-
20
-
21
-
22
-
23
-
24
-
25
-
26
-
27
-
28
-
29
-
30
-
31
-
32
-
33
-
34
-
35
-
36
-
37
-
38
-
39
-
40
-
41
-
42
-
43
-
44
-
45
-
46
-
47
-
48
-
49
-
50
-
51
-
52
-
53
-
54
-
55
-
56
-
 57
57 -
 58
58 -
 59
59 -
 60
60 -
 61
61 -
 62
62 -
 63
63 -
 64
64 -
 65
65 -
 66
66 -
 67
67 -
68
-
69
-
70
-
71
-
72
-
73
-
74
-
75
-
76
-
77
-
78
-
79
-
80
-
81
-
82
-
83
-
84
 |
 |
