Sony DSC V3 Operating Instructions - Page 118
Using “Image Data Converter”, Creating a video CD with
 |
UPC - 027242662155
View all Sony DSC V3 manuals
Add to My Manuals
Save this manual to your list of manuals |
Page 118 highlights
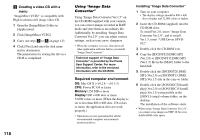
Creating a video CD with a menu "ImageMixer VCD2" is compatible with High resolution still image video CD. 1 Open the [ImageMixer] folder in [Application]. 2 Click [ImageMixer VCD2]. 3 Carry out steps to on page 113. 4 Click [Next] and enter the disk name and its destination. The preparation for storing the file on a CD-R is completed. Using "Image Data Converter" Using "Image Data Converter Ver.1.5" on the CD-ROM supplied with your camera, you can correct images recorded in RAW mode and store them as an ordinary file. Additionally, by installing "Image Data Converter Ver.2.0", you can adjust various settings, such as tone curve, sharpness. • When the computer is in use, shut down all other application software before you install "Image Data Converter." Technical support of "Image Data Converter" is provided by the Pixela User Support Center. For more information, refer to the enclosed information with the CD-ROM. Required computer environment OS: Mac OS X (v10.2.6 - v10.3.3) CPU: Power PC G4 or faster Memory: 256 MB or more Display: 800 × 600 dots or more, 32,000 colors or more (When the display is set to less than 800 × 600 dots, 256 colors or more, the application does not work properly.) • Operations are not guaranteed for all the recommended computer environments mentioned above. Installing "Image Data Converter" 1 Turn on your computer. • The display settings should be 800 × 600 dots or higher and 32,000 colors or higher. 2 Insert the CD-ROM (supplied) into the CD-ROM drive. To install Ver.2.0, insert "Image Data Converter Ver.2.0", and to install Ver.1.5, insert "USB Driver SPVD012". 3 Double-click the CD-ROM icon. 4 Copy the [IDCINST20.DMG.SIT] (Ver.2.0) or [IDCINST15.DMG.SIT] (Ver.1.5) file in the [MAC] folder to the hard disk. 5 Double-click the [IDCINST20.DMG. SIT] (Ver.2.0) or [IDCINST15.DMG. SIT] (Ver.1.5) file in the copy-to folder. 6 Double-click the [SONYIDC20 Install. pkg] (Ver.2.0) or [SONYIDC15 Install. pkg] (Ver.1.5) extracted file in the [SONY] virtual volume folder, on the desktop. The installation of the software starts. • When using "Image Data Converter Ver.2.0", you cannot store images in TIFF 16-bit or in Adobe RGB color space. 118
-
 1
1 -
2
-
3
-
4
-
5
-
6
-
7
-
8
-
9
-
10
-
11
-
12
-
13
-
14
-
15
-
16
-
17
-
18
-
19
-
20
-
21
-
22
-
23
-
24
-
25
-
26
-
27
-
28
-
29
-
30
-
31
-
32
-
33
-
34
-
35
-
36
-
37
-
38
-
39
-
40
-
41
-
42
-
43
-
44
-
45
-
46
-
47
-
48
-
49
-
50
-
51
-
52
-
53
-
54
-
55
-
56
-
57
-
58
-
59
-
60
-
61
-
62
-
63
-
64
-
65
-
66
-
67
-
68
-
69
-
70
-
71
-
72
-
73
-
74
-
75
-
76
-
77
-
78
-
79
-
80
-
81
-
82
-
83
-
84
-
85
-
86
-
87
-
88
-
89
-
90
-
91
-
92
-
93
-
94
-
95
-
96
-
97
-
98
-
99
-
100
-
101
-
102
-
103
-
104
-
105
-
106
-
107
-
108
-
109
-
110
-
111
-
112
-
 113
113 -
 114
114 -
 115
115 -
 116
116 -
 117
117 -
 118
118 -
 119
119 -
 120
120 -
 121
121 -
 122
122 -
 123
123 -
124
-
125
-
126
-
127
-
128
-
129
-
130
-
131
-
132
-
133
-
134
-
135
-
136
-
137
-
138
-
139
-
140
-
141
-
142
-
143
-
144
-
145
-
146
-
147
-
148
-
149
-
150
-
151
-
152
-
153
-
154
-
155
-
156
 |
 |
