Sony DSC V3 Operating Instructions - Page 60
Shooting with manual exposure mode, Selecting the metering method, Set the mode dial to M. - parts
 |
UPC - 027242662155
View all Sony DSC V3 manuals
Add to My Manuals
Save this manual to your list of manuals |
Page 60 highlights
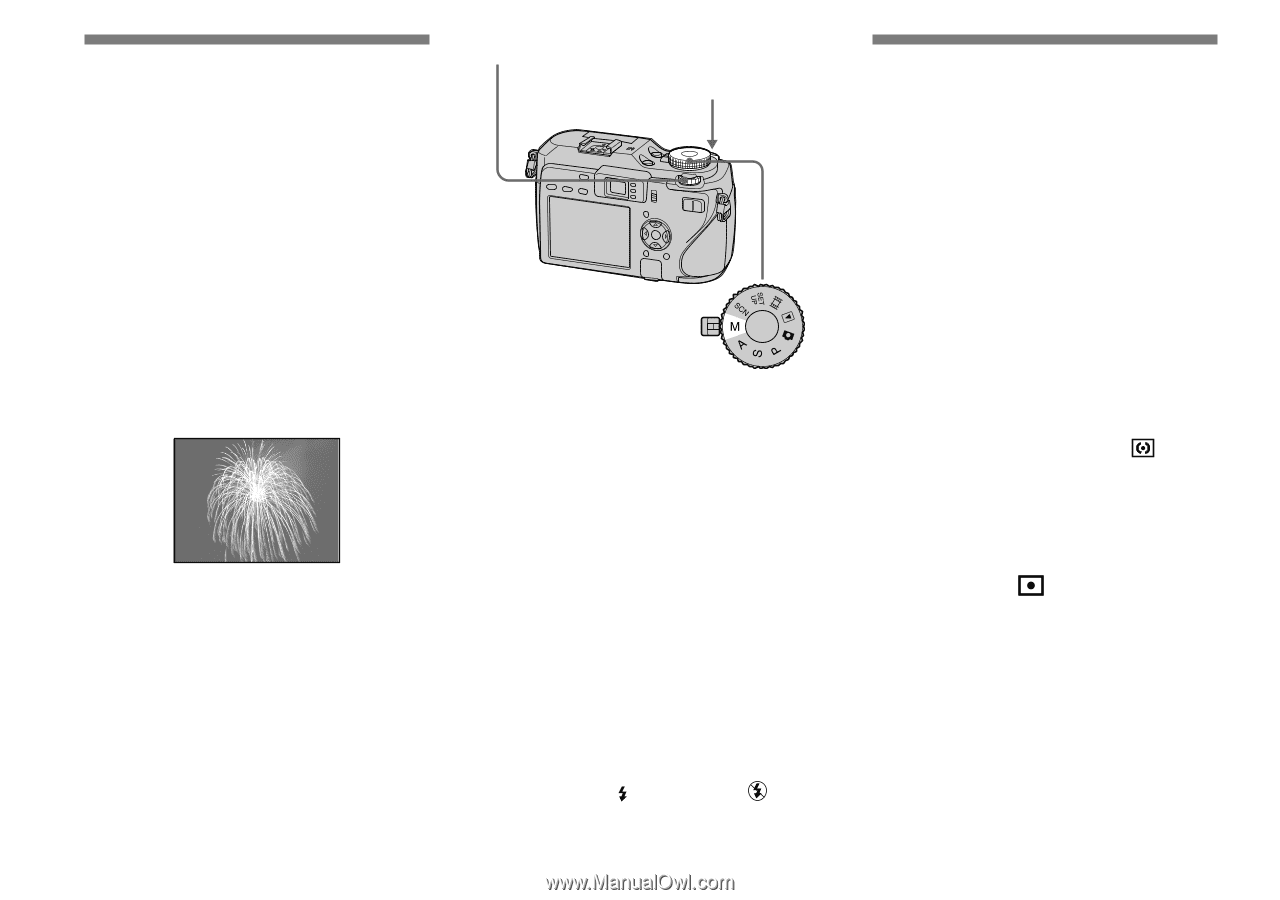
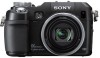
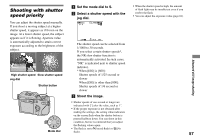
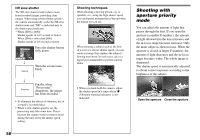
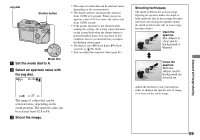
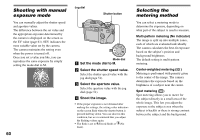
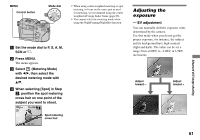
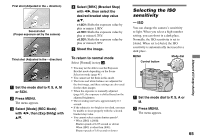
Shooting with manual exposure mode You can manually adjust the shutter speed and aperture values. The difference between the set value and the appropriate exposure determined by the camera is displayed on the screen as the EV value (page 61). 0EV indicates the most suitable value set by the camera. The camera maintains the setting even when the power is turned off. Once you set a value you like, you can reproduce the same exposure by simply setting the mode dial to M. 60 Jog dial Shutter button Mode dial Set the mode dial to M. Select the shutter speed value. Select the shutter speed value with the jog dial (page 51). Select the aperture value. Select the aperture value with the jog dial (page 51). Shoot the image. • If the proper exposure is not obtained after making the settings, the setting value indicators on the screen flash when the shutter button is pressed halfway down. You can shoot in this condition, but we recommend that you adjust the flashing values again. • The flash is set to (Forced flash) or (No flash). Selecting the metering method You can select a metering mode to determine the exposure, depending on what part of the subject is used to measure. Multi-pattern metering (No indicator) The image is split up into multiple zones, each of which are evaluated individually. The camera calculates the best-fit exposure based on the subject's position and background brightness. The default setting is multi-pattern metering. Center-weighted metering ( ) Metering is performed with priority given to the center of the image. The camera determines the exposure based on the brightness of a subject near the center. Spot metering ( ) Spot metering allows you to meter for the subject directly in a small area of the whole image. This lets you adjust the exposure to the subject even when the subject is backlit or there is strong contrast between the subject and the background.
-
 1
1 -
2
-
3
-
4
-
5
-
6
-
7
-
8
-
9
-
10
-
11
-
12
-
13
-
14
-
15
-
16
-
17
-
18
-
19
-
20
-
21
-
22
-
23
-
24
-
25
-
26
-
27
-
28
-
29
-
30
-
31
-
32
-
33
-
34
-
35
-
36
-
37
-
38
-
39
-
40
-
41
-
42
-
43
-
44
-
45
-
46
-
47
-
48
-
49
-
50
-
51
-
52
-
53
-
54
-
 55
55 -
 56
56 -
 57
57 -
 58
58 -
 59
59 -
 60
60 -
 61
61 -
 62
62 -
 63
63 -
 64
64 -
 65
65 -
66
-
67
-
68
-
69
-
70
-
71
-
72
-
73
-
74
-
75
-
76
-
77
-
78
-
79
-
80
-
81
-
82
-
83
-
84
-
85
-
86
-
87
-
88
-
89
-
90
-
91
-
92
-
93
-
94
-
95
-
96
-
97
-
98
-
99
-
100
-
101
-
102
-
103
-
104
-
105
-
106
-
107
-
108
-
109
-
110
-
111
-
112
-
113
-
114
-
115
-
116
-
117
-
118
-
119
-
120
-
121
-
122
-
123
-
124
-
125
-
126
-
127
-
128
-
129
-
130
-
131
-
132
-
133
-
134
-
135
-
136
-
137
-
138
-
139
-
140
-
141
-
142
-
143
-
144
-
145
-
146
-
147
-
148
-
149
-
150
-
151
-
152
-
153
-
154
-
155
-
156
 |
 |