Sony DSC-W120/L Cyber-shot® Handbook - Page 60
(Multi-Purpose Resize): Changing the image size according to usage (DSC-W130 only), Retro, Blog/E-mail
 |
View all Sony DSC-W120/L manuals
Add to My Manuals
Save this manual to your list of manuals |
Page 60 highlights
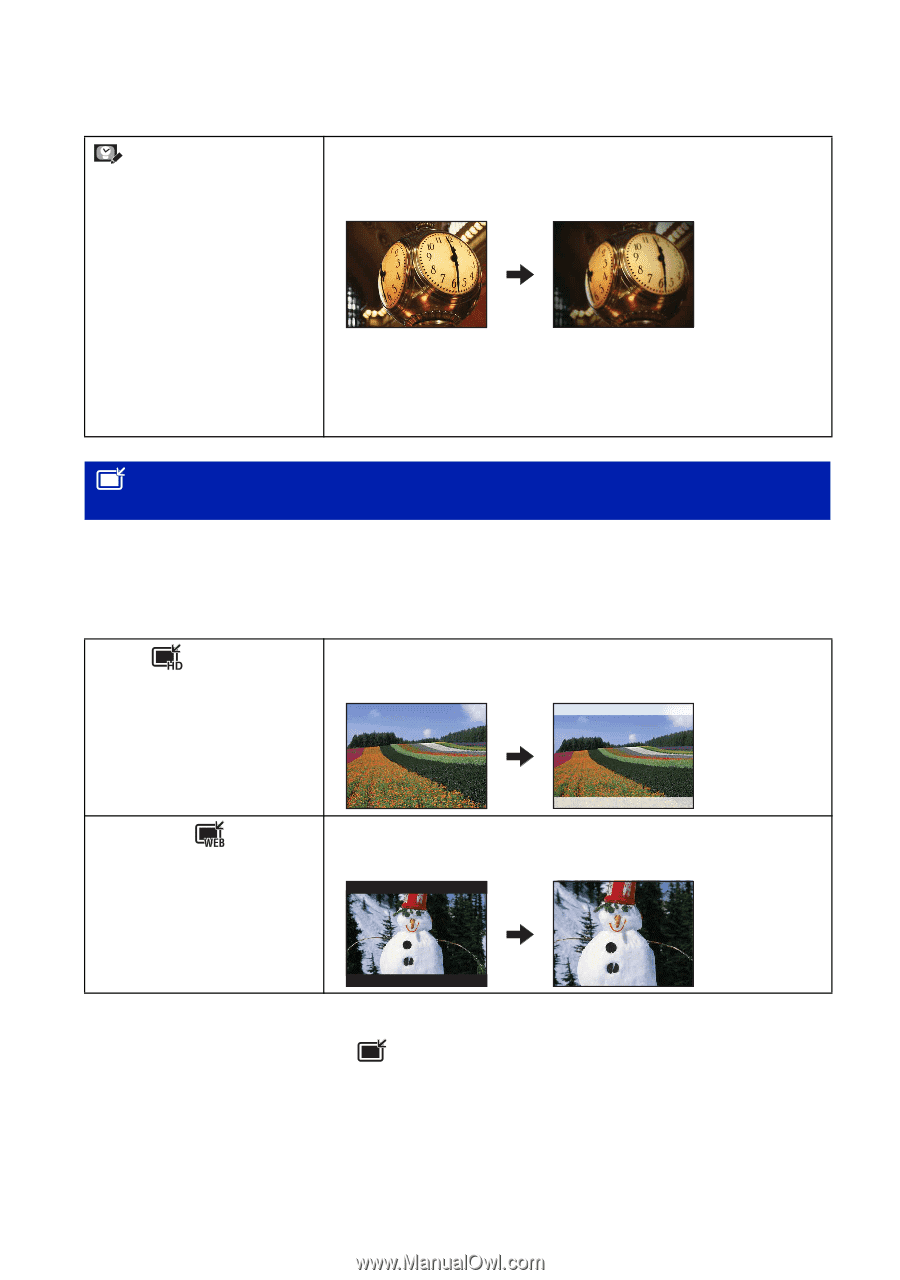
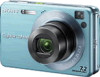
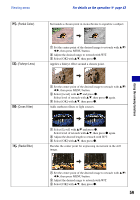
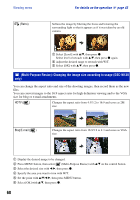
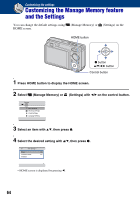
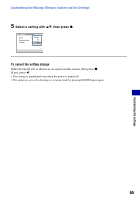
Viewing menu (Retro) For details on the operation 1 page 43 Softens the image by blurring the focus and lowering the surrounding light so that it appears as if it was taken by an old camera. 1 Select [Level] with v/V, then press z. Select level of retouch with v/V, then press z again. 2 Adjust the desired range to retouch with W/T. 3 Select [OK] with v/V, then press z. (Multi-Purpose Resize): Changing the image size according to usage (DSC-W130 only) You can change the aspect ratio and size of the shooting images, then record them as the new files. You can convert images to the 16:9 aspect ratio for high definition viewing and to the VGA size for blog or e-mail attachments. HDTV ( ) Changes the aspect ratio from 4:3/3:2 to 16:9 and saves as 2M size. Blog/E-mail ( ) Changes the aspect ratio from 16:9/3:2 to 4:3 and saves as VGA size. 1 Display the desired image to be changed. 2 Press MENU button, then select (Multi-Purpose Resize) with v/V on the control button. 3 Select the desired size with b/B, then press z. 4 Specify the area you want to trim with W/T. 5 Set the point with v/V/b/B, then press MENU button. 6 Select [OK] with v/V, then press z. 60
-
 1
1 -
2
-
3
-
4
-
5
-
6
-
7
-
8
-
9
-
10
-
11
-
12
-
13
-
14
-
15
-
16
-
17
-
18
-
19
-
20
-
21
-
22
-
23
-
24
-
25
-
26
-
27
-
28
-
29
-
30
-
31
-
32
-
33
-
34
-
35
-
36
-
37
-
38
-
39
-
40
-
41
-
42
-
43
-
44
-
45
-
46
-
47
-
48
-
49
-
50
-
51
-
52
-
53
-
54
-
 55
55 -
 56
56 -
 57
57 -
 58
58 -
 59
59 -
 60
60 -
 61
61 -
 62
62 -
 63
63 -
 64
64 -
 65
65 -
66
-
67
-
68
-
69
-
70
-
71
-
72
-
73
-
74
-
75
-
76
-
77
-
78
-
79
-
80
-
81
-
82
-
83
-
84
-
85
-
86
-
87
-
88
-
89
-
90
-
91
-
92
-
93
-
94
-
95
-
96
-
97
-
98
-
99
-
100
-
101
-
102
-
103
-
104
-
105
-
106
-
107
-
108
-
109
-
110
-
111
-
112
-
113
-
114
-
115
-
116
-
117
-
118
-
119
-
120
-
121
-
122
-
123
-
124
-
125
-
126
-
127
-
128
 |
 |