Sony FWD-40LX2F Operating Instructions - Page 69
Setup Settings, Language, Timer Setting, ECO Mode, Auto Shut Off - replacement
 |
UPC - 027242705166
View all Sony FWD-40LX2F manuals
Add to My Manuals
Save this manual to your list of manuals |
Page 69 highlights
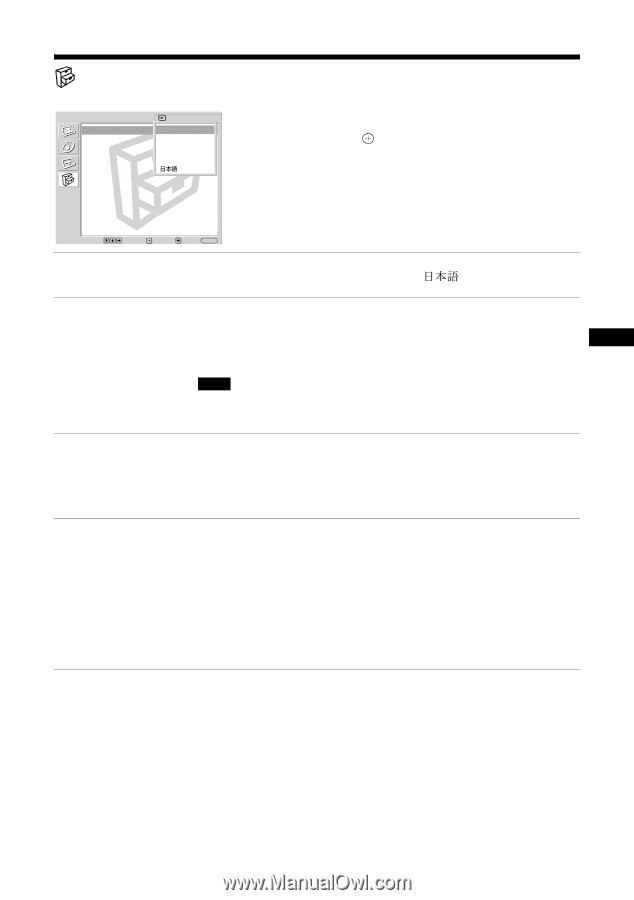
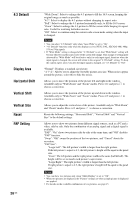
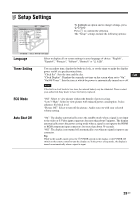
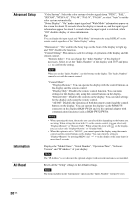
Setup Settings Setup Language : Timer Setting ECO Mode: Auto Shut Off: Advanced Setup Information All Reset IP Address Setup Speed Setup HDMI 1 English Español FOrfafnçais IDOtaeflfiuatnsoch To highlight an option and to change settings, press F/f/G/g. Press to confirm the selection. The "Setup" settings include the following options: Sel: Set: Back: Exit: MENU Language Select to display all on-screen settings in your language of choice: "English", "Español", "Français", "Italiano", "Deutsch" or " ". Timer Setting You can adjust time, display the built-in clock, or set the timer to make the display power on/off at a predetermined time. "Clock Set": Sets the time and the day. "Clock Display": Displays the currently set time on the screen when set to "On". "On/Off Timer": Sets the time at which the power is automatically turned on or off. GB Note If the built-in clock tends to lose time, the internal battery may be exhausted. Please contact your authorized Sony dealer to have the battery replaced. ECO Mode "Off": Select to view picture without the benefit of power saving. "Low"/"High": Select to view picture with reduced power consumption. It also enhances the black level. "Picture Off": Select to turn off the picture. Audio stays on with your selected volume setting. Auto Shut Off "On": The display automatically enters the standby mode when a signal is not input to the video or S Video input connectors for more than about 5 minutes. The display automatically enters the power saving mode when a signal is not input to the HDMI or RGB/component input connectors for more than about 30 seconds. "Off": The display is not turned off automatically even when no signal is input to any connector. Tip While in the standby mode, press the 1 POWER switch on the display or the POWER ON switch on the remote control to turn the display on. In the power saving mode, the display is turned on automatically when a signal is input. 29 GB
-
 1
1 -
2
-
3
-
4
-
5
-
6
-
7
-
8
-
9
-
10
-
11
-
12
-
13
-
14
-
15
-
16
-
17
-
18
-
19
-
20
-
21
-
22
-
23
-
24
-
25
-
26
-
27
-
28
-
29
-
30
-
31
-
32
-
33
-
34
-
35
-
36
-
37
-
38
-
39
-
40
-
41
-
42
-
43
-
44
-
45
-
46
-
47
-
48
-
49
-
50
-
51
-
52
-
53
-
54
-
55
-
56
-
57
-
58
-
59
-
60
-
61
-
62
-
63
-
 64
64 -
 65
65 -
 66
66 -
 67
67 -
 68
68 -
 69
69 -
 70
70 -
 71
71 -
 72
72 -
 73
73 -
 74
74 -
75
-
76
-
77
-
78
-
79
-
80
-
81
-
82
-
83
-
84
-
85
-
86
-
87
-
88
-
89
-
90
-
91
-
92
-
93
-
94
-
95
-
96
-
97
-
98
-
99
-
100
-
101
-
102
-
103
-
104
-
105
-
106
-
107
-
108
-
109
-
110
-
111
-
112
-
113
-
114
-
115
-
116
-
117
-
118
-
119
-
120
-
121
-
122
-
123
-
124
-
125
-
126
-
127
-
128
-
129
-
130
-
131
-
132
-
133
-
134
-
135
-
136
-
137
-
138
-
139
-
140
-
141
-
142
-
143
-
144
-
145
-
146
-
147
-
148
-
149
-
150
-
151
-
152
-
153
-
154
-
155
-
156
-
157
-
158
-
159
-
160
-
161
-
162
-
163
-
164
-
165
-
166
-
167
-
168
-
169
-
170
-
171
-
172
-
173
-
174
-
175
-
176
-
177
-
178
-
179
-
180
-
181
-
182
-
183
-
184
-
185
-
186
-
187
-
188
-
189
-
190
-
191
-
192
-
193
-
194
-
195
-
196
-
197
-
198
-
199
-
200
-
201
-
202
-
203
-
204
-
205
-
206
-
207
-
208
-
209
-
210
-
211
-
212
-
213
-
214
-
215
-
216
-
217
-
218
-
219
-
220
-
221
-
222
-
223
-
224
-
225
-
226
-
227
-
228
-
229
-
230
-
231
-
232
-
233
-
234
-
235
-
236
-
237
-
238
-
239
-
240
-
241
-
242
-
243
-
244
-
245
-
246
-
247
-
248
-
249
-
250
-
251
-
252
-
253
-
254
-
255
 |
 |