Sony HAR-D1000 Primary User Manual - Page 7
Getting Started, Inserting batteries into the remote, Hooking up the system
 |
View all Sony HAR-D1000 manuals
Add to My Manuals
Save this manual to your list of manuals |
Page 7 highlights
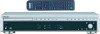
Overview Getting Started Getting Started Inserting batteries into the remote Hooking up the system Hookups This section describes how to hook up the HDD recorder to an amplifier. Be sure to turn off each component before making the connections. HDD recorder ANALOG IN OUT L DIGITAL OPTICAL IN CD CHANGER CONTROL USB R You can control the recorder using the supplied remote. Insert two R6 (size AA) batteries by matching the + and - on the batteries to the diagram inside the battery compartment. Insert the negative (-) end first, then push in and down until the positive (+) end clicks into position. When using the remote, point it at the remote sensor on the recorder. ANALOG OUT (Red) (R) ANALOG OUT (White) (L) To a wall outlet Audio input (White) (L) Audio input (Red) (R) Amplifier Tip When the remote no longer operates the recorder, replace both batteries with new ones. Notes • Do not leave the remote near an extremely hot or humid place. • Do not drop any foreign object into the remote casing, particularly when replacing the batteries. • Do not expose the remote sensor to direct sunlight or lighting apparatuses. Doing so may cause a malfunction. • If you do not use the remote for an extended period of time, remove the batteries to avoid possible damage from battery leakage and corrosion. : Signal flow To a wall outlet Making digital hookups If you have a digital component such as a digital amplifier, D/A converter, DAT, or MD, connect the component via the DIGITAL OPTICAL IN connector using the optical cable (not supplied). Take off the cap and plug in the optical cable. Be sure not to bend or tie the optical cable. POC-15 Optical cable (not supplied) HDD recorder DIGITAL OPTICAL IN Digital component DIGITAL OUTPUT OPTICAL 7 continued
-
 1
1 -
 2
2 -
 3
3 -
 4
4 -
 5
5 -
 6
6 -
 7
7 -
 8
8 -
 9
9 -
 10
10 -
 11
11 -
 12
12 -
13
-
14
-
15
-
16
-
17
-
18
-
19
-
20
-
21
-
22
-
23
-
24
-
25
-
26
-
27
-
28
-
29
-
30
-
31
-
32
-
33
-
34
-
35
-
36
 |
 |
