Sony HCD-NEZ30 Service Manual - Page 13
Hcd-nez30, Mechanical, Adjustments
 |
View all Sony HCD-NEZ30 manuals
Add to My Manuals
Save this manual to your list of manuals |
Page 13 highlights
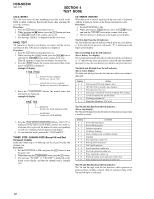
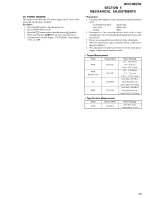
CD POWER MANEGE This mode is for switch the CD power supply on/off. Even if this state pulls out AC plug, it is held. Procedure: 1. Press the I/1 button to turn the power on. 2. Set the FUNCTION to CD. 3. Press the I/1 button again to turn the power off (standby). 4. While pressing the CD u button, press the I/1 button. 5. If turns power on and display "CD POWER", then display "ON" or "OFF". HCD-NEZ30 SECTION 5 MECHANICAL ADJUSTMENTS • Precaution 1. Clean the following parts with a denatured-alcohol-moistened swab : record/playback head pinch roller erase head rubber belts capstan idlers 2. Demagnetize the record/playback head with a head demagnetizer. (Do not bring the head magnetizer close to the erase head.) 3. Do not use a magnetized screwdriver for the adjustments. 4. After the adjustments, appiy suitable locking compound to the parts adjusted. 5. The adjustments should be performed with the rated power supply voltage unless otherwise noted. • Torque Measurement Mode Torque Meter FWD CQ-102C FWD Back Tension CQ-102C FF CQ-201B REW CQ-201B Meter Reading 2.95 - 6.86 mN⋅m (30 - 70 g⋅cm) (0.42 - 0.97 oz⋅inch) 0.15 - 5.39 mN⋅m (1.5 - 5.5 g⋅cm) (0.021 - 0.076 oz⋅inch) more than 5.89 mN⋅m (more than 60 g⋅cm) (more than 0.83 oz⋅inch) more than 5.89 mN⋅m (more than 60 g⋅cm) (more than 0.83 oz⋅inch) • Tape Tension Measurement Mode Tension Meter FWD CQ-403A Meter Reading more than 100 g (more than 3.53 oz) 13
-
 1
1 -
2
-
3
-
4
-
5
-
6
-
7
-
 8
8 -
 9
9 -
 10
10 -
 11
11 -
 12
12 -
 13
13 -
 14
14 -
 15
15 -
 16
16 -
 17
17 -
 18
18 -
19
-
20
-
21
-
22
-
23
-
24
-
25
-
26
-
27
-
28
-
29
-
30
-
31
-
32
-
33
-
34
-
35
-
36
-
37
-
38
-
39
-
40
-
41
-
42
-
43
-
44
-
45
-
46
-
47
-
48
-
49
-
50
-
51
 |
 |
