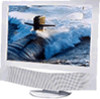
Sony KLV-23HR2 Operating Instructions - Page 6
Installing and Connecting the TV, Unpacking, Inserting Batteries into the Remote Control - power supply
 |
View all Sony KLV-23HR2 manuals
Add to My Manuals
Save this manual to your list of manuals |
Page 6 highlights
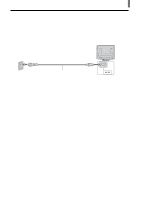
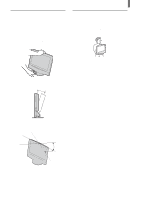
Installing and Connecting the TV Installing and Connecting the TV Unpacking When you unpack this unit, make sure it includes the following: Remote control (1) and size AA batteries (2) AC power cord (1) 75-ohm coaxial cable (1) Operating Instructions Warranty Card Product Registration Connector Types You may find it necessary to use some of the following connector types during set up. Supplied 75-ohm coaxial cable Screw-on type Screw into connection. S VIDEO cable High quality video cable for enhanced picture quality Align guides and push into connection. AUDIO/VIDEO cable Push into connection. VIDEO - Yellow AUDIO (Left) - White AUDIO (Right) - Red Some DVD players are equipped with the following three video connectors: Y - Green PB (CB, Cb or B-Y) - Blue PR (CR, Cr or R-Y) - Red Inserting Batteries into the Remote Control Insert two size AA batteries (supplied) by matching the + and - on the batteries to the diagram inside the remote control's battery compartment. Notes • Remove the batteries to avoid damage from possible battery leakage whenever you anticipate that the remote control will not be used for an extended period. • Handle the remote control with care. Avoid dropping it, getting it wet, or placing it in direct sunlight, near a heater or where the humidity is high. • Your remote control can be programmed to operate most video equipment (See "Operating Video Equipment with Your TV Remote Control" on page 34). 6
-
 1
1 -
 2
2 -
 3
3 -
 4
4 -
 5
5 -
 6
6 -
 7
7 -
 8
8 -
 9
9 -
 10
10 -
 11
11 -
 12
12 -
13
-
14
-
15
-
16
-
17
-
18
-
19
-
20
-
21
-
22
-
23
-
24
-
25
-
26
-
27
-
28
-
29
-
30
-
31
-
32
-
33
-
34
-
35
-
36
-
37
-
38
-
39
-
40
-
41
-
42
-
43
-
44
-
45
-
46
-
47
-
48
-
49
-
50
-
51
-
52
-
53
-
54
-
55
-
56
-
57
-
58
-
59
-
60
-
61
-
62
-
63
-
64
-
65
-
66
-
67
-
68
-
69
-
70
-
71
-
72
-
73
-
74
-
75
-
76
-
77
-
78
-
79
-
80
-
81
-
82
-
83
-
84
 |
 |
