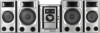
Sony MHC-GX9900 MHCGX9900 Instructions (main component system) - Page 35
Timer recording radio programs, Timer
 |
View all Sony MHC-GX9900 manuals
Add to My Manuals
Save this manual to your list of manuals |
Page 35 highlights
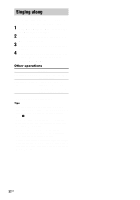
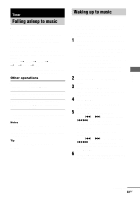
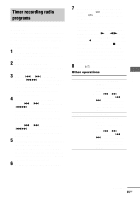
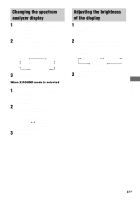
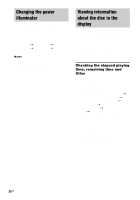
Timer Timer recording radio programs You can record a preset radio station from a specified time. To make a timer recording, you must first preset the radio station (see "Presetting radio stations" on page 19) and set the clock (see "Setting the clock" on page 13). Use buttons on the remote for the operation. 1 Tune in the preset radio station (see "Listening to a preset station" on page 21). 2 Press CLOCK/TIMER SET. "SET" appears in the display, then "PLAY SET?" flashes in the display. 3 Press -. or >+ repeatedly (or turn .> on the unit clockwise or counterclockwise) to select "REC SET?", then press ENTER. "ON" appears and the hour indication flashes in the display. 4 Set the time to start recording. Press -. or >+ repeatedly (or turn .> on the unit clockwise or counterclockwise) to set the hour, then press ENTER. The minute indication start flashes in the display. Press -. or >+ repeatedly (or turn .> on the unit clockwise or counterclockwise) to set the minute, then press ENTER. 5 Set the time to stop recording following the same procedure as step 4. The type of timer ("REC"), followed by the start time, the stop time and the preset radio station to be recorded (e.g., "TUNER FM 5") appears in the display. 6 Load a recordable tape into Deck B. 7 Press DIRECTION repeatedly on the unit to select "g" to record on one side or "j" (or "RELAY") to record on both sides. For recoding from the reverse side, press TAPE (or TAPE A/B on the unit) repeatedly until "TAPE B" appears in the display. Then, press N (or nN on the unit) repeatedly until TAPE B reverse side indicator "b" lights up in the display to start playback of reverse side. Press x at the point where you want to start recording. When you record on both sides, be sure to start from the front side. If you start from the reverse side, recording stops at the end of the reverse side. 8 Press ?/1 to turn off the system. Other operations To Check the setting Change the setting Cancel the timer Do this 1 Press CLOCK/TIMER SELECT. "SELECT" appears in the display. 2 Press -. or >+ repeatedly (or turn . > on the unit clockwise or counterclockwise) to select "REC SELECT?", then press ENTER. Start from step 1. 1 Press CLOCK/TIMER SELECT. "SELECT" appears in the display. 2 Press -. or >+ repeatedly (or turn . > on the unit clockwise or counterclockwise) to select "TIMER OFF?", then press ENTER. continued 35GB
-
 1
1 -
2
-
3
-
4
-
5
-
6
-
7
-
8
-
9
-
10
-
11
-
12
-
13
-
14
-
15
-
16
-
17
-
18
-
19
-
20
-
21
-
22
-
23
-
24
-
25
-
26
-
27
-
28
-
29
-
 30
30 -
 31
31 -
 32
32 -
 33
33 -
 34
34 -
 35
35 -
 36
36 -
 37
37 -
 38
38 -
 39
39 -
 40
40 -
41
-
42
-
43
-
44
-
45
-
46
-
47
-
48
-
49
-
50
-
51
-
52
-
53
-
54
-
55
-
56
 |
 |
