Sony MHC-ZX10 Operating Instructions - Page 6
Step 2: Setting the time - protect
 |
View all Sony MHC-ZX10 manuals
Add to My Manuals
Save this manual to your list of manuals |
Page 6 highlights
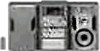
Step 1: Hooking up the system (continued) To attach the front speaker pads Attach the supplied front speaker pads to the bottom of the speakers to stabilize the speakers and prevent them from slipping. Step 2: Setting the time You must set the time before using the timer functions. The clock is on a 24-hour system for the European model, and on a 12-hour system for other models. For illustration purposes, the 24-hour system model is used. ?/1 (Power) 2,3,4,5,6 1 Inserting two size AA (R6) batteries into the remote ] }} ] Tip With normal use, the batteries should last for about six months. When the remote no longer operates the system, replace both batteries with new ones. Note If you do not use the remote for a long period of time, remove the batteries to avoid possible damage from battery leakage. When carrying this system Do the following to protect the CD mechanism. Make sure that all discs are removed from the unit. 1 Press FUNCTION repeatedly until "CD" appears in the display. 2 Hold down V-GROOVE and press ?/1 so that "LOCK" appears in the display. 1 Press MODE SELECT when the system is turned off. "Clock Set ?" appears. When the system is in the Power Saving Mode, "Clock Set ?" will not appear. Either set Power Saving Mode off, or follow the steps on the following page ("To change the time") after turning the power on. 2 Press PUSH ENTER. The hour indication flashes. 6
-
 1
1 -
 2
2 -
 3
3 -
 4
4 -
 5
5 -
 6
6 -
 7
7 -
 8
8 -
 9
9 -
 10
10 -
 11
11 -
 12
12 -
13
-
14
-
15
-
16
-
17
-
18
-
19
-
20
-
21
-
22
-
23
-
24
-
25
-
26
-
27
-
28
-
29
-
30
-
31
-
32
-
33
-
34
-
35
-
36
-
37
-
38
-
39
-
40
-
41
-
42
-
43
-
44
-
45
-
46
-
47
-
48
-
49
-
50
-
51
-
52
-
53
-
54
-
55
-
56
-
57
-
58
-
59
-
60
 |
 |
