Sony MHS-PM5K/V bloggie™ Handbook - Page 54
Viewing 360 Video images, For details on the operation,
 |
UPC - 027242789159
View all Sony MHS-PM5K/V manuals
Add to My Manuals
Save this manual to your list of manuals |
Page 54 highlights
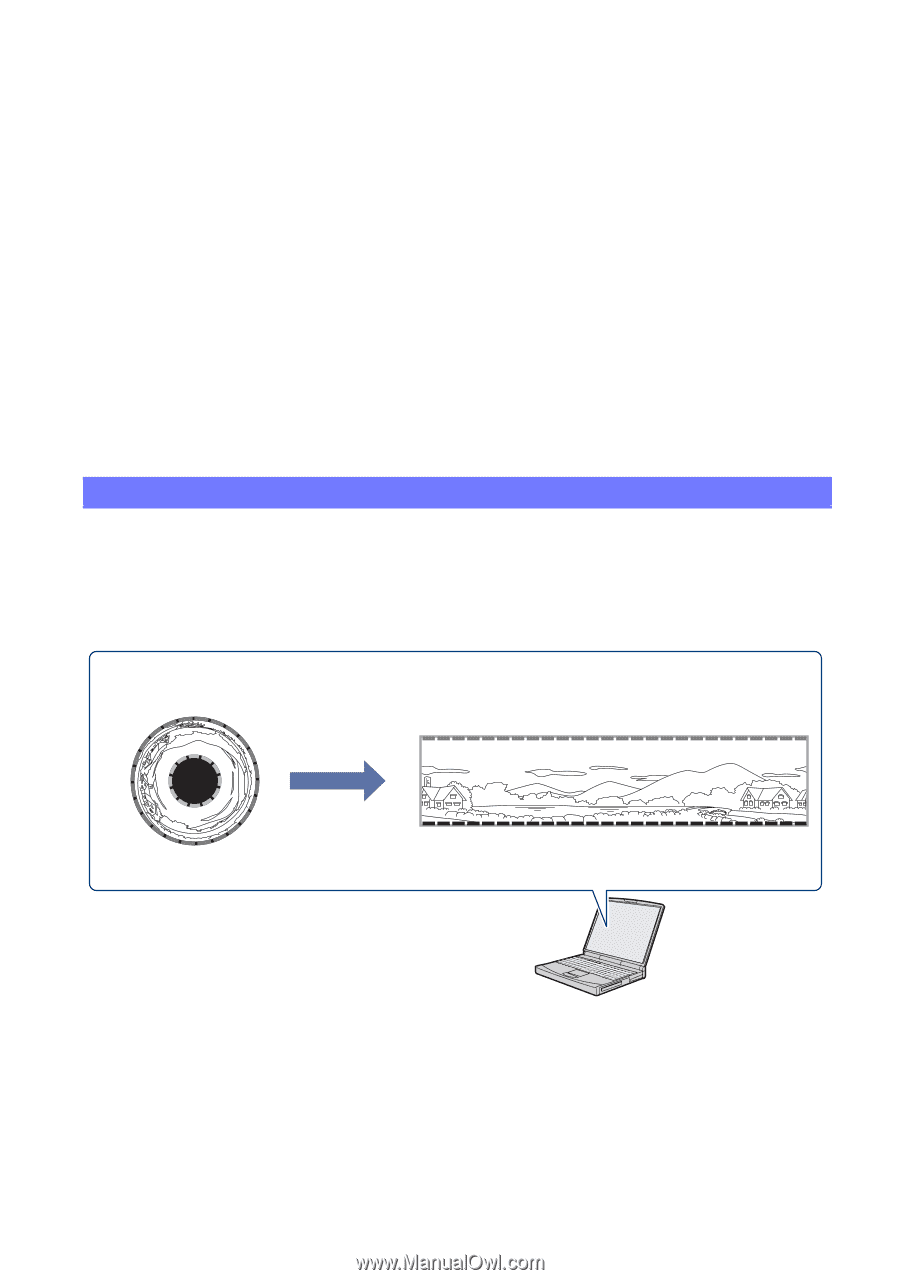
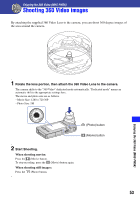
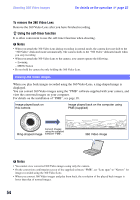
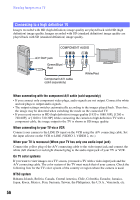
Shooting 360 Video images For details on the operation 1 page 53 To remove the 360 Video Lens Remove the 360 Video Lens after you have finished recording. z Using the self-timer function It is often convenient to use the self-timer function when shooting. b Notes • When you attach the 360 Video Lens during recording in normal mode, the camera does not shift to the "360 Video" dedicated mode automatically. The camera shifts to the "360 Video" dedicated mode when you stop recording. • When you attach the 360 Video Lens to the camera, you cannot operate the following. - Zooming - MENU button • Do not hold the camera by only holding the 360 Video Lens. Viewing 360 Video images When you play back images recorded using the 360 Video Lens, a ring-shaped image is displayed. You can convert 360 Video images using the "PMB" software supplied with your camera, and view the converted images on your computer. For details on the installation of "PMB", see page 38. Image played back on this camera Image played back on the computer using PMB (supplied) Convert images using the supplied Ring-shaped image software "PMB". 360 Video image b Notes • You cannot view converted 360 Video images using only the camera. • On the conversion confirmation screen of the supplied software "PMB", set "Lens span" to "Narrow" for images recorded using the 360 Video Lens. • When you convert 360 Video images and play them back, the resolution of the played back images is lower than that of normal images. 54
-
 1
1 -
2
-
3
-
4
-
5
-
6
-
7
-
8
-
9
-
10
-
11
-
12
-
13
-
14
-
15
-
16
-
17
-
18
-
19
-
20
-
21
-
22
-
23
-
24
-
25
-
26
-
27
-
28
-
29
-
30
-
31
-
32
-
33
-
34
-
35
-
36
-
37
-
38
-
39
-
40
-
41
-
42
-
43
-
44
-
45
-
46
-
47
-
48
-
 49
49 -
 50
50 -
 51
51 -
 52
52 -
 53
53 -
 54
54 -
 55
55 -
 56
56 -
 57
57 -
 58
58 -
 59
59 -
60
-
61
-
62
-
63
-
64
-
65
-
66
-
67
-
68
-
69
-
70
-
71
-
72
-
73
 |
 |