Sony MVC CD1000 Operating Instructions - Page 31
is recordable side., Printed side of the adaptor SONY is printed
 |
UPC - 027242574380
View all Sony MVC CD1000 manuals
Add to My Manuals
Save this manual to your list of manuals |
Page 31 highlights
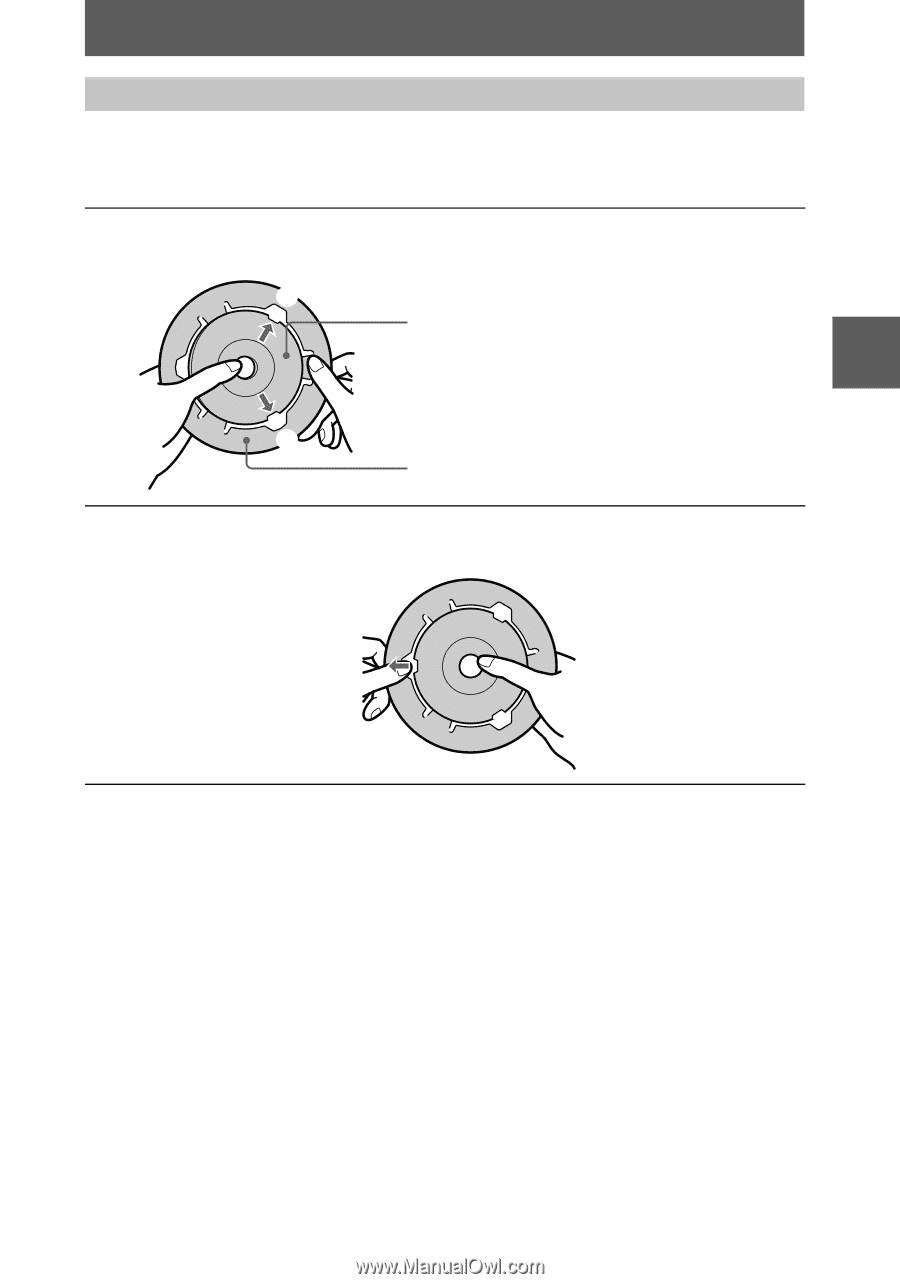
Using the supplied 8 cm CD adaptor When your disc drive does not conform to 8 cm CD or is an upright type, use the supplied 8 cm CD adaptor. 1 Slide the disc into the inner groove and under two of the tabs on the inner circle of adaptor in the numbered order. 1 Printed side of the disc (The other blue side is recordable side.) Printed side of the adaptor (SONY is printed 2 on this side and the other side is the luster side.) 2 Pull the third tab out away from the disc and the disc will slip into place. Release the third tab and the disc will be held firmly in place. B Playback 31
-
 1
1 -
2
-
3
-
4
-
5
-
6
-
7
-
8
-
9
-
10
-
11
-
12
-
13
-
14
-
15
-
16
-
17
-
18
-
19
-
20
-
21
-
22
-
23
-
24
-
25
-
 26
26 -
 27
27 -
 28
28 -
 29
29 -
 30
30 -
 31
31 -
 32
32 -
 33
33 -
 34
34 -
 35
35 -
 36
36 -
37
-
38
-
39
-
40
-
41
-
42
-
43
-
44
-
45
-
46
-
47
-
48
-
49
-
50
-
51
-
52
-
53
-
54
-
55
-
56
-
57
-
58
-
59
-
60
-
61
-
62
-
63
-
64
-
65
-
66
-
67
-
68
-
69
-
70
-
71
-
72
-
73
-
74
-
75
-
76
-
77
-
78
-
79
-
80
 |
 |
B
Playback
31
When your disc drive does not conform to 8 cm CD or is an upright type, use the
supplied 8 cm CD adaptor.
Using the supplied 8 cm CD adaptor
1
Slide the disc into the inner groove and under two of the tabs on
the inner circle of adaptor in the numbered order.
2
Pull the third tab out away from the disc and the disc will slip into
place. Release the third tab and the disc will be held firmly in place.
1
2
Printed side of the disc (The other blue side
is recordable side.)
Printed side of the adaptor (SONY is printed
on this side and the other side is the luster
side.)