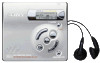
Sony MZ-R501 Operating Instructions - Page 15
Various ways of recording, Two ways of connecting to a sound source - mini disc
 |
View all Sony MZ-R501 manuals
Add to My Manuals
Save this manual to your list of manuals |
Page 15 highlights
Various ways of recording Two ways of connecting to a sound source The input jack of this recorder works as both digital and analog input jacks. Connect the recorder to a CD player or a cassette recorder using either digital (optical) input or analog (line) input. To record, see "Recording an MD right away!" (page 10) to record using digital (optical) input, and "Recording with analog input (line cable required)" (page 16) to record using analog (line) input. Difference between digital (optical) and analog (line) inputs Difference Digital (optical) input Analog (line) input Connectable source Usable cord Equipment with a digital (optical) output jack Optical cable (with an optical or an optical-mini plug)(page 10) Equipment with an analog (line) output jack Line cable (with 2 phono plugs or a stereo-mini plug)(page 16) Signal from the Digital source Analog Even when a digital source (such as a CD) is connected, the signal sent to the recorder is analog. Recorded track numbers Marked (copied) automatically • at the same positions as the source (when the sound source is a CD or an MD). • after more than 2 seconds of blank or low-level segment (with a sound source other than a CD or an MD). • when the recorder is paused during synchro-recording (the recorder pauses automatically when it encounters a section with no audio signal for 3 seconds or more). You can erase unnecessary marks after recording. ("Erasing a track mark", page 29). Marked automatically • after more than 2 seconds of blank or low-level segment. • when the recorder is paused while recording. • at specified intervals when the Auto Time Stamp is on. You can erase unnecessary marks after recording ("Erasing a track mark", page 29). Recorded sound level Same as the source. Can also be adjusted manually (Digital REC level control) ("Adjusting the recording level manually (Manual recording)", page 20). Adjusted automatically. Can also be adjusted manually ("Adjusting the recording level manually (Manual recording)", page 20). Note Track marks may be copied incorrectly: • when you record from some CD players or multi disc players using digital (optical) input. • when the source is in shuffle or program play mode while recording using digital (optical) input. In this case, play the source in normal play mode. • when recording BS or CS programs through digital (optical) input. 15
-
 1
1 -
2
-
3
-
4
-
5
-
6
-
7
-
8
-
9
-
 10
10 -
 11
11 -
 12
12 -
 13
13 -
 14
14 -
 15
15 -
 16
16 -
 17
17 -
 18
18 -
 19
19 -
 20
20 -
21
-
22
-
23
-
24
-
25
-
26
-
27
-
28
-
29
-
30
-
31
-
32
-
33
-
34
-
35
-
36
-
37
-
38
-
39
-
40
 |
 |
