Sony PDW700 User Manual (PDW-700 / PDW-F800 Operation Manual for Firmware Vers - Page 97
Recording with the Clip Continuous Rec function, Retaking the most recent clip
 |
View all Sony PDW700 manuals
Add to My Manuals
Save this manual to your list of manuals |
Page 97 highlights
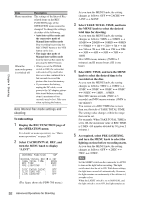
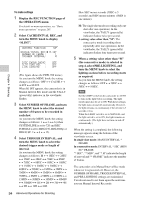
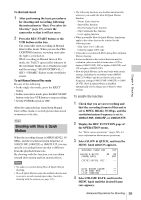
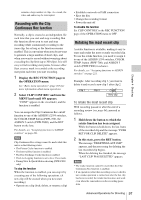
contains a large number of clips. As a result, the video and audio may be interrupted. Recording with the Clip Continuous Rec function Normally, a clip is created as an independent file each time that you start and stop recording. But this function allows you to start and stop recording while continuously recording to the same clip, for as long as the function remains enabled. This is convenient when you do not want to generate a large number of short clips, and when you want to record without worrying about exceeding the clip limit (up to 300 clips). It is still easy to find recording start points, because a Rec Start essence mark is recorded at the recording start point each time you start recording. 1 Display the REC FUNCTION page in the OPERATION menu. See "Basic menu operations" (page 205) for more information about menu operations. 2 Select CLIP CONT REC and turn the MENU knob until ON appears. "CONT" appears in the viewfinder, and the function is enabled. You can assign the Clip Continuous Rec on/off function to one of the ASSIGN 1/2/3/4 switches, the COLOR TEMP button (PDW-700), the ASSIGN 5 switch (PDW-F800), and the RET button on the lens. For details, see "Assigning functions to ASSIGN switches" on page 221. Note Clip Continuous Rec settings cannot be made while this unit is in the following states. • The Picture Cache function is enabled. • The Interval Rec function is enabled. • The Disc Exchange Cache function is enabled. • The Live Logging function is set to Live View mode. • During Slow & Quick Motion shooting (PDW-F800 only) To stop the function When the function is enabled, you can stop it by executing any of the following operations. (A new clip will be created when you next start recording.) • Operate on a clip (lock, delete, or rename a clip) • Establish a network or FAM connection • Eject the disc • Change the recording format • Power the unit off To disable the function Set CLIP CONT REC in the REC FUNCTION page of the OPERATION menu to OFF. Retaking the most recent clip A retake function is available, making it easy to erase and retake the most recently recorded clip. To use the retake function, you need to assign it to one of the ASSIGN 1/3/4 switches, COLOR TEMP. button (PDW-700), and ASSIGN 5 switch (PDW-F800) in advance. For details, see "Assigning functions to ASSIGN switches" on page 221. Example: After recording clip 3, you want to delete it and record a new clip 3 after clip 2. Clip 1 Clip 2 Clip 3 New clip To retake the most recent clip With recording paused or after the end of a recording review (see page 84), proceed as follows. 1 Hold down the button to which the retake function has been assigned. While the button is held down, the last frame of the recorded clip and the message "PUSH RET FOR CLIP DELETE" appears. 2 In this state, press the RET button. The message "DELETING LAST CLIP" appears, and the processing for deleting the last recorded clip begins. When the deleting has finished, the message "LAST CLIP WAS DELETED" appears. Notes • The retake function cannot be used when the Clip Continuous Rec function is enabled. • If an operation (other than recording review) which is not a retake operation is carried out after the last clip has been recorded, the retake function does not work even when the camcorder is in the recording pause state. Advanced Operations for Shooting 97 Chapter 4 Shooting
-
 1
1 -
2
-
3
-
4
-
5
-
6
-
7
-
8
-
9
-
10
-
11
-
12
-
13
-
14
-
15
-
16
-
17
-
18
-
19
-
20
-
21
-
22
-
23
-
24
-
25
-
26
-
27
-
28
-
29
-
30
-
31
-
32
-
33
-
34
-
35
-
36
-
37
-
38
-
39
-
40
-
41
-
42
-
43
-
44
-
45
-
46
-
47
-
48
-
49
-
50
-
51
-
52
-
53
-
54
-
55
-
56
-
57
-
58
-
59
-
60
-
61
-
62
-
63
-
64
-
65
-
66
-
67
-
68
-
69
-
70
-
71
-
72
-
73
-
74
-
75
-
76
-
77
-
78
-
79
-
80
-
81
-
82
-
83
-
84
-
85
-
86
-
87
-
88
-
89
-
90
-
91
-
 92
92 -
 93
93 -
 94
94 -
 95
95 -
 96
96 -
 97
97 -
 98
98 -
 99
99 -
 100
100 -
 101
101 -
 102
102 -
103
-
104
-
105
-
106
-
107
-
108
-
109
-
110
-
111
-
112
-
113
-
114
-
115
-
116
-
117
-
118
-
119
-
120
-
121
-
122
-
123
-
124
-
125
-
126
-
127
-
128
-
129
-
130
-
131
-
132
-
133
-
134
-
135
-
136
-
137
-
138
-
139
-
140
-
141
-
142
-
143
-
144
-
145
-
146
-
147
-
148
-
149
-
150
-
151
-
152
-
153
-
154
-
155
-
156
-
157
-
158
-
159
-
160
-
161
-
162
-
163
-
164
-
165
-
166
-
167
-
168
-
169
-
170
-
171
-
172
-
173
-
174
-
175
-
176
-
177
-
178
-
179
-
180
-
181
-
182
-
183
-
184
-
185
-
186
-
187
-
188
-
189
-
190
-
191
-
192
-
193
-
194
-
195
-
196
-
197
-
198
-
199
-
200
-
201
-
202
-
203
-
204
-
205
-
206
-
207
-
208
-
209
-
210
-
211
-
212
-
213
-
214
-
215
-
216
-
217
-
218
-
219
-
220
-
221
-
222
-
223
-
224
-
225
-
226
-
227
-
228
-
229
-
230
-
231
-
232
-
233
-
234
-
235
-
236
-
237
-
238
-
239
-
240
-
241
-
242
-
243
-
244
-
245
-
246
-
247
-
248
-
249
-
250
-
251
-
252
-
253
-
254
-
255
-
256
-
257
-
258
-
259
-
260
-
261
-
262
-
263
-
264
-
265
-
266
-
267
-
268
-
269
-
270
-
271
-
272
-
273
-
274
-
275
-
276
-
277
-
278
-
279
-
280
-
281
-
282
-
283
-
284
-
285
-
286
-
287
-
288
-
289
-
290
-
291
-
292
-
293
-
294
-
295
 |
 |
