Sony STR-DA5ES Operating Instructions - Page 55
Parts Description, to revert back to the component
 |
View all Sony STR-DA5ES manuals
Add to My Manuals
Save this manual to your list of manuals |
Page 55 highlights
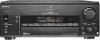
Parts Description 1 Display window The current status of the selected component or a list of selectable items appears here. Note Characters other than letters of the alphabet or numbers may be displayed incorrectly on the remote, even if they appear correctly in the display window on the main unit. 2 ?/1 switch Press to turn the receiver on or off. 3 SET UP button Press to display the set up list. Press again to revert back to the component information. 4 FUNCTION button Press to display the function (component) list. Press again to revert back to the component information. See the table on page 58 for information on the buttons you can use to control each component. If you want to change the contents of the function list to match your particular components, do the procedure "Programming the Remote" on page 64. 5 Easy scroll key While displaying a list, move up or down to select an item from the list, and then press to enter the selection. 6 Tape/disc operation buttons The following table shows what components are operated by each button and the function of the buttons. Button(s) Function H Starts play of the playback medium. h Starts play on the reverse side of the cassette. X Pauses play or recording or starts recording when the component is in recording standby. x Stops play. ./> Skips tracks. m/M Fastwinds or rewinds. Searches tracks in the forward or backward direction. See the table on page 58 for information on the buttons that you can use to control each component. 7 CH/PRESET/D.SKIP +/- buttons Press repeatedly to select a preset station, channel, track, or a disc. 8 MASTER VOL +/- buttons Press to adjust the volume level of all speakers at the same time. 9 ON SCREEN button The function of this button is same as the ON SCREEN button on the receiver. See page 9. 0 NIGHT MODE button The function of this button is same as the NIGHT MODE button on the receiver. See page 33. continued Operations using the remote 55
-
 1
1 -
2
-
3
-
4
-
5
-
6
-
7
-
8
-
9
-
10
-
11
-
12
-
13
-
14
-
15
-
16
-
17
-
18
-
19
-
20
-
21
-
22
-
23
-
24
-
25
-
26
-
27
-
28
-
29
-
30
-
31
-
32
-
33
-
34
-
35
-
36
-
37
-
38
-
39
-
40
-
41
-
42
-
43
-
44
-
45
-
46
-
47
-
48
-
49
-
 50
50 -
 51
51 -
 52
52 -
 53
53 -
 54
54 -
 55
55 -
 56
56 -
 57
57 -
 58
58 -
 59
59 -
 60
60 -
61
-
62
-
63
-
64
-
65
-
66
-
67
-
68
-
69
-
70
-
71
-
72
-
73
-
74
-
75
-
76
-
77
-
78
-
79
-
80
-
81
-
82
-
83
-
84
-
85
-
86
-
87
-
88
-
89
-
90
-
91
-
92
-
93
-
94
-
95
-
96
 |
 |
