Sony STR-DH820 Operating Instructions - Page 40
Customizing the Auto, Calibration, Message list after Auto, Calibration measurement - error code 33
 |
UPC - 027242809321
View all Sony STR-DH820 manuals
Add to My Manuals
Save this manual to your list of manuals |
Page 40 highlights
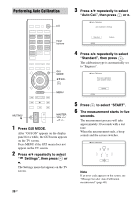
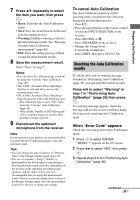
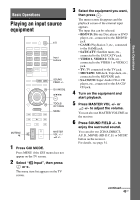
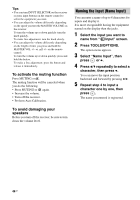
Message list after Auto Calibration measurement Display and explanation Error Code 31 The SPEAKERS is set to off. Set to other speaker settings and perform the Auto Calibration again. Error Code 32 None of the speakers were detected. Make sure that the optimizer microphone is connected properly and perform the Auto Calibration again. If the optimizer microphone is connected properly but the error code still appears, the optimizer microphone cable may be damaged. Error Code 33 • None of the front speakers are connected or only one front speaker is connected. • The optimizer microphone is not connected. • Either the surround left or surround right speaker is not connected. • Surround back speakers or front high speakers are connected even though surround speakers are not connected. Connect the surround speaker(s) to the SPEAKERS SURROUND terminals. • The surround back speaker is connected only to the SPEAKERS SURROUND BACK/FRONT HIGH/BI-AMP/FRONT B R terminals. When you connect only one surround back speaker, connect it to the SPEAKERS SURROUND BACK/FRONT HIGH/BI-AMP/FRONT B L terminals. • Either the front left high or front right high speaker is not connected. Warning 40 The measurement process has completed with high noise level detection. You may be able to achieve better results if you try in a quiet environment again. Warning 41 Warning 42 The input from the microphone is too big. • The distance between the speaker and the microphone may be too close. Set them apart and perform the measurement again. Warning 43 The distance and position of a subwoofer cannot be detected. This may be caused by noise. Try to perform the measurement in a quiet environment. No Warning There is no warning information. Tip Depending on the position of the subwoofer, the measurement results may vary. However, there will be no problems even if you continue to use the receiver with that value. 40GB Customizing the Auto Calibration You can customize the Auto Calibration by selecting the calibration type you want. 1 Press GUI MODE. After "GUI ON" appears on the display panel for a while, the GUI menu appears on the TV screen. Press MENU if the GUI menu does not appear on the TV screen. 2 Press V/v repeatedly to select " Settings", then press or b. The Settings menu list appears on the TV screen. 3 Press V/v repeatedly to select "Auto Cal.", then press or b. 4 Press B/b repeatedly to select "Custom", then press . 5 Press V/v repeatedly to select the calibration type you want, then press . • Full Flat: Makes the measurement of frequency from each speaker flat. • Engineer: Sets to "the Sony listening room standard" frequency characteristics. • Front Reference: Adjusts the characteristics of all the speakers to match the characteristics of the front speaker. • Off: Sets the Auto Calibration equalizer level and the A.P.M. (Automatic Phase Matching) function to off. Note Set the calibration type to "Off" if you want to decode DTS 96/24 audio format. 6 Press to confirm the selected calibration type. 7 Repeat steps 5 to 9 in "Performing Auto Calibration" (page 38).
-
 1
1 -
2
-
3
-
4
-
5
-
6
-
7
-
8
-
9
-
10
-
11
-
12
-
13
-
14
-
15
-
16
-
17
-
18
-
19
-
20
-
21
-
22
-
23
-
24
-
25
-
26
-
27
-
28
-
29
-
30
-
31
-
32
-
33
-
34
-
 35
35 -
 36
36 -
 37
37 -
 38
38 -
 39
39 -
 40
40 -
 41
41 -
 42
42 -
 43
43 -
 44
44 -
 45
45 -
46
-
47
-
48
-
49
-
50
-
51
-
52
-
53
-
54
-
55
-
56
-
57
-
58
-
59
-
60
-
61
-
62
-
63
-
64
-
65
-
66
-
67
-
68
-
69
-
70
-
71
-
72
-
73
-
74
-
75
-
76
-
77
-
78
-
79
-
80
-
81
-
82
-
83
-
84
-
85
-
86
-
87
-
88
-
89
-
90
-
91
-
92
-
93
-
94
-
95
-
96
-
97
-
98
-
99
-
100
 |
 |