Sony XDS1000 User Manual (XDS-1000 Operation Manual for Firmware Version 1.1) - Page 60
Deleting clips, Copying clips, Setting the index picture frame, To unlock clips
 |
View all Sony XDS1000 manuals
Add to My Manuals
Save this manual to your list of manuals |
Page 60 highlights
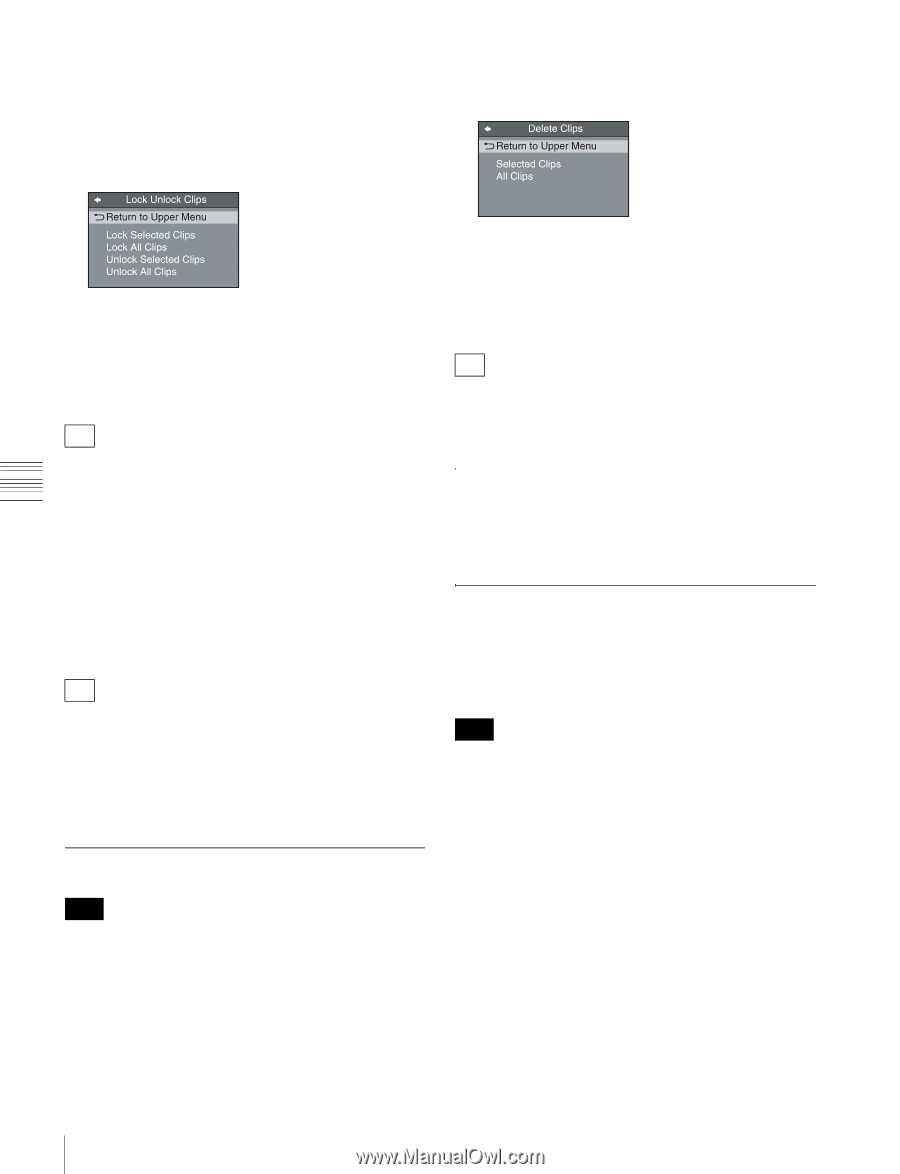
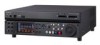
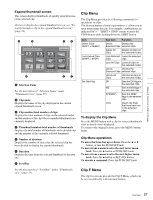
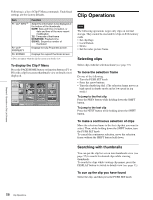
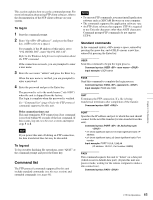
Chapter 5 Operations in Clip List Screens This step is not needed if you lock all clips. 2 Display the Clip Menu. 3 Select Lock Unlock Clips. The Lock Unlock Clips screen appears. 3 Select Delete Clips. The Delete Clips screen appears. 4 Select Lock Selected Clips or Lock All Clips, and then press the PUSH SET knob. The clips selected in step 1 or all clips are locked. A lock icon (see page 56) appears on the thumbnail of the locked clips. Tip You can lock the selected clips by pressing the STOP button while holding down the SHIFT button in step 1. To unlock clips 1 Execute the steps 1 to 3 in the previous section. 2 Select Unlock Selected Clips or Unlock All Clips, and then press the PUSH SET knob. 3 Select "OK", and then press the PUSH SET knob. Tip When you select a clip you want to unlock in the clip list screen and then press the STOP button while holding down the SHIFT button, a dialog appears asking you to confirm unlock. When you select "OK" and press the PUSH SET knob, the selected clip is unlocked. (To cancel unlock, select "CANCEL" and press the PUSH SET knob.) Deleting clips Note Locked clips cannot be deleted. 1 In a clip list screen, select the clips that you want to delete (multiple selections possible). This step is not needed if you delete all clips. 2 Display the Clip Menu. 4 Select Delete Selected Clips or Delete All Clips, and then press the PUSH SET knob. 5 Select "OK", and then press the PUSH SET knob. The clips selected in step 1 or all clips are deleted. Tip You can delete the selected clips by pressing the RESET button while holding down the SHIFT button in step 1 and by carrying out step 5. Copying clips See "Copy operations" (page 52) for information about operations. Setting the index picture frame The clip thumbnail screen displays thumbnails as index pictures for clips. Normally the index picture is the first frame in a clip, but you can change it to any frame in the clip for a different index picture. Note You cannot set index pictures for EDLs. 1 In the basic operation screen or video monitor screen, play back the clip you want to set the index picture frame. 2 Press the STOP button at the frame you want to be the index picture frame, to obtain a still frame display. 3 Display the page P5 OTHER of the function menu, and press the INDEX function button (F1). A confirmation box appears asking you whether to set the frame of the still image as the index picture frame. 4 To set the current frame as the index picture frame, select "OK" and press the PUSH SET knob. 60 Clip Operations
-
 1
1 -
2
-
3
-
4
-
5
-
6
-
7
-
8
-
9
-
10
-
11
-
12
-
13
-
14
-
15
-
16
-
17
-
18
-
19
-
20
-
21
-
22
-
23
-
24
-
25
-
26
-
27
-
28
-
29
-
30
-
31
-
32
-
33
-
34
-
35
-
36
-
37
-
38
-
39
-
40
-
41
-
42
-
43
-
44
-
45
-
46
-
47
-
48
-
49
-
50
-
51
-
52
-
53
-
54
-
 55
55 -
 56
56 -
 57
57 -
 58
58 -
 59
59 -
 60
60 -
 61
61 -
 62
62 -
 63
63 -
 64
64 -
 65
65 -
66
-
67
-
68
-
69
-
70
-
71
-
72
-
73
-
74
-
75
-
76
-
77
-
78
-
79
-
80
-
81
-
82
-
83
-
84
-
85
-
86
-
87
-
88
-
89
-
90
-
91
-
92
-
93
-
94
-
95
-
96
-
97
-
98
-
99
-
100
-
101
-
102
-
103
-
104
-
105
-
106
-
107
-
108
-
109
-
110
-
111
-
112
-
113
-
114
-
115
-
116
 |
 |