Stihl RMA 510 V Instruction Manual - Page 30
Checking, the Lawn Mower, During Operation
 |
View all Stihl RMA 510 V manuals
Add to My Manuals
Save this manual to your list of manuals |
Page 30 highlights
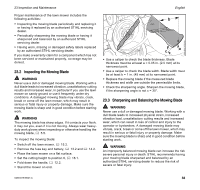
English 17 Checking the Lawn Mower 17.1 Testing the Controls Before starting work, confirm that the switch lever lockout (1), switch lever (3), self-propel lever (2) and speed lever (4) are undamaged and functioning properly. 2 3 4 1 18 During Operation 18.1 Adjusting the Cutting Height 0000-GXX-8167-A0 17 Checking the Lawn Mower To adjust the cutting height: ► Pull the cutting height adjustment lever (1) out of the recess and set it to the selected position. A marking indicates the selected cutting height. 8 different cutting heights can be selected: - Position 1: 0.98 in. (25 mm) - Position 2: 1.03 in. (33 mm) - Position 3: 1.70 in. (43 mm) - Position 4: 2.00 in. (52 mm) - Position 5: 2.48 in. (63 mm) - Position 6: 2.95 in. (75 mm) - Position 7: 3.43 in. (87 mm) - Position 8: 3.94 in. (100 mm) NOTICE To reduce the risk of damaging the lawn mower, never attempt to lift, carry or transport the lawn mower by the cutting height adjustment lever. NOTICE To avoid overloading the motor, avoid setting the cutting height too low in tall grass. If the motor speed begins to slow, raise the cutting height. 18.2 Activating ECO Mode When the ECO mode is selected, the mower operates at a lower RPM for situations requiring less power. This increases energy efficiency and battery runtime. 1 0000-GXX-4633-A0 28 0458-819-8621-A
-
 1
1 -
2
-
3
-
4
-
5
-
6
-
7
-
8
-
9
-
10
-
11
-
12
-
13
-
14
-
15
-
16
-
17
-
18
-
19
-
20
-
21
-
22
-
23
-
24
-
 25
25 -
 26
26 -
 27
27 -
 28
28 -
 29
29 -
 30
30 -
 31
31 -
 32
32 -
 33
33 -
 34
34 -
 35
35 -
36
-
37
-
38
-
39
-
40
-
41
-
42
-
43
-
44
-
45
-
46
-
47
-
48
-
49
-
50
-
51
-
52
-
53
-
54
-
55
-
56
-
57
-
58
-
59
-
60
-
61
-
62
-
63
-
64
-
65
-
66
-
67
-
68
-
69
-
70
-
71
-
72
-
73
-
74
-
75
-
76
-
77
-
78
-
79
-
80
-
81
-
82
-
83
-
84
-
85
-
86
-
87
-
88
 |
 |
