Stihl RZ 142 Instruction Manual - Page 32
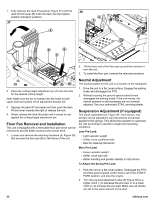
Floor Pan Removal and Installation, Neutral Adjustment, Suspension Adjustment if equipped
 |
View all Stihl RZ 142 manuals
Add to My Manuals
Save this manual to your list of manuals |
Page 32 highlights
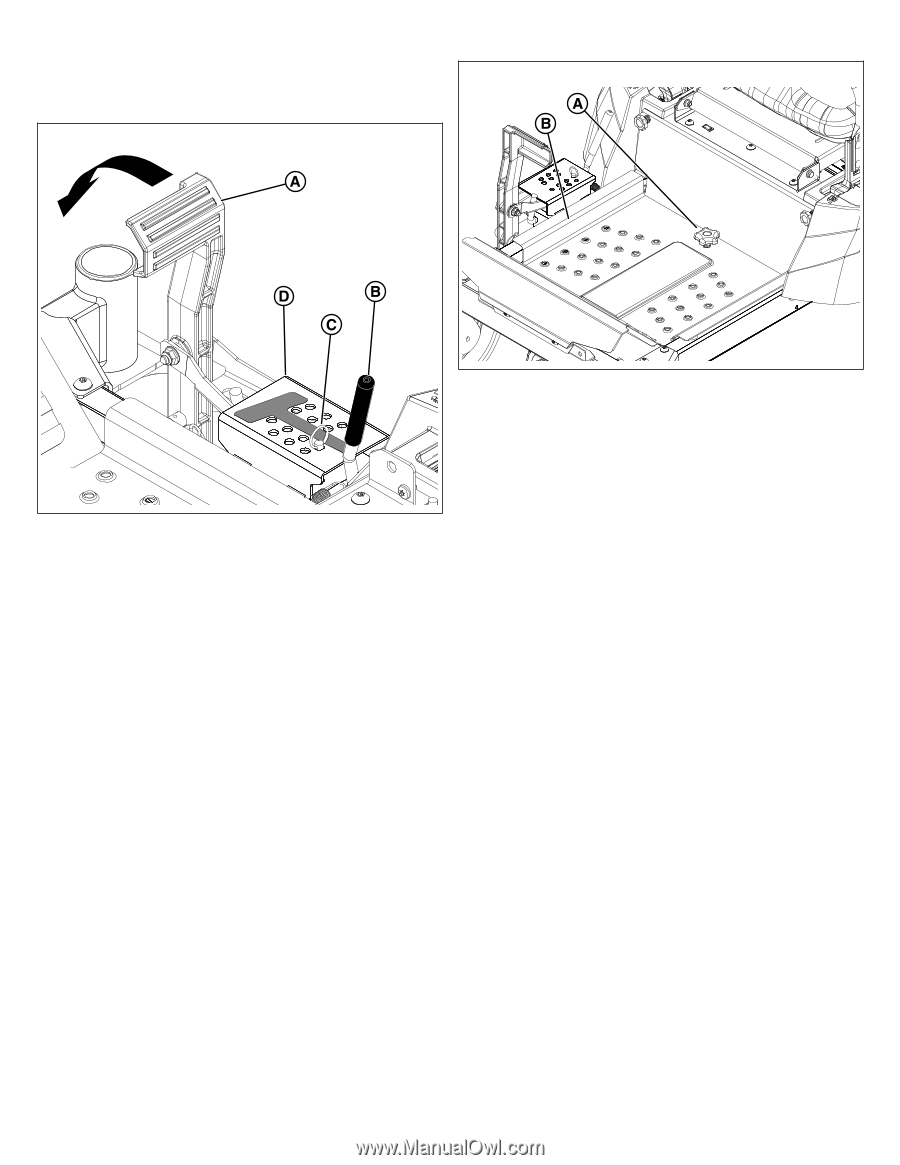
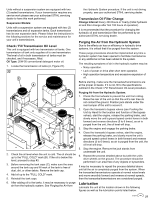
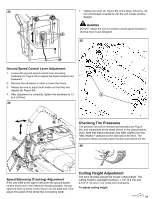
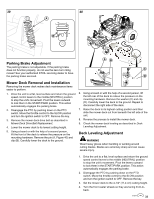
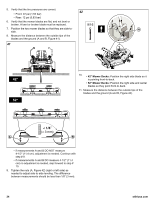
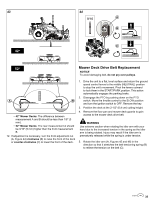
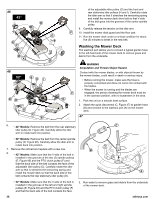
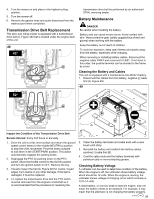
1. Fully depress the deck lift pedal (A, Figure 37) until the deck lift lock lever (B) locks the deck into the highest 38 position (transport position). 37 2. Tilt the back end of the floor pan up and then remove it from the unit. 3. To install the floor pan: reverse the removal procedure. 2. Place the cutting height adjustment pin (C) into the hole for the desired cutting height. Note: Make sure the pin is inserted into the holes in both upper and lower plates of the adjustment bracket (D). 3. Depress the deck lift foot pedal and then push the deck lift lock lever towards the right to release the lock. 4. Slowly release the deck lift pedal until it comes to rest against the cutting height adjustment pin. Floor Pan Removal and Installation This unit is equipped with a removable floor pan which can be removed to provide better access to the mower deck. 1. Loosen and remove the retaining hardware (A, Figure 38) that secures the floor pan (B) to the frame of the unit. Neutral Adjustment The neutral system for this unit is a function of the transaxles. 1. Drive the unit to a flat, level surface. Engage the parking brake and disengage the PTO. 2. Without touching the ground speed control levers disengage the parking brake. If the unit moves, the neutral systems on the transaxles are not correctly adjusted. See your authorized STIHL servicing dealer. Suspension Adjustment (if equipped) The shock assemblies (A, Figure 39 - front shown, rear similar) can be adjusted to vary the amount of pre-load applied to the springs. This allows the operator to customize the ride according to operator's weight and operating conditions. Less Pre-Load: • Light operator weight • Softer, more cushioned ride • Best for relatively flat terrain More Pre-Load: • Heavy operator weight • Stiffer, more rigid ride • Better handling and greater stability on hilly terrain To Adjust the Spring Pre-Load: 1. Park the unit on a flat, level surface. Disengage the PTO, pivot the ground speed control levers out to the START/ PARK position, and stop the engine. 2. Turn the pre-load adjustment collar (B, Figure 39) to a higher notch (-) to decrease the pre-load, or to a lower notch (+) to increase the pre-load. Make sure all shocks are set to the same amount of pre-load. 32 stihlusa.com
-
 1
1 -
2
-
3
-
4
-
5
-
6
-
7
-
8
-
9
-
10
-
11
-
12
-
13
-
14
-
15
-
16
-
17
-
18
-
19
-
20
-
21
-
22
-
23
-
24
-
25
-
26
-
 27
27 -
 28
28 -
 29
29 -
 30
30 -
 31
31 -
 32
32 -
 33
33 -
 34
34 -
 35
35 -
 36
36 -
 37
37 -
38
-
39
-
40
-
41
-
42
-
43
-
44
 |
 |