Stihl RZ 142 Instruction Manual - Page 37
Transmission Drive Belt Replacement, Battery Maintenance
 |
View all Stihl RZ 142 manuals
Add to My Manuals
Save this manual to your list of manuals |
Page 37 highlights
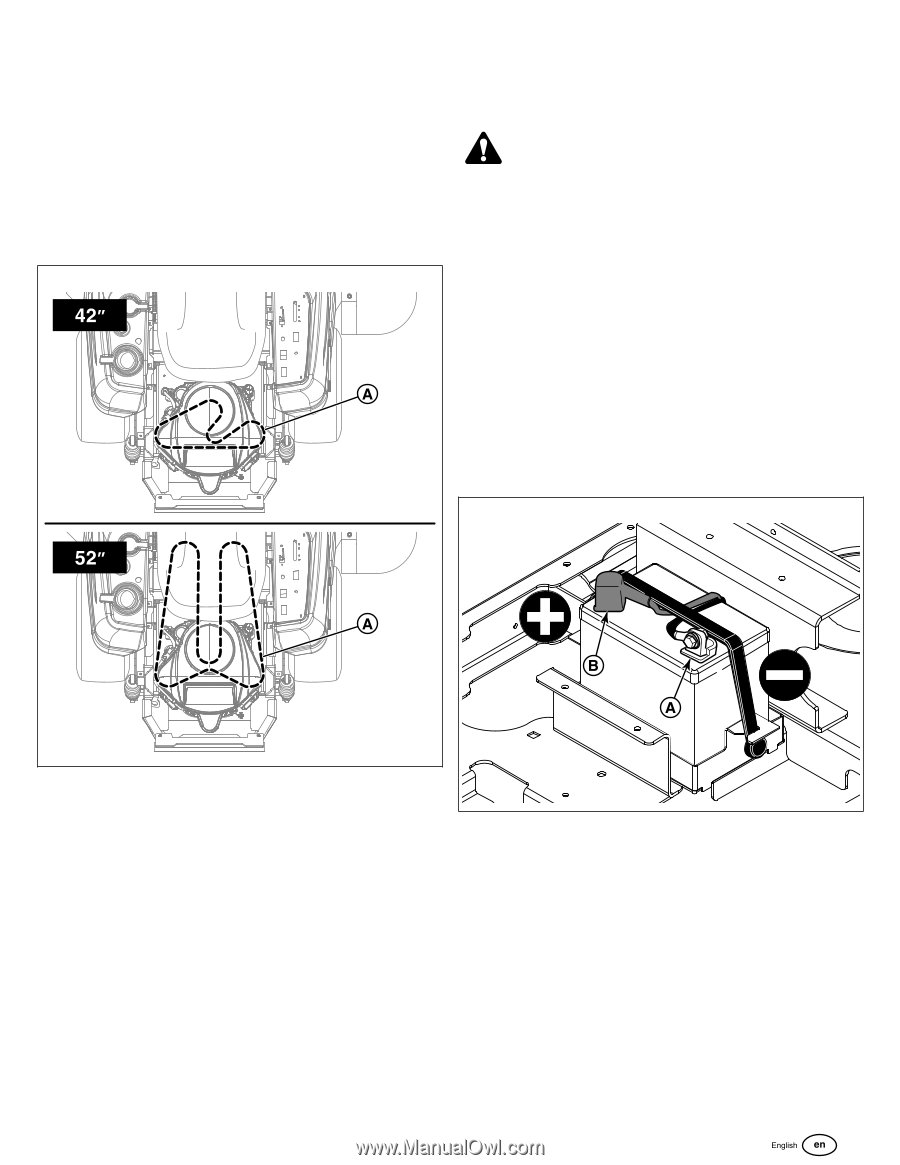
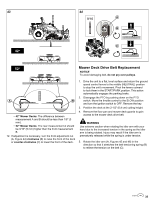
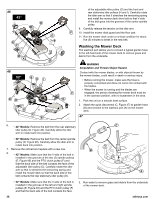
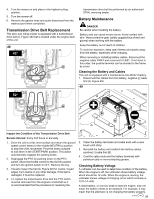
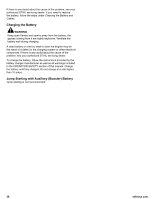
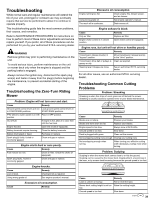
4. Turn the mower on and place in the highest cutting position. 5. Turn the mower off. 6. Remove the garden hose and quick disconnect from the washout port when completed. Transmission Drive Belt Replacement This zero-turn riding mower is equipped with a transmission drive belt (A, Figure 48) that is located under the engine deck of the unit. 48 transmission drive belt be performed by an authorized STIHL servicing dealer. Battery Maintenance DANGER Be careful when handling the battery. Battery acid can cause severe burns. Avoid contact with skin. Wear protective gear (safety goggles/face shield and gloves) when working with the battery. Keep the battery out of reach of children. To avoid an explosion, keep open flames and sparks away from the battery, especially while charging. When removing or installing battery cables, disconnect the negative cable FIRST and reconnect it LAST. If not done in this order, the positive terminal can be shorted to the frame by a tool. Cleaning the Battery and Cables This unit is equipped with a maintenance-free BCIU1 battery. 1. Disconnect the cables from the battery, negative [-] cable first (A, Figure 49). 49 Inspect the Condition of the Transmission Drive Belt Service Interval: Every 400 hours or annually. 1. Drive the unit to a flat, level surface and return the ground speed control levers to the middle (NEUTRAL) position to stop the unit's movement. Pivot the levers outward to lock them in the START/PARK position. This action automatically engages the parking brake. 2. Disengage the PTO by pushing down on the PTO switch. Move the throttle control to the SLOW position and turn the ignition switch to OFF. Remove the key. 3. Visually inspect the belt (A, Figure 48) for cracks, frayed edges, burn marks or any other damage. If the belt is damaged, it must be replaced. 4. To replace the transmission drive belt the PTO clutch must be removed from the engine's crankshaft so it is recommended that the procedure for replacing the 2. Clean the battery terminals and cable ends with a wire brush until shiny. 3. Reinstall the battery and reattach the battery cables, positive [+] cable first (B). 4. Coat the cable ends and the battery terminals with petroleum jelly or non-conducting grease. Checking Battery Voltage A voltmeter can be used to determine condition of the battery. When the engine is off, the voltmeter shows battery voltage, which should be 12 volts. When the engine is running, the voltmeter shows voltage of charging circuit which normally is 13 to 14 volts. A dead battery, or one too weak to start the engine, may not mean the battery needs to be replaced. For example, it may mean that the alternator is not charging the battery properly. 37
-
 1
1 -
2
-
3
-
4
-
5
-
6
-
7
-
8
-
9
-
10
-
11
-
12
-
13
-
14
-
15
-
16
-
17
-
18
-
19
-
20
-
21
-
22
-
23
-
24
-
25
-
26
-
27
-
28
-
29
-
30
-
31
-
 32
32 -
 33
33 -
 34
34 -
 35
35 -
 36
36 -
 37
37 -
 38
38 -
 39
39 -
 40
40 -
 41
41 -
 42
42 -
43
-
44
 |
 |