Symphonic TR-WF13 Owners Manual - Page 23
wires, camera
 |
View all Symphonic TR-WF13 manuals
Add to My Manuals
Save this manual to your list of manuals |
Page 23 highlights
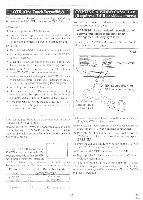
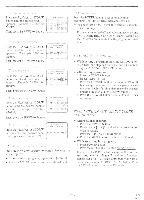
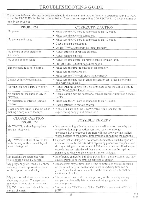
OTR -(One Touch Recording) This function enables you to set a recording length simply by pressing the REC/OTR button on the TVNCR. Make sure ... • TV/VCR power must be turned on. • insert a cassette tape with its erase prevention tab in place. (If necessary. rewind or fast forward the tape to the point at which you want to begin recording.) NOTES: COPYING A VIDEO CASSET (Re a wires a VCR or Aided camera) You can make copies of video tapes made by friends or relatives for your enjoyment. WARNING: Unauthorized recordings of copyrighted video tapes may be an i infringement of copyright laws. Connect your TVNCR and a Source (Playing) VCR using the following diagram. • This function CkNINOT be done from the remote control. • Recording starts immediately when the REC/OTR button is pressed. • When the REC/OTR button is pressed 18 times, the TV/VCR returns to the Normal Recording mode. E•• PRI* O [Fig.8]i M ..DEC [The TVNCR] • To stop the OW operation, press the STOP button on the TV/VCR or on the remote control. • To show the remaining time. press the DISPLAY button on the remote control so that "OTR" appears on the TV screen. (It will show up momentarily then disappear.) • Recording stops when 0:00 is reached. • Please note that in the SLP mode maximum recording time, assuming the tape is started at the beginning. is 8 hours using T-160 (or 6 hours usine. T-120). • If the tape runs out before the end time, the TVNCR will switch to the Stop mode immediately. ejects the tape and turns itself off. AudioNideo adapter cable (not supplied) [Ex: Source (Playing) VCR or video camera] OUT IN AUDIO O Press the number buttons on the remote control or the CHANNEL V or A button. Remember: If the TVNCR is connected to a cable box or satellite box, the TVNCR must be on CH3 or CH4. then the channel to be recorded is selected on the cable box or satellite box. WA, Press the REGOTR button on the TVNCRas manytimesasneeded.The recording length will be determined by the number of times you press the `- REC/OTR button. Each additional push will increase It.COrding tine by 30 minutes. It is set up to 8 hots. Push(es) Display i Recording length I push (normal recording) 2 pushes 0:30 30 minutes 3 pushes ! 1:00 60 minutes 1) Insert a pre-recorded video cassette into the Source (Playing) VCR or video camera. 2) Insert a blank video cassette. or one you want to record over, into the TVNCR's cassette compartment. 3) Press the SPEED button on remote control for the TV/VCR to select the desired recording speed (SP/LP/SLP). 4) Press the CHANNEL A or V button on the TVNCR until "AUX" appears on the screen. 5) Press the RECORD button on the TV/VCR. 6) Begin playback of the tape in the source (Playing) VCR or video camera. NOTE: For best results during dubbing. use the TVNCR's front panel controls whenever possible. The remote control might affect the source (Playing) VCR's playback operation. 17 pushes 8:00 480 minutes - 23 - EN 6K03
-
 1
1 -
2
-
3
-
4
-
5
-
6
-
7
-
8
-
9
-
10
-
11
-
12
-
13
-
14
-
15
-
16
-
17
-
 18
18 -
 19
19 -
 20
20 -
 21
21 -
 22
22 -
 23
23 -
 24
24 -
 25
25 -
 26
26 -
 27
27 -
 28
28 -
29
-
30
 |
 |
