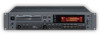
TEAC CD-RW901SL CD-RW901SL Owner's Manual - Page 32
Continuous recording CONT REC
 |
View all TEAC CD-RW901SL manuals
Add to My Manuals
Save this manual to your list of manuals |
Page 32 highlights
5IM−PROeRcToArNdiTnSgAFETY PRECAUTIONS Continuous recording (CONT REC) Using two CD-RW901SL units to make continuous recording. 1 Connect two CD-RW901SL units using the PARALLEL ports. Unit 1 EOM TALLY (5 pins) FADER START/STOP (11 pins) GND (8 pins) Unit 2 FADER START/STOP (11pins) EOM TALLY (5 pins) GND (8 pins) 2 On both units, select the CONT REC sub-menu in the REC option (see "Operation basics" on page 16). Cont Rec> XXXappears on the display where XXX shows time setting of 30s, 60s or 90s to trigger the units to start recording when the EOM (End of Message) tally signal is received one after another. NOTE OFF is also shown in the time setting, however if selected, the CONT REC function is canceled. We recommend selecting the same time setting on both units. The CD-RW901SL may take longer for OPC calibration for discs with scratches, grime or dust. To avoid clipping a recording, we recommend not to use such discs, or to select a time setting more than 30s. 3 Connect recording source(s) to both units. 4 Press REC key on the one of the units to start continuous recording, and Cont Reclights up in the display. While the one unit is recording, the second unit should be in stop mode. When the remaining time on a disc being recorded reaches the time setting, the unit sends the EOM tally signal to the second unit. Simultaneously, Now OPCis displayed on the second unit, and when OPC calibration completes, the unit starts recording. The two units are now in recording mode during the time setting selected. When the first unit finishes recording, the recorded disc should be replaced with another recordable disc for the next recording which starts when the unit receives the EOM tally signal from the second unit. This loop recording will be continued until either of the units is stopped. NOTE While the first unit is recording, the second unit can be set in recording standby mode. However, it may shorten the unit's lifetime by running the motor 32 TASCAM CD-RW901SL continuously. We recommend to set the second unit in stop mode during stand by. If the number of tracks is restricted, the EOM tally signal is not output and the continuous recording cannot be operated. The CONT REC function remains selected even the power is turned off, so that when the power is turned on again on one of the units, and when the following conditions are met, the unit starts recording: • Both units are connected • The unit has a recordable disc To avoid recording accidently, remove the recordable disc from the unit before turning off the power, or disconnect the units from each other. Use two CD-RW901SL units connected only when CONT REC is operated. In any other operation, two units should be disconnected, or set the CONT REC function off on both units to avoid any unexpected recording.
-
 1
1 -
2
-
3
-
4
-
5
-
6
-
7
-
8
-
9
-
10
-
11
-
12
-
13
-
14
-
15
-
16
-
17
-
18
-
19
-
20
-
21
-
22
-
23
-
24
-
25
-
26
-
 27
27 -
 28
28 -
 29
29 -
 30
30 -
 31
31 -
 32
32 -
 33
33 -
 34
34 -
 35
35 -
 36
36 -
 37
37 -
38
-
39
-
40
-
41
-
42
 |
 |
