TP-Link MA180 MA180 V2 User Guide
TP-Link MA180 Manual
 |
View all TP-Link MA180 manuals
Add to My Manuals
Save this manual to your list of manuals |
TP-Link MA180 manual content summary:
- TP-Link MA180 | MA180 V2 User Guide - Page 1
MA180 3.75G HSUPA USB Adapter Rev: 2.0.0 1910010681 - TP-Link MA180 | MA180 V2 User Guide - Page 2
TP-LINK TECHNOLOGIES CO., LTD. Other brands and product names are trademarks or registered trademarks of their respective holders. No part of the specifications , if not installed and used in accordance with the instructions, may cause harmful interference to radio communications. However, there - TP-Link MA180 | MA180 V2 User Guide - Page 3
Note: The manufacturer is not responsible for any radio or tv interference caused by unauthorized modifications to this equipment. Such modifications could void the user's authority to operate the equipment. CE Mark Warning This is a Class B product. In a domestic environment, this product may cause - TP-Link MA180 | MA180 V2 User Guide - Page 4
Korea Warning Statements: NCC Notice: - TP-Link MA180 | MA180 V2 User Guide - Page 5
TECHNOLOGIES CO., LTD DECLARATION OF CONFORMITY For the following equipment: Product Description: 3.75G HSUPA USB Adapter Model No.: MA180 Trademark: TP-LINK We declare under our own responsibility that the above products satisfy all the technical regulations applicable to the product within the - TP-Link MA180 | MA180 V2 User Guide - Page 6
Conventions 2 1.3 Main Features 2 1.4 System Requirement 2 1.5 Hardware Overview 3 Chapter 2. Installation 4 2.1 Hardware Installation 4 2.2 Software Installation 5 Chapter 3. Connect to Network 9 Chapter 4. Management 11 4.1 Interface Introduction 11 4.1.1 Functional Button Icons - TP-Link MA180 | MA180 V2 User Guide - Page 7
Appendix: Specifications 33 - TP-Link MA180 | MA180 V2 User Guide - Page 8
3.75G HSUPA USB Adapter User Guide Package Contents The following contents should be found in your package: One MA180 3.75G HSUPA USB Adapter Quick Installation Guide Note: Make sure that the above items are contained in the package. If any of the above items are damaged or missing, please - TP-Link MA180 | MA180 V2 User Guide - Page 9
HSUPA USB Adapter User Guide Chapter 1. Product Overview 1.1 Introduction TP-LINK's 3.75G HSUPA USB Adapter, MA180 allows you to acquire 3G mobile broadband access simply by inserting a standard 3G SIM/USIM card into the Adapter and plugging it into your laptop or desktop computer. It supports the - TP-Link MA180 | MA180 V2 User Guide - Page 10
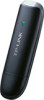
1.5 Hardware Overview MA180 3.75G HSUPA USB Adapter User Guide LED Explanation: Status Solid Red Flashing Red Flashing Green Solid Green Indication The Adapter is initializing. No SIM/USIM card is inserted. The SIM/USIM - TP-Link MA180 | MA180 V2 User Guide - Page 11
MA180 3.75G HSUPA USB Adapter User Guide Chapter 2. Installation 2.1 Hardware Installation Install the Adapter following the steps below: 1. Open the cover. 2. Insert the press it to eject it form the Adapter. 3. Replace the cover. 4. Plug the Adapter directly into the USB port on your computer. 4 - TP-Link MA180 | MA180 V2 User Guide - Page 12
3.75G HSUPA USB Adapter User Guide 2.2 Software Installation The MA180's Setup Wizard will guide you through the installation procedures. The procedures in different systems are quite similar. Here we use the procedures in Windows 7 as an example. 1. The window as shown in Figure 2-1 will appear - TP-Link MA180 | MA180 V2 User Guide - Page 13
MA180 3.75G HSUPA USB Adapter User Guide Figure 2-2 3. Click Change to specify the destination you wish the application to be located or leave it in default location. Click Next to continue. Figure 2-3 4. Click Install to begin the installation. 6 - TP-Link MA180 | MA180 V2 User Guide - Page 14
MA180 3.75G HSUPA USB Adapter User Guide Figure 2-4 5. The installation process may take 1~2 minutes. Please wait. Figure 2-5 6. The screen as shown in Figure 2-6 will then appear. Click Finish to complete the setup. 7 - TP-Link MA180 | MA180 V2 User Guide - Page 15
MA180 3.75G HSUPA USB Adapter User Guide Note: After installation, the icon Figure 2-6 will appear on your desktop. Double-clicking it can start the utility. 8 - TP-Link MA180 | MA180 V2 User Guide - Page 16
MA180 3.75G HSUPA USB Adapter User Guide Chapter 3. Connect to Network With both the hardware and software successfully installed into your computer, you can quickly connect to network following the steps below. 1. After installation, the utility will automatically appear on your desktop. - TP-Link MA180 | MA180 V2 User Guide - Page 17
MA180 3.75G HSUPA USB Adapter User Guide Figure 3-2 3. If you see the Disconnect button and the icon , it indicates that you are now connected to the Internet and can enjoy using it. To disconnect from the Internet, click Disconnect. Figure 3-3 10 - TP-Link MA180 | MA180 V2 User Guide - Page 18
3.75G HSUPA USB Adapter User Guide Chapter 4. Management This section will show you how to manage the MA180 using the utility. The MA180 uses utility as the management software. The utility provides you with an easy interface to use various functions and configure the MA180. Double-clicking on - TP-Link MA180 | MA180 V2 User Guide - Page 19
Status MA180 3.75G HSUPA USB Adapter User Guide Information Indicates the network's signal strength. Displays the name of your Internet service provider. Indicates that the current Internet status is disconnected. Indicates that the current Internet status is connected. Indicates that a new - TP-Link MA180 | MA180 V2 User Guide - Page 20
MA180 3.75G HSUPA USB Adapter User Guide Figure 4-1 Inbox: Saves the received messages. Outbox: Saves the sent messages. Draftbox: Saves the unsent messages. Note: The sent messages and the unsent messages can - TP-Link MA180 | MA180 V2 User Guide - Page 21
MA180 3.75G HSUPA USB Adapter User Guide Figure 4-2 2. Enter the recipient's number. There are two methods: 1) Enter the recipient's number directly. 2) Click Send to... and then select a number in the Choose Number - TP-Link MA180 | MA180 V2 User Guide - Page 22
MA180 3.75G HSUPA USB Adapter User Guide Note: You can also send mass messages following the above steps. 4.2.2 Search a Message To search a message, click on the icon and then a textbox will appear - TP-Link MA180 | MA180 V2 User Guide - Page 23
MA180 3.75G HSUPA USB Adapter User Guide Figure 4-4 4.2.4.1 Alert Settings You can set visual and audio prompt for the received messages in the Text message handling area. Show a notification when a new text - TP-Link MA180 | MA180 V2 User Guide - Page 24
MA180 3.75G HSUPA USB Adapter User Guide 4.3 Phonebook Click on the icon , and you will see the Phonebook interface, as shown in Figure 4-5. Figure 4-5 4.3.1 Create a Contact To create a contact, follow the steps - TP-Link MA180 | MA180 V2 User Guide - Page 25
MA180 3.75G HSUPA USB Adapter User Guide Figure 4-6 2) If you choose to save the contact on your PC, the interface as shown in Figure 4-7 will appear. Figure 4-7 3. Enter the above information. 4. Click - TP-Link MA180 | MA180 V2 User Guide - Page 26
MA180 3.75G HSUPA USB Adapter User Guide 1. Choose your desired location. 2. Select a contact to view. 3. Click the selected contact. The contact information will be displayed below the contact list. The contact can't - TP-Link MA180 | MA180 V2 User Guide - Page 27
MA180 3.75G HSUPA USB Adapter User Guide 4.4.1 View the Statistics Click the following tabs in the navigation tree to view corresponding statistics. Transfer Time: Displays the duration of the current connection. Upload: Displays the upload speed and date of the current connection. Download: - TP-Link MA180 | MA180 V2 User Guide - Page 28
MA180 3.75G HSUPA USB Adapter User Guide functions. Otherwise, nothing will be displayed in the Profile Name field and you need to create a new dial-up profile according to the actual situation. - TP-Link MA180 | MA180 V2 User Guide - Page 29
MA180 3.75G HSUPA USB Adapter User Guide Figure 4-11 3. Click Save to save the advanced settings and return to the Dial Config interface. 4. Click Save to save this profile, or click Cancel - TP-Link MA180 | MA180 V2 User Guide - Page 30
MA180 3.75G HSUPA USB Adapter User Guide 3. Click Yes to delete the profile or click No to cancel PIN (Personal Identity Number) code can protect your card from unauthorized use. The followings are detailed instructions about PIN operation. Note: The PIN code and the PUK (PIN Unlocking Key) code - TP-Link MA180 | MA180 V2 User Guide - Page 31
MA180 3.75G HSUPA USB Adapter User Guide Figure 4-12 To disable it again, follow the steps below: 1. Choose Disable Pin form the drop-down list, as shown in Figure 4-13. 2. Enter the PIN Value. 3. Click OK. 24 - TP-Link MA180 | MA180 V2 User Guide - Page 32
MA180 3.75G HSUPA USB Adapter User Guide Figure 4-13 4.5.2.2 Verify the PIN Code With PIN protection enabled, you need to enter the PIN code when starting the utility again, as shown in Figure 4-14. Enter the correct PIN code and then click OK to use the Adapter. 25 - TP-Link MA180 | MA180 V2 User Guide - Page 33
MA180 3.75G HSUPA USB Adapter User Guide Figure 4-14 If you click the Cancel button before entering the PIN code, follow the steps below to verify the PIN protection. 1. Click on the - TP-Link MA180 | MA180 V2 User Guide - Page 34
MA180 3.75G HSUPA USB Adapter User Guide Figure 4-15 Note: The remaining number of attempts for entering the PIN code is displayed on the interface. If you enter the wrong PIN code - TP-Link MA180 | MA180 V2 User Guide - Page 35
MA180 3.75G HSUPA USB Adapter User Guide Figure 4-16 If you click the Cancel button before entering the PUK code, follow the steps below to unlock the PIN. 1. Click on the icon - TP-Link MA180 | MA180 V2 User Guide - Page 36
MA180 3.75G HSUPA USB Adapter User Guide Figure 4-17 Note: 1) The remaining number of attempts for entering the PUK code is displayed on the interface. 2) The PIN code should be a numeric string - TP-Link MA180 | MA180 V2 User Guide - Page 37
MA180 3.75G HSUPA USB Adapter User Guide Figure 4-18 4.5.3 Network You can select the search and registration mode here. Click the Network button, and you will see the interface as shown in Figure 4-19. 30 - TP-Link MA180 | MA180 V2 User Guide - Page 38
MA180 3.75G HSUPA USB Adapter User Guide Figure 4-19 Auto search and register: When you select this mode, the Adapter will automatically search and register to an available network. Manual search and register: When you select this mode, follow the steps below to register to an available network. - TP-Link MA180 | MA180 V2 User Guide - Page 39
MA180 3.75G HSUPA USB Adapter User Guide 4.6 Help Figure 4-20 Click on the icon to display the Help interface where you can get information on installation, functions and operation guide, etc. 32 - TP-Link MA180 | MA180 V2 User Guide - Page 40
MA180 3.75G HSUPA USB Adapter User Guide Appendix: Specifications Normal Network Type WCDMA Network Services HSUPA, HSDPA, UMTS, GPRS, EDGE and GSM Bands GSM (850/900/1800/1900MHz), HSUPA (2100MHz) Data Transfer Rates Download: 7.2Mbps Upload: 5.76Mbps Antenna Type Internal antenna
-
 1
1 -
 2
2 -
 3
3 -
 4
4 -
 5
5 -
 6
6 -
 7
7 -
8
-
9
-
10
-
11
-
12
-
13
-
14
-
15
-
16
-
17
-
18
-
19
-
20
-
21
-
22
-
23
-
24
-
25
-
26
-
27
-
28
-
29
-
30
-
31
-
32
-
33
-
34
-
35
-
36
-
37
-
38
-
39
-
40
 |
 |
MA180
3.75G HSUPA USB Adapter
Rev: 2.0.0
1910010681