TP-Link MA180 MA180 V2 User Guide - Page 28
MA180, Profile Name, Connecting, 5.1.1 Create a Profile, Advanced
 |
View all TP-Link MA180 manuals
Add to My Manuals
Save this manual to your list of manuals |
Page 28 highlights
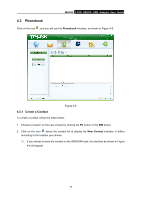
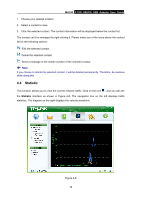
MA180 3.75G HSUPA USB Adapter User Guide functions. Otherwise, nothing will be displayed in the Profile Name field and you need to create a new dial-up profile according to the actual situation. Click the Connecting button, and you will see the interface as shown in Figure 4-10. Figure 4-10 4.5.1.1 Create a Profile To create a profile, follow the steps below: 1. Click New to set the Profile Name, APN (Access Point Name) and Authentication. 2. Click the Advanced button, and you will see the Advanced interface as shown in Figure 4-11. Complete the parameters as required. 21
-
 1
1 -
2
-
3
-
4
-
5
-
6
-
7
-
8
-
9
-
10
-
11
-
12
-
13
-
14
-
15
-
16
-
17
-
18
-
19
-
20
-
21
-
22
-
 23
23 -
 24
24 -
 25
25 -
 26
26 -
 27
27 -
 28
28 -
 29
29 -
 30
30 -
 31
31 -
 32
32 -
 33
33 -
34
-
35
-
36
-
37
-
38
-
39
-
40
 |
 |
MA180
3.75G HSUPA USB Adapter User Guide
21
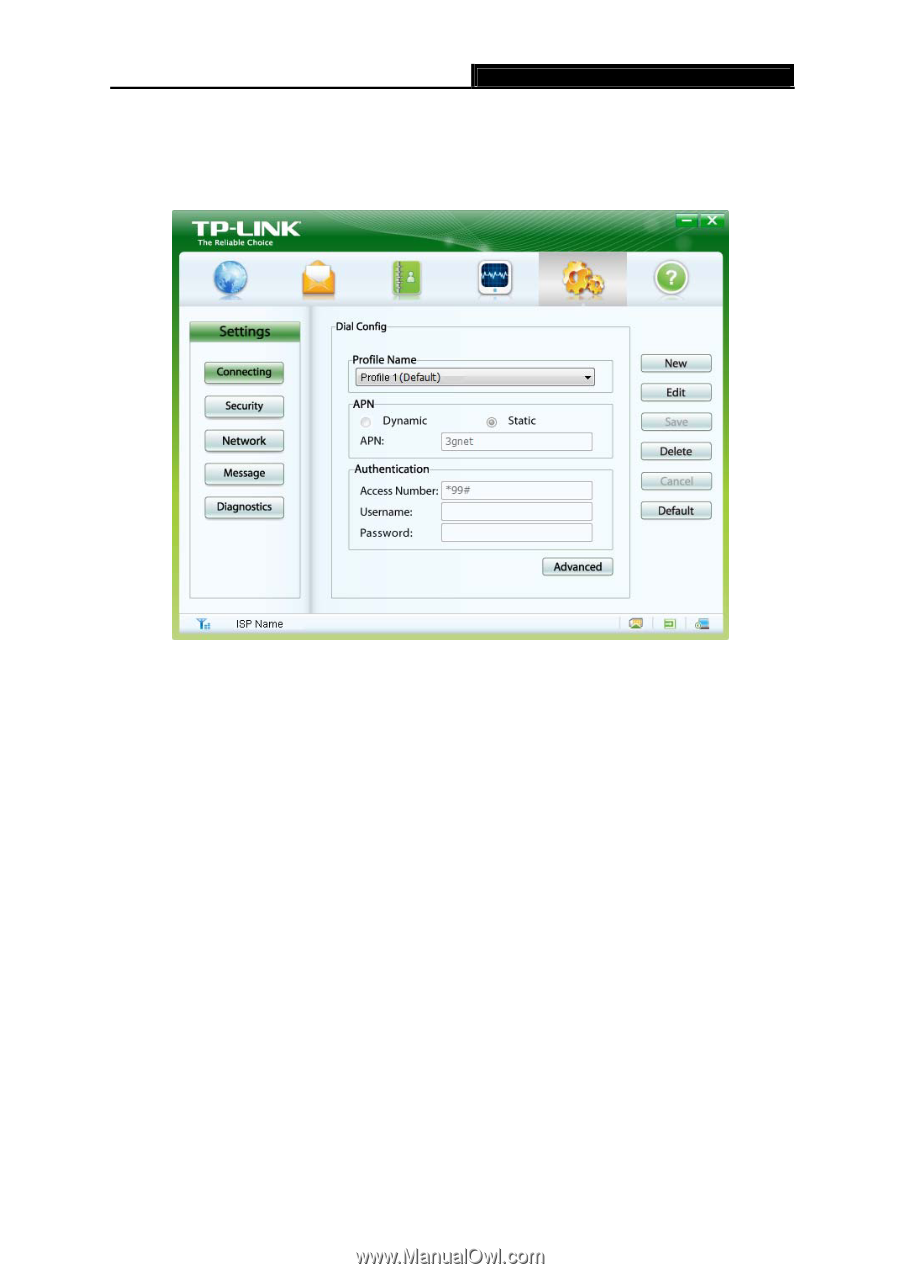
functions. Otherwise, nothing will be displayed in the
Profile Name
field and you need to create a
new dial-up profile according to the actual situation. Click the
Connecting
button, and you will see
the interface as shown in Figure 4-10.
Figure 4-10
4.5.1.1 Create a Profile
To create a profile, follow the steps below:
1. Click
New
to set the Profile Name, APN (Access Point Name) and Authentication.
2. Click the
Advanced
button, and you will see the
Advanced
interface as shown in Figure 4-11.
Complete the parameters as required.