TP-Link MA180 MA180 V2 User Guide - Page 22
Search a Message, 2.3 View a Message, 2.4 Message Settings
 |
View all TP-Link MA180 manuals
Add to My Manuals
Save this manual to your list of manuals |
Page 22 highlights
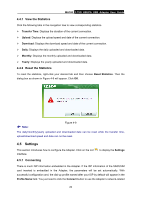
MA180 3.75G HSUPA USB Adapter User Guide Note: You can also send mass messages following the above steps. 4.2.2 Search a Message To search a message, click on the icon and then a textbox will appear beside it. Enter the name/phone number of the message sender. Then the matched messages will be displayed in the message list area. 4.2.3 View a Message To view a message, follow the steps below: 1. Select a message to view. 2. Click the selected message. The name and phone number of the message sender, message content and receiving time will be displayed below the message list. The message can't be managed by right-clicking it. Please make use of the icons displayed above the message list for the following options: : Delete the selected message. : Re-edit the content of the selected message. : Reply to the sender of the selected message. : Forward the selected message to other recipients. Note: 1. You can press and hold the Ctrl or Shift and then click the selected messages. You can also press Ctrl + A to select all the messages in the list. Then you can click on the icon to delete the selected messages at the same time. 2. If you choose to delete a message, it will be deleted permanently. Therefore, be cautious while doing this. 3. You can forward only one message at a time. 4.2.4 Message Settings You can set visual and audio prompt as well as save mode for the received messages. Click on the icon , and then click the Message button to display the interface as shown in Figure 4-4. 15
-
 1
1 -
2
-
3
-
4
-
5
-
6
-
7
-
8
-
9
-
10
-
11
-
12
-
13
-
14
-
15
-
16
-
 17
17 -
 18
18 -
 19
19 -
 20
20 -
 21
21 -
 22
22 -
 23
23 -
 24
24 -
 25
25 -
 26
26 -
 27
27 -
28
-
29
-
30
-
31
-
32
-
33
-
34
-
35
-
36
-
37
-
38
-
39
-
40
 |
 |