TP-Link TD-VG3631 TD-VG3631 V1 User Guide - Page 15
The Back Panel, POWER, USB1/USB2, PHONE2/PHONE1, LAN1, LAN4/WAN, Antennas, RESET, Method one
 |
View all TP-Link TD-VG3631 manuals
Add to My Manuals
Save this manual to your list of manuals |
Page 15 highlights
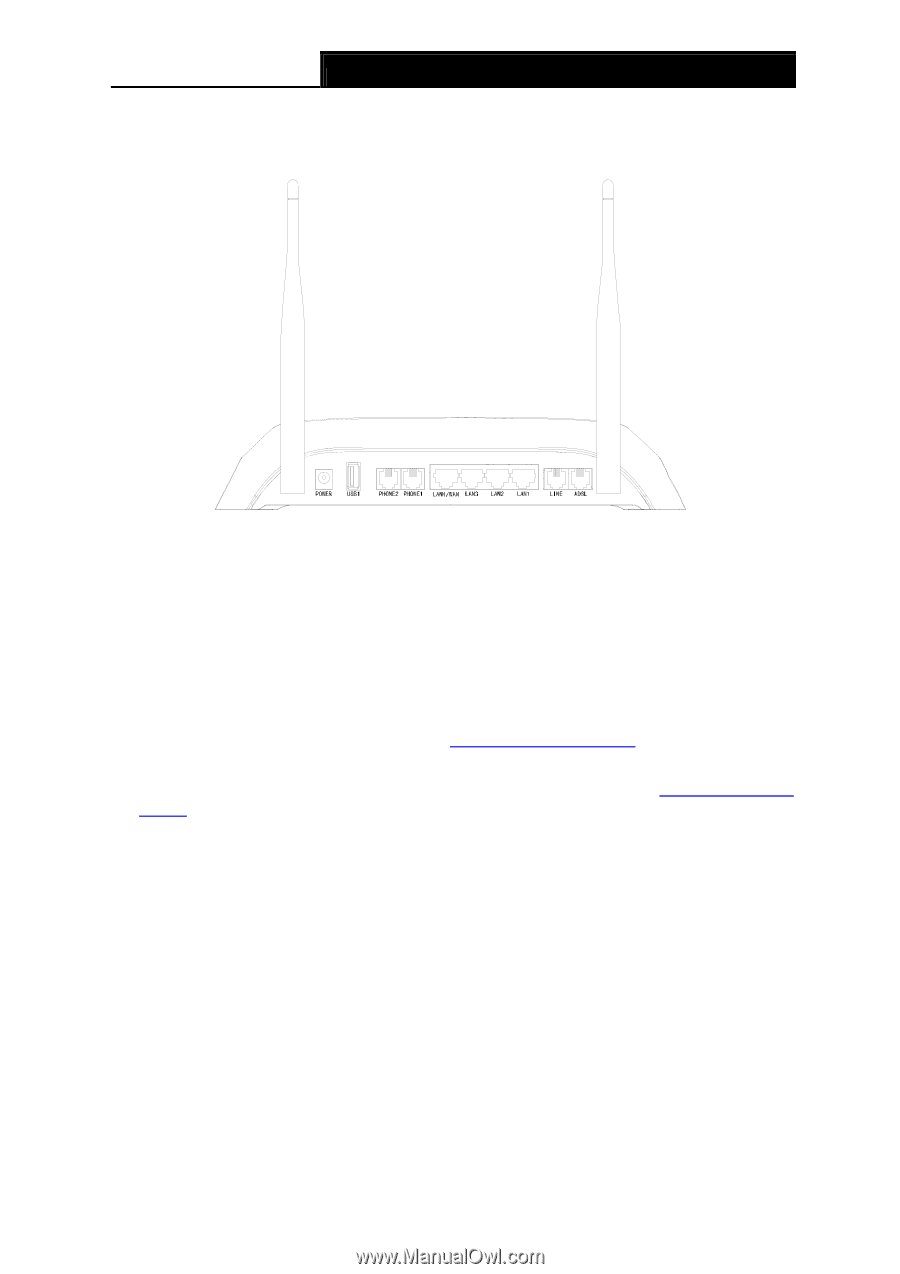
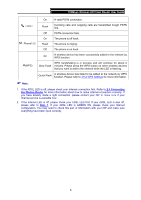
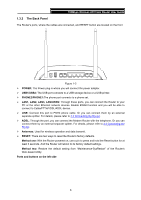
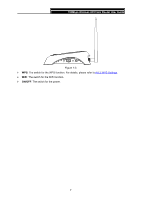
150Mbps Wireless AP/Client Router User Guide 1.3.2 The Back Panel The Router's ports, where the cables are connected, and RESET button are located on the front Figure 1-2 ¾ POWER: The Power plug is where you will connect the power adapter. ¾ USB1/USB2: The USB port connects to a USB storage device or a USB printer. ¾ PHONE2/PHONE1:The phone port connects to a phone set. ¾ LAN1, LAN2, LAN3, LAN4/WAN: Through these ports, you can connect the Router to your PC or the other Ethernet network devices. Enable EWAN function and you will be able to connect to Cable/FTTH/VDSL/ADSL device. ¾ LINE: Connect this port to PSTN phone cable. Or you can connect them by an external separate splitter. For details, please refer to 2.3 Connecting the Router. ¾ ADSL: Through the port, you can connect the Modem Router with the telephone. Or you can connect them by an external separate splitter. For details, please refer to 2.3 Connecting the Router. ¾ Antennas: Used for wireless operation and data transmit. ¾ RESET: There are two ways to reset the Router's factory defaults. Method one: With the Router powered on, use a pin to press and hold the Reset button for at least 5 seconds. And the Router will reboot to its factory default settings. Method two: Restore the default setting from "Maintenance-SysRestart" of the Router's Web-based Utility. Ports and buttons on the left side 6
-
 1
1 -
2
-
3
-
4
-
5
-
6
-
7
-
8
-
9
-
 10
10 -
 11
11 -
 12
12 -
 13
13 -
 14
14 -
 15
15 -
 16
16 -
 17
17 -
 18
18 -
 19
19 -
 20
20 -
21
-
22
-
23
-
24
-
25
-
26
-
27
-
28
-
29
-
30
-
31
-
32
-
33
-
34
-
35
-
36
-
37
-
38
-
39
-
40
-
41
-
42
-
43
-
44
-
45
-
46
-
47
-
48
-
49
-
50
-
51
-
52
-
53
-
54
-
55
-
56
-
57
-
58
-
59
-
60
-
61
-
62
-
63
-
64
-
65
-
66
-
67
-
68
-
69
-
70
-
71
-
72
-
73
-
74
-
75
-
76
-
77
-
78
-
79
-
80
-
81
-
82
-
83
-
84
-
85
-
86
-
87
-
88
-
89
-
90
-
91
-
92
-
93
-
94
-
95
-
96
-
97
-
98
-
99
-
100
-
101
-
102
-
103
-
104
-
105
-
106
-
107
-
108
-
109
-
110
-
111
-
112
-
113
-
114
-
115
-
116
-
117
-
118
-
119
-
120
-
121
-
122
-
123
-
124
-
125
 |
 |