TP-Link TL-WN8200ND TL-WN8200ND V1 User Guide - Page 34
Modify a profile, TL-WN8200ND, Encryption Type, Security Key, Show characters
 |
View all TP-Link TL-WN8200ND manuals
Add to My Manuals
Save this manual to your list of manuals |
Page 34 highlights
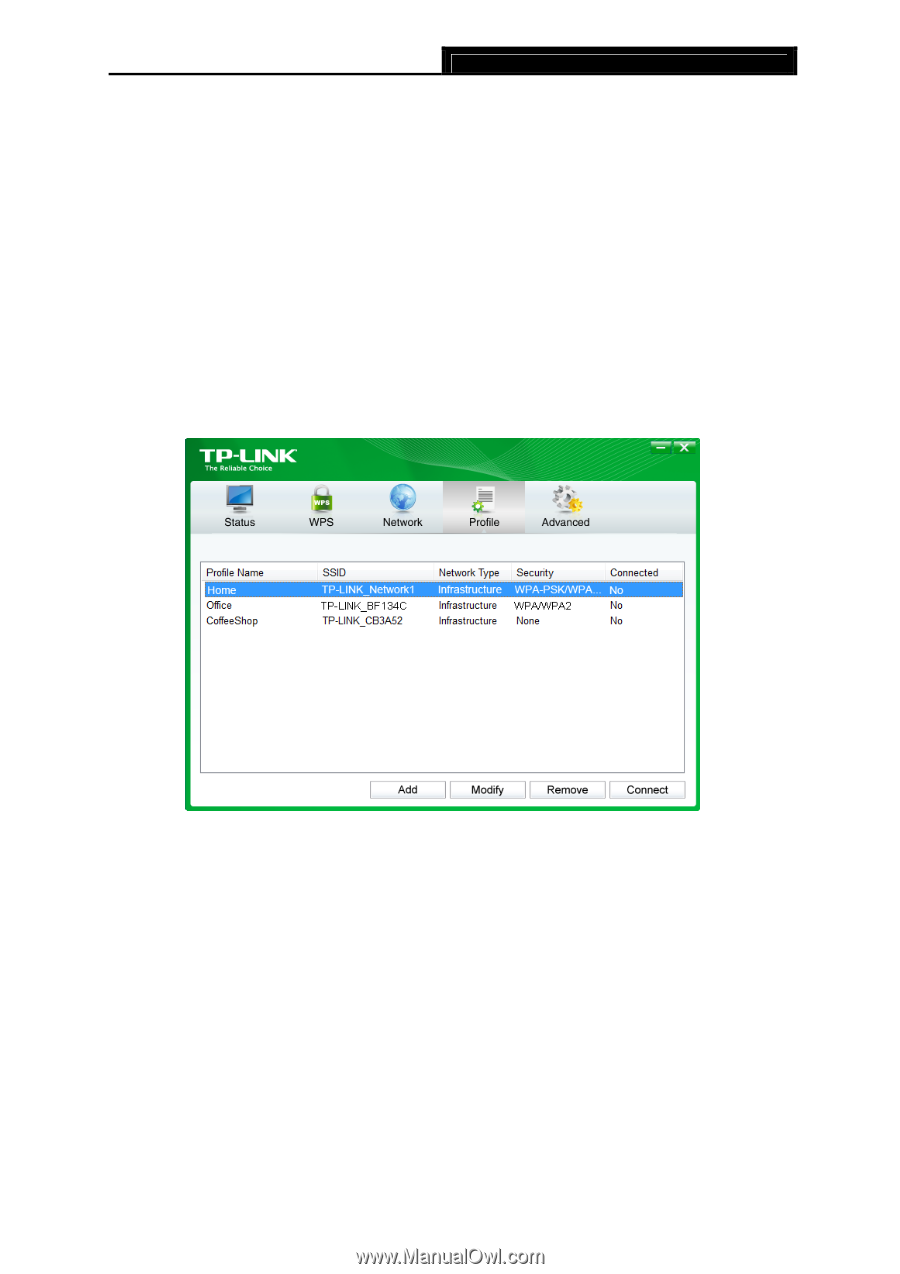
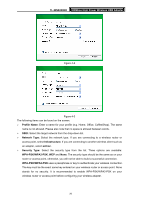
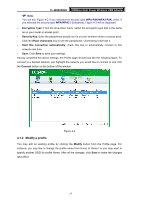
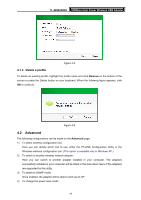
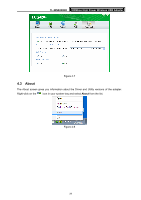
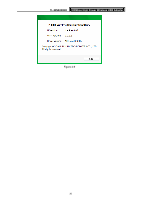
TL-WN8200ND 300Mbps High Power Wireless USB Adapter ) Note: You will see Figure 4-2 if you selected the security type WPA-PSK/WPA2-PSK; while, if you selected the security type WPA/WPA2 (-Enterprise), Figure 4-3 will be displayed. ¾ Encryption Type: From the drop-down menu, select the encryption type that is the same as on your router or access point. ¾ Security Key: Enter the passphrase exactly as it is on your wireless router or access point. Click the Show characters box to see the passphrase. Unchecking it will hide it. ¾ Start this connection automatically: check this box to automatically connect to this network next time. ¾ Save: Click Save to save your settings. Having completed the above settings, the Profile page should look like the following figure. To connect to a desired network, just highlight the network you would like to connect to and click the Connect button on the bottom of the window. Figure 4-4 4.1.2 Modify a profile You may edit an existing profile by clicking the Modify button from the Profile page. For instance, you may like to change the profile name from Home to Home1 or you may want to specify another SSID for profile Home. After all the changes, click Save to make the changes take effect. 27
-
 1
1 -
2
-
3
-
4
-
5
-
6
-
7
-
8
-
9
-
10
-
11
-
12
-
13
-
14
-
15
-
16
-
17
-
18
-
19
-
20
-
21
-
22
-
23
-
24
-
25
-
26
-
27
-
28
-
 29
29 -
 30
30 -
 31
31 -
 32
32 -
 33
33 -
 34
34 -
 35
35 -
 36
36 -
 37
37 -
 38
38 -
 39
39 -
40
-
41
-
42
-
43
-
44
 |
 |