TP-Link TL-WR1042ND User Guide - Page 78
Rule, Enable Internet Access Control
 |
View all TP-Link TL-WR1042ND manuals
Add to My Manuals
Save this manual to your list of manuals |
Page 78 highlights
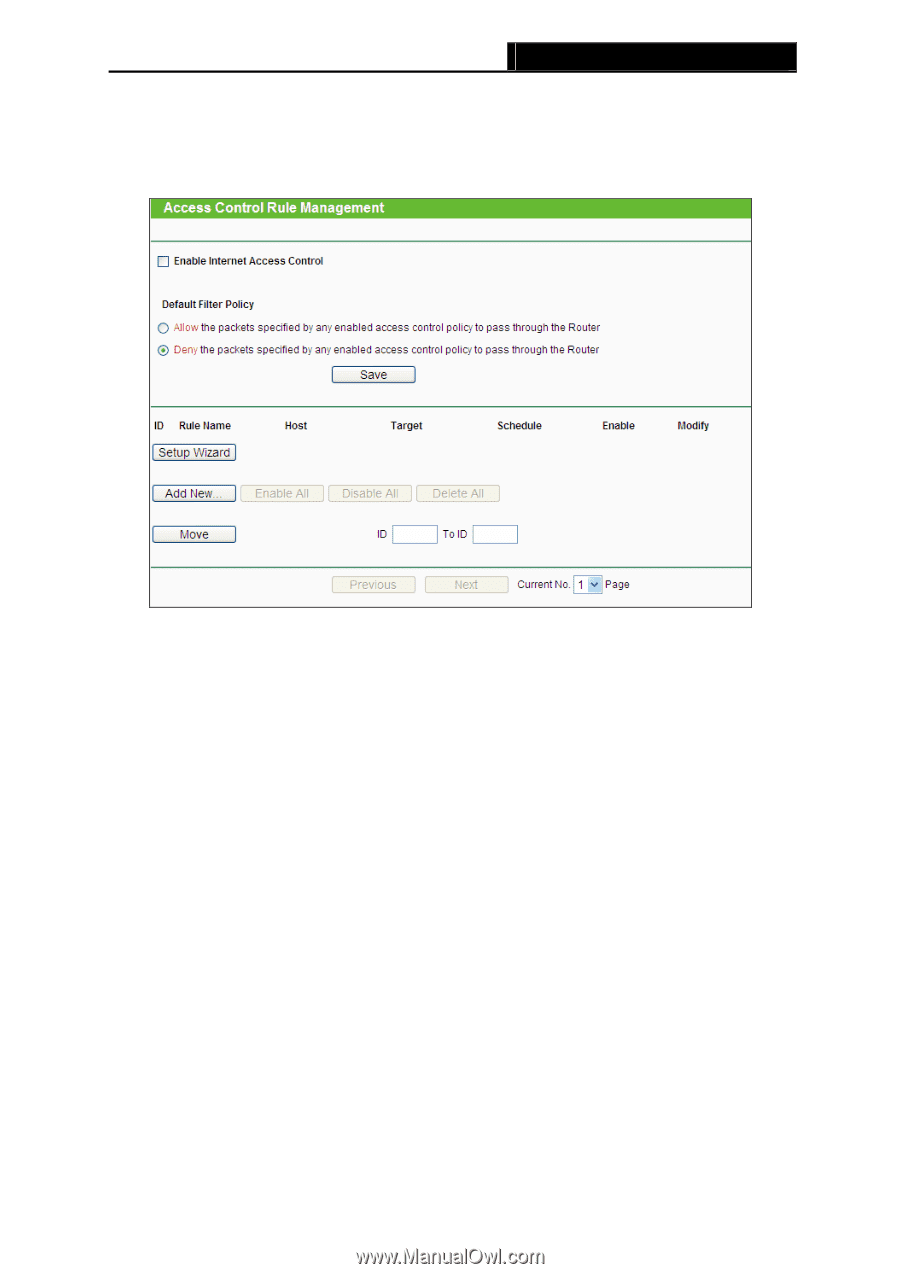
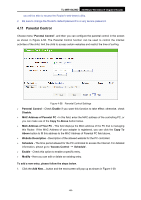
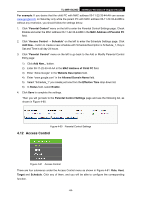
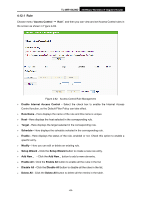
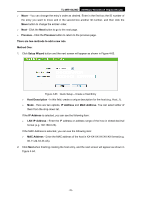
TL-WR1042ND 300Mbps Wireless N Gigabit Router 4.12.1 Rule Choose menu "Access Control → Rule", and then you can view and set Access Control rules in the screen as shown in Figure 4-62. Figure 4-62 Access Control Rule Management ¾ Enable Internet Access Control - Select the check box to enable the Internet Access Control function, so the Default Filter Policy can take effect. ¾ Rule Name - Here displays the name of the rule and this name is unique. ¾ Host - Here displays the host selected in the corresponding rule. ¾ Target - Here displays the target selected in the corresponding rule. ¾ Schedule - Here displays the schedule selected in the corresponding rule. ¾ Enable - Here displays the status of the rule, enabled or not. Check this option to enable a specific entry. ¾ Modify - Here you can edit or delete an existing rule. ¾ Setup Wizard - Click the Setup Wizard button to create a new rule entry. ¾ Add New... - Click the Add New... button to add a new rule entry. ¾ Enable All - Click the Enable All button to enable all the rules in the list. ¾ Disable All - Click the Disable All button to disable all the rules in the list. ¾ Delete All - Click the Delete All button to delete all the entries in the table. -69-
-
 1
1 -
2
-
3
-
4
-
5
-
6
-
7
-
8
-
9
-
10
-
11
-
12
-
13
-
14
-
15
-
16
-
17
-
18
-
19
-
20
-
21
-
22
-
23
-
24
-
25
-
26
-
27
-
28
-
29
-
30
-
31
-
32
-
33
-
34
-
35
-
36
-
37
-
38
-
39
-
40
-
41
-
42
-
43
-
44
-
45
-
46
-
47
-
48
-
49
-
50
-
51
-
52
-
53
-
54
-
55
-
56
-
57
-
58
-
59
-
60
-
61
-
62
-
63
-
64
-
65
-
66
-
67
-
68
-
69
-
70
-
71
-
72
-
 73
73 -
 74
74 -
 75
75 -
 76
76 -
 77
77 -
 78
78 -
 79
79 -
 80
80 -
 81
81 -
 82
82 -
 83
83 -
84
-
85
-
86
-
87
-
88
-
89
-
90
-
91
-
92
-
93
-
94
-
95
-
96
-
97
-
98
-
99
-
100
-
101
-
102
-
103
-
104
-
105
-
106
-
107
-
108
-
109
-
110
-
111
-
112
-
113
-
114
-
115
-
116
-
117
-
118
-
119
-
120
 |
 |