TP-Link Touch P5 Touch P5 V1 User Guide - Page 23
Devices Under Parental Controls, Enable This Entry
 |
View all TP-Link Touch P5 manuals
Add to My Manuals
Save this manual to your list of manuals |
Page 23 highlights
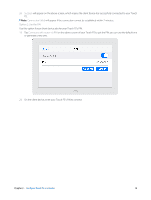
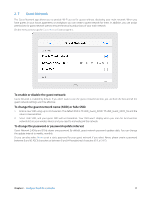
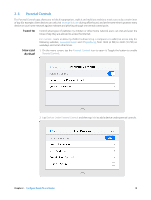
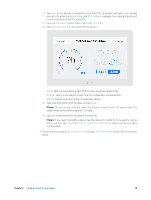
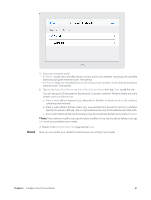
1 ) Tap View to see devices connected to your Touch P5 at present and select your desired device(s). Or, enter the Device Name and MAC Address manually if your desired device isn't connected to your Touch P5 at present. 2 ) Enter the Description of the device. Tap Enable This Entry. 3 ) Tap Internet Access Time to set time for the device. Single: Select to set Internet access time for every single day respectively. Multiple: Select to set Internet access time for multiple days simultaneously. AM/PM: Select to set time for the corresponding day(s). 4 ) Select the time period and the date, and tap Done. Note: The access time schedule takes effect based on your Touch P5's system time. The system time can be set through the Clock app. 5 ) Tap Save to add the device to parental controls list. Note: If you want to modify a device, tap the device to modify it. If you want to add or delete a device, tap Edit on the Devices Under Parental Controls page to set up according to your needs. 3. Return to the home page of Parental Controls and tap Content Restriction to specify the restriction policy. Chapter 2 . Configure Touch P5 as a Router 20
-
 1
1 -
2
-
3
-
4
-
5
-
6
-
7
-
8
-
9
-
10
-
11
-
12
-
13
-
14
-
15
-
16
-
17
-
 18
18 -
 19
19 -
 20
20 -
 21
21 -
 22
22 -
 23
23 -
 24
24 -
 25
25 -
 26
26 -
 27
27 -
 28
28 -
29
-
30
-
31
-
32
-
33
-
34
-
35
-
36
-
37
-
38
-
39
-
40
-
41
-
42
-
43
-
44
-
45
-
46
-
47
-
48
-
49
-
50
-
51
-
52
-
53
-
54
-
55
-
56
-
57
-
58
-
59
-
60
-
61
-
62
-
63
-
64
-
65
-
66
-
67
-
68
-
69
-
70
-
71
-
72
-
73
-
74
-
75
-
76
-
77
-
78
-
79
-
80
-
81
-
82
-
83
-
84
-
85
-
86
-
87
-
88
-
89
-
90
-
91
-
92
-
93
-
94
-
95
-
96
-
97
-
98
-
99
-
100
-
101
-
102
-
103
-
104
-
105
-
106
-
107
-
108
-
109
-
110
-
111
-
112
-
113
-
114
-
115
 |
 |
