TRENDnet TV-IP310PI User's Guide - Page 14
Access your Camera Through the Web Browser, System Management and Default Settings - reset
 |
View all TRENDnet TV-IP310PI manuals
Add to My Manuals
Save this manual to your list of manuals |
Page 14 highlights
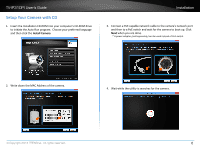
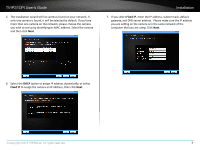
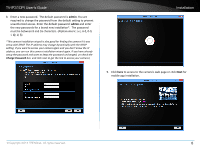
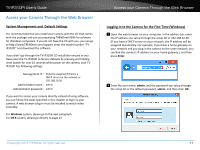
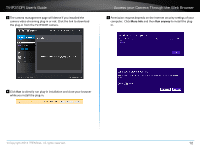
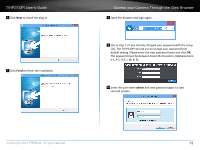
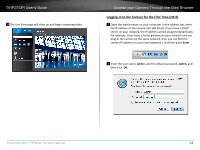
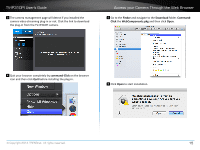
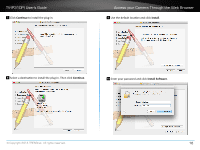
TV-IP310PI User's Guide Access your Camera Through the Web Browser System Management and Default Settings It is recommended that you install your camera with the CD that comes with the package and use accompanying TRENDnetVIEW Pro software for Windows computers. If you do not have the CD with you, you can go to http://www.TRENDnet.com/support enter the model number "TVIP310PI" and download the software. If you didn't go through the TV-IP310PI CD installation wizard or you have reset the TV-IP310PI to factory defaults by pressing and holding reset button for over 10 seconds while power on the camera, your TVIP310PI has following settings: Management IP : Dynamic assigned if there's a DHCP server on the network or 192.168.10.30 Administrator name : admin Administrator password : admin If you want to access your camera directly instead of using software, you can follow the steps specified in this chapter to login to your camera. A web browser plug-in must be installed to watch video smoothly. For Windows system, please go to the next paragraph. For OS X system, please go directly to page 14 Access your Camera Through the Web Browser Logging-in to the Camera for the First Time (Windows) 1 Open the web browser on your computer. In the address bar, enter the IP address you setup through the setup CD or 192.168.10.30. (If you have a DHCP server on your network, the IP address will be assigned dynamically. For example, if you have a home gateway on your network and you plug-in the camera on the same network, you can find the camera's IP address on your home gateway.), and then press Enter. 2 Enter the user name, admin, and the password you setup through the setup CD or the default password, admin, and then click OK. © Copyright 2014 TRENDnet. All rights reserved. 11
-
 1
1 -
2
-
3
-
4
-
5
-
6
-
7
-
8
-
 9
9 -
 10
10 -
 11
11 -
 12
12 -
 13
13 -
 14
14 -
 15
15 -
 16
16 -
 17
17 -
 18
18 -
 19
19 -
20
-
21
-
22
-
23
-
24
-
25
-
26
-
27
-
28
-
29
-
30
-
31
-
32
-
33
-
34
-
35
-
36
-
37
-
38
-
39
-
40
-
41
-
42
-
43
-
44
-
45
-
46
-
47
-
48
-
49
-
50
-
51
-
52
-
53
-
54
-
55
-
56
-
57
-
58
-
59
 |
 |