Thermador MED301WS Instruction manual - Page 16
Cleaning the Accessories, Adjust Basic Settings
 |
View all Thermador MED301WS manuals
Add to My Manuals
Save this manual to your list of manuals |
Page 16 highlights
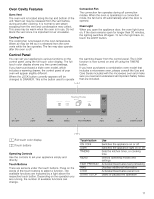
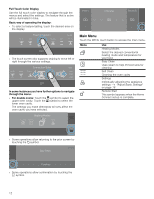
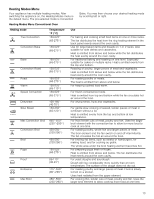
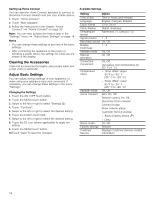
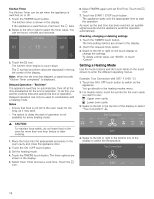
Setting up Home Connect You can start the Home Connect assistant to connect to the Home Connect network and pair your mobile device. 1. Touch "Home Connect". 2. Touch "Start assistant". 3. Follow the instructions in the chapter "Home Connect".~ "Home Connect" on page 30 Note: You can also activate this feature later in the "Settings" menu.~ "Adjust Basic Settings" on page 16 Notes ▯ You can change these settings at any time in the basic settings. ▯ After connecting the appliance to the power or following a power failure, the settings for initial use are shown in the display. Cleaning the Accessories Clean the accessories thoroughly using soapy water and a dish cloth or soft brush. Adjust Basic Settings You can adjust various settings of your appliance, to make using your appliance easy and convenient. If necessary, you can change these settings in the menu "Settings". Changing the Settings 1. Touch the ON l OFF touch button. 2. Touch the MENU touch button. 3. Swipe to the left or right to select "Settings 4". 4. Touch "Continue". 5. Swipe to the left or right to select the desired setting. 6. Touch the bottom touch field. 7. Swipe to the left or right to select the desired setting. 8. Touch the 8 icon (where applicable) to apply the setting. 9. Touch the MENU touch button. 10.Touch "Save" to save the changes. Available Settings Setting Option Time of day Time in hours and minutes Language English, Français, Español Clock format 12 hr, 24 hr Clock display Digital, Analogue Temperature format Fahrenheit (°), Celsius (°C) Signal volume 1 - 5 Key press sound On, Off Display brightness 1 - 5 Standby mode On, Off Start-up animation On, Off Convection Conversion On, Off Decreases oven temperature by 25° F (4 °C) Temperature offset ▯ Temp offset: Upper -35°F to +35° F (-20 °C to +20 °C) ▯ Temp offset: Lower -35°F to +35° F (-20 °C to +20 °C) Sabbath mode On, Off Home Connect WiFi: On, Off Remote control: On, Off Disconnect from network Connect to app Show network status Customer Service access: ▯ Allow (Display shows t) ▯ Deny Demo mode On, Off Factory settings Restore Customer Service -------- Displays Customer Service contact information 16
-
 1
1 -
2
-
3
-
4
-
5
-
6
-
7
-
8
-
9
-
10
-
 11
11 -
 12
12 -
 13
13 -
 14
14 -
 15
15 -
 16
16 -
 17
17 -
 18
18 -
 19
19 -
 20
20 -
 21
21 -
22
-
23
-
24
-
25
-
26
-
27
-
28
-
29
-
30
-
31
-
32
-
33
-
34
-
35
-
36
-
37
-
38
-
39
-
40
-
41
-
42
-
43
-
44
-
45
-
46
-
47
-
48
-
49
-
50
-
51
-
52
-
53
-
54
-
55
-
56
-
57
-
58
-
59
-
60
-
61
-
62
-
63
-
64
-
65
-
66
-
67
-
68
-
69
-
70
-
71
-
72
-
73
-
74
-
75
-
76
-
77
-
78
-
79
-
80
-
81
-
82
-
83
-
84
-
85
-
86
-
87
-
88
-
89
-
90
-
91
-
92
 |
 |