Thermador PRG366GH User Manual
Thermador PRG366GH Manual
 |
View all Thermador PRG366GH manuals
Add to My Manuals
Save this manual to your list of manuals |
Thermador PRG366GH manual content summary:
- Thermador PRG366GH | User Manual - Page 1
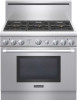
CARE AND USE MANUAL For Thermador Professional® PRO-HARMONY™ Gas Ranges GUIDE D'UTILISATION ET D'ENTRETIEN For Thermador Professional® PRO-HARMONY™ Gas Ranges Models/ Modèles / Modelos: PRG30 PRG36 PRG48 PRL30 PRL36 PRL48 MANUAL DE USO Y CUIDADO For Thermador Professional® PRO-HARMONY™ Gas Ranges - Thermador PRG366GH | User Manual - Page 2
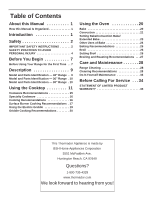
- 36" Range . 10 Model and Parts Identification - 30" Range . 10 Using the Cooktop 11 Cookware Recommendations 15 Specialty Cookware 16 Cooking Recommendations 16 Surface Burner Cooking Recommendations . 17 Using the Electric Griddle 19 Griddle Cooking Recommendations 20 Using the Oven 20 - Thermador PRG366GH | User Manual - Page 3
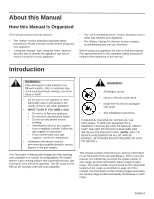
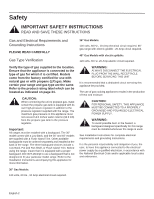
PER INSTALLATION INSTRUCTIONS. (NOTE: ANTI-TIP DEVICE IS REQUIRED ON ALL 30" AND 36" RANGES; 48" RANGES DO NOT REQUIRE AN ANTITIP DEVICE:) This manual contains important Care and Use information for all Thermador Professional® Ranges. When using this manual, it is critical that you know the model - Thermador PRG366GH | User Manual - Page 4
particular model range. Refer to the Installation Instructions accompanying this appliance for more information. 30" Gas Models: 120 volts, 60 Hz., 10 Amp electrical circuit required. 36" Gas Models: 120 volts, 60 Hz., 10 Amp electrical circuit required. 36" gas range with electric griddle - 20 - Thermador PRG366GH | User Manual - Page 5
READ AND SAVE THESE INSTRUCTIONS WARNING - ALL MODELS: IN CASE OF AN ELECTRICAL FAILURE If for any reason a gas control knob is turned ON and there is no electrical power to operate the electronic igniters on the range's cooktop burners, turn OFF the gas control knob and wait 5 minutes for - Thermador PRG366GH | User Manual - Page 6
technician. Have the installer show you where the gas supply shut-off valve is located so that you know how and where to turn off the gas to the range. Do not repair or replace any part of the appliance unless specifically recommended in this manual. All other servicing should be referred to - Thermador PRG366GH | User Manual - Page 7
instructions. • If the range is pulled away from the wall for cleaning, service or any other reason, ensure that the Anti-Tip Device is properly reengaged when the range is pushed back against the wall. In the event of abnormal usage (such as a person standing, sitting, or leaning on an open door - Thermador PRG366GH | User Manual - Page 8
small quantities of alcohol in foods, and open the oven door carefully. WARNING: To avoid possible burn or fire hazard, a backguard designed specifically for this range must be installed whenever the range is used. IMPORTANT SAFETY NOTICE: The California Safe Drinking Water and Toxic Enforcement - Thermador PRG366GH | User Manual - Page 9
then mail it to the indicated address. 3. Optional Accessories: Gliding oven racks (all sizes), Grill Plate, Black Knob Kit, Blue Knob Kit, Chopping Board, Griddle Cover, Wok Support Ring and other accessories are available from your Thermador Dealer. WARNING: To help prevent burns, NEVER remove - Thermador PRG366GH | User Manual - Page 10
Rack Positions 5. Gliding Oven Racks Your Thermador range includes three extendable, gliding racks that can be pulled out and pushed back into the oven with minimum effort - even while supporting a large turkey or roast. If yours is a 48" model, the secondary oven of your range also has two gliding - Thermador PRG366GH | User Manual - Page 11
Description Model and Parts Identification - 48" Range Key for 48" Models 1. 22" Pot-and-Pan Shelf, 9" Low Back or Flush Island Trim (Pot-and-Pan Shelf and Low Back ordered separately) 2. Burner Grates & Burners 3. Electric Griddle 4. Control Knobs, ExtraLow® Burners (2) 5. Control Knobs, Standard - Thermador PRG366GH | User Manual - Page 12
Knobs, Standard Burners (4) 5. Oven Temperature Selector 6. Oven Mode Selector 7. Oven Door 8. Viewing Window 9. Kick Panel 10. Range Feet (4) 1 2 3 4 2 5 6 4 7 8 10 9 10 Model and Parts Identification - 30" Range Figure 6: 36" Model Key for 30" Model 1. 6" Low Back - shown (Island Trim - Thermador PRG366GH | User Manual - Page 13
Using the Cooktop Sealed Star® Burners Your new range has sealed Star® burners. There are no burner parts under the cooktop to clean, disassemble or adjust. The cooktop features four or six gas surface burners; each rated at 18,000 BTU/HR (15,000 BTU/ HR using Propane). The burners are mounted on - Thermador PRG366GH | User Manual - Page 14
igniter stops clicking. • Rotate the knob to any flame setting between HI and SIM. • The blue signal light, between the burner knobs, will light when adjacent burners are lit. The light will remain on until the adjacent burners are turned off. BTU for Standard XLO range marked on the knob. ExtraLow - Thermador PRG366GH | User Manual - Page 15
the burner base when viewed from the top as shown in Figure 10: Correct Burner Cap Placement. Burner Cap Ports Figure 13: Star® Burner problems may occur. • Burner flames are too high. • Flames shoot out of burners. • Burners do not ignite. • Burner flames light unevenly. • Burner emits gas - Thermador PRG366GH | User Manual - Page 16
turned off. • The griddle cannot be used during a power failure. • If you smell gas, refer to safety precautions listed inside the front cover. WARNING: In the event of a power failure, all knobs are to be turned to the OFF Position. Only the standard burners can be lit manually. Flame Height • The - Thermador PRG366GH | User Manual - Page 17
contact with a hot burner grate, They may melt or catch fire. • Never let a pan boil dry. This can damage your pan and the cooking surface. • Professional quality pans with metal handles are recommended because plastic handles can melt or blister if the flame extends up the side of the pan - Thermador PRG366GH | User Manual - Page 18
" has been separated for the standard and ExtraLow burners. There may or may not be a change between the two burner settings. Figure 22: Round-Bottom Wok In Support Ring • Woks - Either flat based or round bottom woks with the accessory ring can be used on all models. Round bottom woks must be - Thermador PRG366GH | User Manual - Page 19
Finish Setting ExtraLow (XLO) Burners XLO - keep warm, cover* MED - preheat skillet SIM to MED - cook Same as for Standard Burners SIM - to start melting Allow 5 to 10 minutes to melt HI - cover, bring water to a boil, add cereal SIM to MED - finish cooking according to package directions - Thermador PRG366GH | User Manual - Page 20
, bring liquid to a boil Finish Setting ExtraLow (XLO) Burners Same as for Standard Burners XLO - to hold To finish cooking XLO - to simmer slowly XLO - and vegetables to a boil SIM to maintain simmer SIM to MED - cook 10 minutes, or until tender Frozen Deep Frying HI - cover, bring water and - Thermador PRG366GH | User Manual - Page 21
on top of the surface when the griddle is not being used. The coated-aluminum grill plate accessory is designed to replace the griddle plate. See the instructions that come with the grill plate accessory for more details. Figure 23: Griddle Control Knob The maple chopping block and stainless steel - Thermador PRG366GH | User Manual - Page 22
griddle plate overhang. 2. Turn the knob to the cooking temperature to preheat the griddle. 3. Preheat 10 to 12 minutes. 4. Add butter, margarine, oil or shortening if desired. NOTICE: Griddle oven. Getting the Best Results • Minimize opening the door: • Use a minute timer. • Use the interior oven - Thermador PRG366GH | User Manual - Page 23
numbered like an elevator. Number one level is the lowest and number five level is at the top. Secondary Oven (48" Models) • Baking on rack #3 will result in the best product. When additional height is needed, rack #2 may in foods that are brown and crispy on the outside and moist and English 21 - Thermador PRG366GH | User Manual - Page 24
For accurate information, write the Extension Service, Colorado State University, Fort Collins, Colorado on any surface cooler than the inside of the oven, such as the control panel. Rack Positions One results. Aluminum commercial half-sheets or professional cooking utensils may be used. Placement - Thermador PRG366GH | User Manual - Page 25
roasting or warming using one, two or three racks. Figure 26: Oven Controls for 36" Range To Set the Oven 1. Select BAKE mode or CONVECTION BAKE mode using the Mode Selector Knob. 2. Set oven temperature using the Temperature Selector Knob. • If using CONVECTION BAKE, set the Temperature Selector - Thermador PRG366GH | User Manual - Page 26
the top of the oven door. DO NOT continue to use the oven if the cooling blower fails to activate while baking at temperature settings of 425°F or greater, or while broiling. Call a qualified service agency to repair the range. LEFT OVEN Figure 27: Secondary Oven Controls for 48" Range To Set the - Thermador PRG366GH | User Manual - Page 27
is not recommended. Suggested Temperature Recommendations to Keep Food Hot FOOD Beef Bacon OVEN TEMPERATURE 150°F 200° - 225°F FOOD Biscuits and Muffins (covered) Casserole 35 minutes 30 to 40 minutes 60 to 75 minutes 20 to 25 minutes 10 to 15 minutes 55 to 70 minutes 14 to 19 minutes 35 to 45 - Thermador PRG366GH | User Manual - Page 28
to BROIL. 3. Set Temperature Selector Knob to BROIL. 4. Wait until PREHEATING light turns off, after approximately three (3) minutes. 5. Place food in oven at desired rack position. 6. The oven door must be closed when broiling in the oven. • Your Professional Range comes with a large two- piece - Thermador PRG366GH | User Manual - Page 29
the broiler pan included with the range. FOOD ITEM RACK NUMBER BEEF Ground Beef Patties, 4 1/2" thick T-Bone Steak 4 OVEN MODE Broil Broil Flank Steak 4 to 20 minutes 20 to 25 min/lb 20 to 25 min/lb SPECIAL INSTRUCTIONS AND TIPS Broil until no pink in center Time depends on rareness of - Thermador PRG366GH | User Manual - Page 30
local markets. It is imperative that all products be used in strict accordance with instructions on the package. The following chart gives directions for cleaning this range. Cleaning Recommendations PART/MATERIAL Brass Burner Base and Cast Iron Cap Brass Burner Base Burner Cap SUGGESTED CLEANERS - Thermador PRG366GH | User Manual - Page 31
PART/MATERIAL Exterior Finish/Back Guard / Stainless Steel Grates / Porcelain Enamel on Cast Iron Griddle Grease Tray / Aluminum Stainless steel resists most food stains and pit marks providing the surface is kept clean and protected. • Never allow food stains or salt to remain on stainless steel - Thermador PRG366GH | User Manual - Page 32
stick to the griddle plate, remove with a nylon scrubber or mild abrasive cleaner such as Soft Scrub®. Igniters / Ceramic igniter is damaged, it may not light the burner. A cleaner such as Soft Scrub® may be used. Apply with a damp sponge or cloth according to the manufacturer's instructions - Thermador PRG366GH | User Manual - Page 33
PART/MATERIAL Broil Pan Grid/Bottom Porcelain Enamel Cavity Porcelain Enamel on Steel Front Frame Stainless Steel CLEANING PRODUCTS food has burned onto the oven and is difficult to remove, the spots can be soaked with a cloth saturated with household ammonia. Close the door and allow it to soak - Thermador PRG366GH | User Manual - Page 34
Enamel Seal Door Gasket Harsh Cleaners: Easy Off® Oven Cleaner. Note: Some commercial oven cleaners cause darkening and discoloration. Test the cleaner on a small part of the rack and check for discoloration before cleaning the entire rack. • Apply a generous coating. Allow to stand for 10 to 15 - Thermador PRG366GH | User Manual - Page 35
. • Carefully dry or clean igniter. • Clean ports on burner cap with a wire, a needle or straightened paper clip. • Improper fit of burner cap onto burner base. • Align burner cap properly on burner base. • Range is not properly grounded. • Refer to Installation Instructions. Have a qualified - Thermador PRG366GH | User Manual - Page 36
or is the circuit breaker tripped? • Is the manual shut-off valve closed, preventing the flow of gas? Data Rating Label The data rating label shows the model and serial number of your range. It is located on the frame, behind the oven door (See illustration). CAUTION: Before removing the toe kick - Thermador PRG366GH | User Manual - Page 37
pay for labor and parts and ship the parts to the nearest authorized service provider, but you would still be fully liable and responsible for any travel time or other special charges by the service company, assuming they agree to make the service call. Out of Warranty Product Thermador is under no - Thermador PRG366GH | User Manual - Page 38
EXCLUSIVELY BY THERMADOR, OR OTHERWISE. SOME STATES DO NOT ALLOW THE EXCLUSION OR LIMITATION OF INCIDENTAL OR CONSEQUENTIAL DAMAGES, AND SOME STATES DO NOT ALLOW LIMITATIONS ON HOW LONG AN IMPLIED WARRANTY LASTS, SO THE ABOVE LIMITATIONS MAY NOT APPLY TO YOU. THIS WARRANTY GIVES YOU SPECIFIC LEGAL - Thermador PRG366GH | User Manual - Page 39
ères Concernant ce guide 1 Présentation de ce guide 1 Introduction 1 Sécurit 2 Instructions de sécurité chauffante 21 Utilisation de la table de cuisson 21 Cuisson au four 21 Convection service technique 36 ÉNONCÉ DE GARANTIE LIMITÉE DU PRODUIT 37 Cet appareil électroménager de Thermador - Thermador PRG366GH | User Manual - Page 40
- Thermador PRG366GH | User Manual - Page 41
les instructions de la compagnie. • Si vous n'arrivez pas à contacter votre compagnie de gaz, appelez les pompiers. • L'installation et les réparations doivent être réalisées par un installateur qualifié, un centre de réparation agréé ou la compagnie de gaz. Les cuisinières Thermador Professional - Thermador PRG366GH | User Manual - Page 42
cuisinière. Consultez les instructions d'installation fournies avec l'appareil pour plus d'information. Modèles à gaz 30 po : 120 volts, 60 Hz, Circuit électrique de 10 A requis. Modèles à gaz 36 po : 120 volts, 60 Hz, Circuit électrique de 10 A requis. Modèle 36 po avec grille électrique - Circuit - Thermador PRG366GH | User Manual - Page 43
DE SÉCURITÉ IMPORTANTES LISEZ ET CONSERVEZ CES INSTRUCTIONS AVERTISSEMENT - TOUS LES MODÈLES : EN CAS ricain de l'électricité ANSI/NFPA no 70, ou bien au Code canadien Can - B149 régissant l'installation des appareils à gaz naturel et propane et à la section 1 du code électrique canadien C22.1. Il - Thermador PRG366GH | User Manual - Page 44
CURITÉ DESTINÉES À ÉVITER LES BLESSURES Votre cuisinière Thermador Professional® a été conçue pour être un appareil fiable de blessures. L'installation et l'entretien doivent être correctement effectués. Lisez les Instructions d'installation fournies avec ce produit. Faites installer la cuisinière - Thermador PRG366GH | User Manual - Page 45
sol, au mur ou à une armoire à l'aide du dispositif antibascule qui vous est fourni. • L'appareil risque de basculer s'il n'est pas installé conformément à ces instructions. • En déplaçant la cuisinière pour nettoyage, réparation ou autre raison, assurez-vous que le dispositif antibascule est bien - Thermador PRG366GH | User Manual - Page 46
utilisez pas le four. Appelez votre Centre de service agréé pour réparation. Pour éviter le des alcools sur la table de cuisson, suivez les instructions du fabricant de la hotte. Faire attention en çu spécifiquement pour la cuisinière doit être installé chaque fois que la cuisinière est utilisée. - Thermador PRG366GH | User Manual - Page 47
du produit 1 1 1 1 Dosseret 1** 1*** 1*** 1*** Instructions d'installation 1 1 1 1 Guide d'utilisation et d'entretien 1 1 1 1 *Tous les po est vendu avec un dosseret bas de 6 po. *** Les modèles de 36 po et de 48 po sont vendus avec une garniture d'îlot. Veuillez consulter les - Thermador PRG366GH | User Manual - Page 48
36. Consultez l'étiquette signalétique. Ces numéros peuvent être utilisés à des fins de contact avec le service guide: 5 4 3 2 1 Figure 1 : Positions des grilles dans le four 5. Grilles de four coulissantes Cette cuisinière Thermador assurez-vous que les supports avant des guides reposent dans les - Thermador PRG366GH | User Manual - Page 49
de commande, brûleurs ExtraLow® (2) 5. Boutons de commande et brûleurs standards (4) 6. Bouton de commande, plaque chauffante (1) 7. Sélecteurs de température du four 10. Hublot 11. Four secondaire (2 grilles coulissantes incluses) 12. Base 13. Pieds (4) 1 2 2 3 2 4 5 8 7786 5 9 10 11 12 - Thermador PRG366GH | User Manual - Page 50
ûleurs et brûleurs 3. Bouton de commande, brûleurs ExtraLow® (2) 4. Boutons de commande et brûleurs standards (4) 5. Sélecteur de température du four 6. Sélecteur de mode du four 7. Porte du four 8. Hublot 9. Base 10. Pieds (4) 1 2 3 4 2 5 6 4 7 8 10 9 10 Figure 6 : Modèle 36 po Français - Thermador PRG366GH | User Manual - Page 51
centrale 4. Boutons de commande, brûleurs ExtraLow® (2) 5. Boutons de commande et brûleurs standards (2) 6. Sélecteur de température du four 7. Sélecteur de mode du four 8. Porte du four 9. Hublot 10. Base 11. Pieds (4) AVERTISSEMENT : Pour assurer une bonne ventilation de la cuisinière, n'enlevez - Thermador PRG366GH | User Manual - Page 52
CENTRE BRÛLEUR : PLAQUE : Figure 9 : Symboles de la table de cuisson Indicateur de réglage Français 12 Bouton Plaque Figure 10 : Bouton de commande de brûleur standard Fonctionnement des brûleurs • Pousser sur le bouton et tourner dans le sens horaire pour le réglage . • L'allumeur pour le - Thermador PRG366GH | User Manual - Page 53
est doté de réglages de flamme encore plus bas que les réglages standards pour mijoter SIM. Indicateur de réglage Gamme ExtraLow® Figure 11 : Bouton réglage est également déterminé par le type de récipient choisi. Ses dimensions, sa forme, le matériau et l'utilisation ou non d'un couvercle sont des - Thermador PRG366GH | User Manual - Page 54
que les allumeurs produisent des étincelles. Si un brûleur ne s'allume pas, consultez le chapitre « Avant d'appeler le service technique », à la « Avant d'appeler le service technique » à la page 36. Base de brûleur en laiton Vérification de la mise en place du capuchon de brûleur • Vérifier chaque - Thermador PRG366GH | User Manual - Page 55
ûleurs standards en approchant service qualifié en vue d'assurer une combustion appropriée. 2.S'assurer d'une ventilation adéquate par une fenêtre ouverte ou utiliser un ventilateur ou une hotte pour la cuisson au gaz. 3.Faites toujours fonctionner l'appareil conformément aux instructions de ce guide - Thermador PRG366GH | User Manual - Page 56
Récipients recommandés AVERTISSEMENT : Pour éviter le risque de dommages sérieux, les dommages à l'appareil ou aux casseroles, observent ce qui suit : • Les grands récipients, tôles à biscuits, etc. ne doivent pas être utilisés sur la surface de cuisson. • Placez les grandes casseroles de façon dé - Thermador PRG366GH | User Manual - Page 57
bas. Récipients pour spécialités Figure 21 : Wok à fond plat fond rond. L'anneau de support de wok en fonte émaillée est vendu séparément. • Cocottes et marmites - Choisissez une base d'au maximum 51 mm (2") de plus que le diamètre du foyer. Cocotte de dimensions standards 19,95 à 20,9 litres (42 - Thermador PRG366GH | User Manual - Page 58
, couvrir, porter l'eau à ébullition SIM à MED - Finir la cuisson selon les instructions sur l'emballage. SIM à MED SIM SIM Identique aux brûleurs standards XLO - Pour maintenir la chaleur, couvrir* XLO - Laisser fondre pendant 10 à 15 minutes. XLO - Pour maintenir la température* Identique aux br - Thermador PRG366GH | User Manual - Page 59
que l'eau soit absorbée. SIM pour cuire doucement Identique aux brûleurs standards XLO - Pour maintenir la chaleur, couvrir XLO - Laisser mijoter(pour ébullition l'eau et les légumes MED SIM à MED - Laisser cuire entre 10 minutes ou jusqu'à ce que les légumes soient tendres * Il est recommandé de - Thermador PRG366GH | User Manual - Page 60
final brûleurs standards Congelés HI - Couvrir, porter à ébullition l'eau et les légumes SIM à MED - Faire cuire selon les instructions du paquet Friture l'avant pour un rendement optimal. Consultez le guide d'installation pour vérifier et régler l'inclinaison appropriée. Le gril est - Thermador PRG366GH | User Manual - Page 61
de commande indique. Remarque : Une hotte de ventilation dûment installée n'est pas considérée comme une source de circulation d' le bouton à la température de cuisson pour préchauffer. 3. Préchauffez de 10 à 12 minutes. 4. Ajoutez du beurre, de la margarine ou de l'huile si four. Français 21 - Thermador PRG366GH | User Manual - Page 62
• Choisissez un ustensile de taille adéquate; utilisez le récipient recommandé dans la recette. • Sortez les lèchefrites du four. Une lèchefrite sans aliments nuira au dorage et à la cuisson. • Le dorage dépend du type d'ustensile utilisé : • Pour obtenir des croûtes tendres, légèrement dorées, - Thermador PRG366GH | User Manual - Page 63
altitude, en mode CUISSON ou CUISSON PAR CONVECTION, les recettes et durées de cuisson varient. Pour une information précise, écrire à Extension Service, Colorado State University, Fort Collins, Colorato 80521. Il peut y avoir des frais pour les bulletins. Précisez le type d'information désiré (ex - Thermador PRG366GH | User Manual - Page 64
et PRÉCHAUFFAGE s'allument. Figure 26 : contrôles du four pour cuisinière 36 po OVEN ON PREHEATING • Le four est préchauffé à la température réglée lorsque le voyant PRÉCHAUFFAGE fait un cycle arrêt la première fois. OVEN ON PREHEATING • Le voyant de FOUR reste allumé pendant un mode de - Thermador PRG366GH | User Manual - Page 65
(marche 3 secondes / arrêt 3 secondes) indiquant la phase finale. OVEN ON PREHEATING et demeurent en circuit, les 3 dernières minutes permettent aux °F ou plus ou pendant le gril. Communiquer avec un centre de service qualifié pour faire réparer la cuisinière. • PHASE ACCÈS (four au - Thermador PRG366GH | User Manual - Page 66
température. • Les voyants FOUR EN CIRCUIT et PRÉCHAUFFAGE s'allument. OVEN ON PREHEATING • Le four est préchauffé à la température réglée température. Les plats cuisinés chauds seront conservés à leur température de service. Réglez le four sur le mode cuisson et utilisez la température indiquée - Thermador PRG366GH | User Manual - Page 67
Conseils de cuisson au four ALIMENTS DIMENSIONS DU PLAT RÉGLAGE DE TEMPÉRATURE °C (425 °F) ou instructions du paquet 350° 425° 425° 400° 350° 375° 375° 375° TEMPS DE CUISSON TOTAL SUGGÉRÉ 8 à 12 minutes 25 à 35 minutes 30 à 40 minutes 60 à 75 minutes 20 à 25 minutes 10 à 15 minutes 55 à - Thermador PRG366GH | User Manual - Page 68
La porte doit être fermée pendant le cycle de grillade. • Votre cuisinière Professional vous est fournie avec une grande lèchefrite en deux pièces. Les jus de jusqu'à la température de gril. Communiquer avec un centre de service qualifié pour faire réparer la cuisinière. Remarque : L'éclairage du - Thermador PRG366GH | User Manual - Page 69
Conv Bake (Cuisson par conv) 350° 325° TEMPS DE CUISSON APPROXIMATIF 15 à 20 minutes 12 à 20 minutes 12 à 20 minutes 44 à 55 min/kg INSTRUCTIONS PARTICULIÈRES ET CONSEILS Faire griller jusqu'à disparitionde la teinte rosée au centre. Le temps dépend du point de cuisson. Le meilleur résultat est - Thermador PRG366GH | User Manual - Page 70
de brûleur est bien positionné sur la base du brûleur. Boutons de commande de métal Cadrans de chrome Veuillez consulter le guide à la page 10 pour l'identification des boutons. page 12 • Eau chaude savonneuse : rincez • Ne trempez pas les boutons et séchez immédiatement dans l'eau. • Ne forcez - Thermador PRG366GH | User Manual - Page 71
PIÈCE/MATÉRIAU Finition externe/Plaque de protection / Acier inoxydable Grilles / Porcelaine émaillée sur fonte Plateau à graisse de la plaque / Aluminium avec revêtement antiadhésif PRODUITS D'ENTRETIEN SUGGÉRÉS RAPPELS IMPORTANTS • Produits d'entretien non abrasifs • L'acier inoxydable résiste - Thermador PRG366GH | User Manual - Page 72
endommagés, le brûleur ne s'allumera pas. Un nettoyant tel Soft Scrub® peut être utilisé. Appliquer avec une éponge ou un chiffon humide selon les instructions du fabricant. Bien rincer et assécher avec un chiffon doux. Si l'on utilise des produits tels Bar Keeper's Friend®, Bon-ami®, Comet® ou - Thermador PRG366GH | User Manual - Page 73
PIÈCE/MATÉRIAU Grille/base de la lèchefrite Porcelaine émaillée Cavité Porcelaine émaillée sur acier Cadre frontal Acier inoxydable PRODUITS D'ENTRETIEN/INDICATIONS Pour détacher les résidus d'aliments, saupoudrez la grille quand elle est encore chaude avec un produit d'entretien en poudre pour la - Thermador PRG366GH | User Manual - Page 74
et guide Nickelées Remarque : Les guides de grilles sont amovibles pour le nettoyage à l'aide de cette marche à suivre (voir instructions de la totalité de la grille. • Appliquez une couche généreuse. Laissez reposer de 10 à 15 minutes. Rincez soigneusement et séchez. Si après le nettoyage, les - Thermador PRG366GH | User Manual - Page 75
la position OFF. Approchez une allumette de l'orifice du brûleur standard et tournez le bouton de commande à la position . Attendez mal faite. • L'alimentation électrique est mal polarisée. • Consultez les Instructions d'installation. Appelez un électricien qualifié pour qu'il effectue une mise à - Thermador PRG366GH | User Manual - Page 76
service technique Avant d'appeler le service et de l'utiliser. Information pour le service technique Afin de conserver ces données du marchand Nom du centre de service Numéro de téléphone du centre de service Complétez également la carte d' service. Remettez en place après l'entretien. Français - Thermador PRG366GH | User Manual - Page 77
et non pour la revente ou l'utilisation commerciale; • aux États-Unis ou au Canada, et qu'il soit en tout temps demeuré dans le pays d'origine de l'achat période de garantie, Thermador ou l'un de ses prestataires de services agréés réparera le produit sans frais de votre part (sous réserve de - Thermador PRG366GH | User Manual - Page 78
, installation inadéquate ou négligée, altération, manquement à observer les instructions de fonctionnement, manipulation sans précaution, service non ÉDENT DES DOMMAGES DIRECTS QUI SONT MANIFESTEMENT CAUSÉS EXCLUSIVEMENT PAR THERMADOR OU AUTREMENT.CERTAINS ÉTATS NE PERMETTENT PAS L'EXCLUSION OU LA - Thermador PRG366GH | User Manual - Page 79
este manual 1 Cómo está organizado este manual 1 Modelo e identificación de piezas: estufa de 36 10 Modelo e identificación de piezas: estufa de ctrica 21 Recomendaciones 36 Antes de solicitar servicio . . . 37 DECLARACIÓN DE GARANTÍA LIMITADA DEL PRODUCTO 38 Este electrodomestico de Thermador - Thermador PRG366GH | User Manual - Page 80
- Thermador PRG366GH | User Manual - Page 81
INSTALAR EL DISPOSITIVO ANTIVUELCO EN TODAS LAS ESTUFAS DE 30" Y 36", PERO NO EN LAS DE 48"). Este manual contiene información importante sobre el uso y cuidado de todas las estufas de la serie Professional® de Thermador®. Al leer este manual, es sumamente importante que sepa el número de modelo de - Thermador PRG366GH | User Manual - Page 82
instrucciones de instalación que se incluyen con este aparato. Modelo de gas de 30": 120 V, 60 Hz, se requiere un circuito eléctrico de 10 A. Modelo de gas de 36": 120 V, 60 Hz, se requiere un circuito eléctrico de 10 A. Estufa de gas de 36" con plancha eléctrica; se requiere un circuito eléctrico - Thermador PRG366GH | User Manual - Page 83
Domésticas • CAN/CSA-22.2 No. 61-08 Estufas de Cocina Domésticas • CAN/CGA 1.1-M81 Estufas a Gas Domésticas Consulte sus códigos de edificación los Códigos de Instalación para Electrodomésticos a Gas y C22.1 Código Eléctrico Canadiense, Parte 1. El propietario y el instalador son responsables de - Thermador PRG366GH | User Manual - Page 84
Con el cuidado adecuado, su nueva estufa Thermador de la serie Professional® ha sido diseñada para brindarle una operaci apagar el suministro de gas a la estufa. No repare ni reemplace ninguna parte del aparato, a menos que haya sido recomendado específicamente en este manual. Para cualquier otro - Thermador PRG366GH | User Manual - Page 85
por la estufa misma. ADVERTENCIA: El aparato se usa para cocinar. Para fines de seguridad, no use el gas no quemado a la habitación. En la portada interior se incluye información sobre las fugas de gas. de utensilios muy pequeños podría dejar expuesta una parte de la llama y causar que la ropa se - Thermador PRG366GH | User Manual - Page 86
calientan lo suficiente como para causar quemaduras. El deflector de calor, que desvía el calor de la superficie de cocina y de la moldura en la parte superior y los costados de la puerta del horno, estará también caliente cuando el horno esté encendido. Coloque las rejillas del horno en la posici - Thermador PRG366GH | User Manual - Page 87
una buena ventilación al cocinar con gas. 2. Siempre maneje el aparato siguiendo las instrucciones de este manual. No almacene ni use quí 30" se suministra con un protector trasero bajo de 6 pulg. ** Los modelos de 36" y 48" se suministran con una moldura de isla. Le rogamos leer las advertencias - Thermador PRG366GH | User Manual - Page 88
Anote el modelo y el número de serie en la page 38. Vea "Placa de Thermador puede obtener las rejillas deslizantes del horno (todos los tamaños), la plancha de asar, los kits es la posición que se usa con mayor frecuencia. Coloque las frente del horno. Levante la parte frontal de la rejilla arriba de - Thermador PRG366GH | User Manual - Page 89
el horno. No se debe quitar el quemador infrarrojo del horno de gas. Nota: Durante el proceso de enfriamiento, es normal la expulsión de Patas de la estufa (4) 1 2 2 2 3 4 5 8 7786 5 9 10 11 12 13 Figura 4: Modelo de 48" ADVERTENCIA: Para proporcionar una ventilación adecuada, - Thermador PRG366GH | User Manual - Page 90
21. Encendedor incandescente para asar 14 21 15 16 20 18 17 19 Figura 5: Interior del horno de gas Modelo e identificación de piezas: estufa de 36" Clave para modelos de 36 delantero inferior 10. Patas de la estufa (4) 1 2 3 4 2 5 6 4 7 8 10 9 10 Figura 6: Modelo de 36" Español - Thermador PRG366GH | User Manual - Page 91
quite las patas a la estufa. 1 4 8 11 2 3 2 6 7 5 9 10 11 Uso de la superficie de cocina Quemadores sellados Star® Su nueva estufa está diseñada con de gas; cada uno con capacidad nominal de 18,000 BTU/hora (15,000 BTU/hora usando propano). Los quemadores están montados en la parte superior de - Thermador PRG366GH | User Manual - Page 92
de control para dos quemadores sellados de gas, uno en la parte delantera y uno en en la parte trasera, se encuentran directamente en la parte delantera inferior del par de quemadores, en de cocina Indicador de ajuste Perilla Anillo Figura 10: Perilla de control del quemador estándar Español 12 - Thermador PRG366GH | User Manual - Page 93
BTU para quemadores estándares • HI es equivalente a 18,000 BTU/hora (15,000 BTU/ hora con propano). • SIM es equivalente a 2,100 BTU/hora. BTU para quemadores ExtraLow® • HI es equivalente a 18,000 BTU/hora (15,000 BTU de control a otro ajuste. • Si se usa una olla extra grande, es posible que la - Thermador PRG366GH | User Manual - Page 94
quemadores no se encienden uniformemente. • Los quemadores producen un olor a gas. ADVERTENCIA: Para prevenir destellos y evitar la formación de derivados estrellada del quemador al verse desde la parte superior, tal como se muestra en la figura 10: Colocación correcta de las tapas de quemadores - Thermador PRG366GH | User Manual - Page 95
la luz, no se puede volver a prender hasta no apagar primero la perilla. • La plancha no funcionará durante una falla de electricidad. • Si huele a gas, consulte las precauciones de seguridad listadas dentro de la portada. ADVERTENCIA: En el caso de una falla de electricidad se deben girar todas las - Thermador PRG366GH | User Manual - Page 96
haya una buena ventilación con una ventana abierta, o ponga a funcionar un ventilador o una campana cuando cocine con gas. 3.Siempre maneje el aparato siguiendo las instrucciones en este manual. Recomendaciones para los utensilios de cocina 2" (51 mm) Figura 17: Diámetro de la base • Seleccione el - Thermador PRG366GH | User Manual - Page 97
se encuentran a veces en la base o en el centro de la olla entre partes de acero inoxidable. Figura 20: Olla tapada • Una tapa bien ajustada acorta el a deformar las ollas. No agregue agua fría a una olla caliente. Figura 21: Olla tipo "wok" con base plana Figura 22: Wok con base redonda sobre - Thermador PRG366GH | User Manual - Page 98
no se extienda más de 2 pulgadas (51 mm) de la rejilla. Enlatador estándar con baño de agua 21 a 22 cuartos de galón (19.95 a 20.9 litros), con una base de 11 a 12 pulg. tapar* Igual que para los quemadores estándares Esperar 5 a 10 minutos para que se derrita Igual que para los quemadores estándares - Thermador PRG366GH | User Manual - Page 99
, agregar huevos SIM - terminar de cocinar HI - hervir agua, agregar huevos SIM a MED - terminar de cocinar Ajuste final (quemadores ExtraLow®) XLO - dejar 10 a 15 minutos para que se derrita XLO - mantener* Igual que para los quemadores estándares Igual que para los quemadores estándares Igual - Thermador PRG366GH | User Manual - Page 100
hasta que se absorba el agua. SIM para mantener a fuego lento SIM - terminar de cocinar SIM para mantener a fuego lento SIM a MED - cocinar 10 min., o hasta ablandar SIM a MED - cocinar según las indicaciones del empaque. MED a MED HI - mantener temperatura de freír Igual que para los quemadores - Thermador PRG366GH | User Manual - Page 101
limpiarla. Se debe inclinar la plancha ligeramente hacia adelante para lograr un óptimo desempeño. Consulte el manual de instalación para averiguar el procedimiento de comprobar y ajustar la plancha para lograr una inclinación de la plancha Figura 23: Perilla de control de la plancha Español 21 - Thermador PRG366GH | User Manual - Page 102
debajo del saliente de la bandeja de la plancha. 2. Gire la perilla a la temperatura de cocinar para precalentar la plancha. 3. Precaliente de 10 a 12 minutos. 4. Si lo desea, añada mantequilla, margarina, aceite o manteca. AVISO: El rendimiento de la plancha/parrilla podría variar si el flujo - Thermador PRG366GH | User Manual - Page 103
sirve mejor para hornear con una sola rejilla en la posición #3, que se usa para la mayoría de los alimentos horneados. Si el alimento es alto, como #2, para que se hornee bien el fondo de la corteza sin dorar demasiado la parte superior. Si se asan piezas grandes de carne o pollo, como un "prime - Thermador PRG366GH | User Manual - Page 104
y aves con el modo de convección produce alimentos dorados y crujientes en la parte exterior y húmedos y jugosos en el interior. Es posible que los cortes horneado. Para obtener información más precisa, escriba a Extension Service, Colorado State University, Fort Collins, Colorado 80521. Es posible - Thermador PRG366GH | User Manual - Page 105
del horno con la perilla del selector de temperatura. • Si usa el modo CONVECTION BAKE ("horneado por convección"), fije el selector de 36" ventilador de convección seis (6) minutos después de prender el horno. • Se prenden las luces OVEN ON("horno encendido") y PREHEATING ("precalentamiento"). OVEN - Thermador PRG366GH | User Manual - Page 106
19) minutos, excepto durante los últimos dos (2) minutos, las luces OVEN ON ("horno prendido") y PREHEATING ("precalentamiento) parpadean lentamente (prendido 3 seg adelante, a través del espacio de aire que está encima de la parte superior de la puerta del horno. NO siga usando el horno si el - Thermador PRG366GH | User Manual - Page 107
PREHEATING • Cuando el horno llega a la temperatura de precalentamiento fijada, se apaga la luz de precalentamiento (PREHEATING) por vez primera. OVEN ON PREHEATING • La luz del horno permanece prendida durante cualquier modo de cocina, y sigue prendida hasta que se gire cualquiera de las perillas - Thermador PRG366GH | User Manual - Page 108
35 minutos 30 a 40 minutos 60 a 75 minutos 20 a 25 minutos 10 a 15 minutos 55 a 70 minutos 14 a 19 minutos 35 a los mejores resultados • Precalentar el asador de gas unos 3 minutos antes de añadir la comida grosor de 1 pulg. o menos. También se usa para dorar alimentos. • #3: Use esta posición - Thermador PRG366GH | User Manual - Page 109
puede prender el otro. Ajuste del modo de asar Asado: Horno de gas Solamente el quemador infrarrojo se calienta en el modo de BROIL ("asar"). horno, la puerta del horno debe estar cerrada. • Su estufa de la serie Professional viene con una bandeja grande de asar de dos piezas. La rejilla ranurada - Thermador PRG366GH | User Manual - Page 110
ALIMENTO Filete de falda ("Flank") NO. MODO DEL REJILLA HORNO AJUSTE DE CONTROL DE TEMP. (F.) 4 Broil ("asar") Broil ("asar") Centro de cuarto trasero (Eye of Round Roast") PUERCO Lomo asado ("Loin Roast") AVES Pechugas de pollo sin hueso/pellejo Muslos de pollo Bake ("Hornear") o 3 Conv - Thermador PRG366GH | User Manual - Page 111
almohadillas de plástico, no metálicas o de lana de acero para limpiar y frotar, según se recomienda en la tabla. 4. Se puede limpiar cualquier parte de este aparato con agua jabonosa caliente. Cuando se necesite enjuagar, hágalo a fondo. 5. Siempre seque de inmediato para evitar las marcas de agua - Thermador PRG366GH | User Manual - Page 112
PIEZA/MATERIAL Acabado exterior/Protector trasero / Acero inoxidable Rejillas / Esmalte de porcelana sobre hierro fundido LIMPIADORES SUGERIDOS RECORDATORIOS IMPORTANTES • Limpiadores no abrasivos: Agua • El acero inoxidable resiste caliente y detergente, amoníaco, la mayoría de las manchas - Thermador PRG366GH | User Manual - Page 113
. Limpiar la aluminio. superficie de la plancha con agua jabonosa tibia y enjuagar con agua tibia. Secar con un trapo suave. • Si hay partículas de alimentos pegadas a la bandeja de la plancha, quitarlas con un detergente poco abrasivo como Soft Scrub®. Encendedores / Cerámica Bandejas para - Thermador PRG366GH | User Manual - Page 114
PIEZA/MATERIAL Rejillas de la bandeja de asar/Parte de abajo Esmalte de porcelana LIMPIADORES/INSTRUCCIONES Para aflojar los restos de alimentos muy pegados, rociar la rejilla vacía y/o el fondo calientes con detergente en - Thermador PRG366GH | User Manual - Page 115
®Oven Cleaner (detergente para horno). Nota: Algunos detergentes comerciales para horno causan decoloración y oscurecimiento. Hacer pruebas en una parte pequeña de la rejilla y verificar si hay decoloración antes de limpiar toda la rejilla. • Aplicar una capa abundante. Dejar reposar de 10 - Thermador PRG366GH | User Manual - Page 116
Qué hacer en caso de que haya olor a gas", adentro de la portada. • Si hay baja presión de gas, comuníquese con su proveedor de gas. Chispas intermitentes o constantes del encendedor Las chispas intermitentes a un electricista calificado para poner la estufa a tierra debidamente. Español 36 - Thermador PRG366GH | User Manual - Page 117
en la casa o se activó el cortacircuitos? • ¿La válvula de cierre del gas está cerrada (y, por, tanto, no está fluyendo el gas)? Placa de información del aparato La placa con información del aparato muestra el número de modelo y de serie de su estufa. Se encuentra en el bastidor, detrás de la puerta - Thermador PRG366GH | User Manual - Page 118
efectiva la cobertura de la garantía, es la mejor manera para que Thermador le notifique en el caso poco probable de que se emita un aviso seguridad o se retire del mercado un producto. Duración de la garantía Thermador garantiza que el Producto estará libre de defectos en los materiales y en la - Thermador PRG366GH | User Manual - Page 119
electrodoméstico realizados por uno mismo) por parte de cualquier persona. • Ajuste, alteración expuestas; productos en los cuales los números de serie hayan sido alterados, modificados o eliminados; visitas del HAYAN SIDO CAUSADOS DE MANERA EXCLUSIVA POR THERMADOR O DE OTRO MODO. ALGUNOS ESTADOS NO - Thermador PRG366GH | User Manual - Page 120
5551 McFadden Avenue, Huntington Beach, CA 92649 • 800-735-4328 • www.thermador.com 9000465286 • Rev. B • 5U034P • 4/10 © BSH Home Appliances Corporation, 2009 • All rights reserved Litho in USA
-
 1
1 -
 2
2 -
 3
3 -
 4
4 -
 5
5 -
 6
6 -
 7
7 -
8
-
9
-
10
-
11
-
12
-
13
-
14
-
15
-
16
-
17
-
18
-
19
-
20
-
21
-
22
-
23
-
24
-
25
-
26
-
27
-
28
-
29
-
30
-
31
-
32
-
33
-
34
-
35
-
36
-
37
-
38
-
39
-
40
-
41
-
42
-
43
-
44
-
45
-
46
-
47
-
48
-
49
-
50
-
51
-
52
-
53
-
54
-
55
-
56
-
57
-
58
-
59
-
60
-
61
-
62
-
63
-
64
-
65
-
66
-
67
-
68
-
69
-
70
-
71
-
72
-
73
-
74
-
75
-
76
-
77
-
78
-
79
-
80
-
81
-
82
-
83
-
84
-
85
-
86
-
87
-
88
-
89
-
90
-
91
-
92
-
93
-
94
-
95
-
96
-
97
-
98
-
99
-
100
-
101
-
102
-
103
-
104
-
105
-
106
-
107
-
108
-
109
-
110
-
111
-
112
-
113
-
114
-
115
-
116
-
117
-
118
-
119
-
120
 |
 |

CARE AND USE MANUAL
For Thermador Professional®
PRO-HARMONY™ Gas Ranges
GUIDE D'UTILISATION
ET D'ENTRETIEN
For Thermador Professional
®
PRO-HARMONY™ Gas Ranges
MANUAL DE USO Y
CUIDADO
For Thermador Professional
®
PRO-HARMONY™ Gas Ranges
Models/
Modèles /
Modelos:
PRG30
PRG36
PRG48
PRL30
PRL36
PRL48