Thermador T36BT820NS Installation Manual - Page 16
Remove the frame
 |
View all Thermador T36BT820NS manuals
Add to My Manuals
Save this manual to your list of manuals |
Page 16 highlights
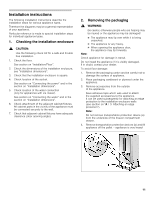
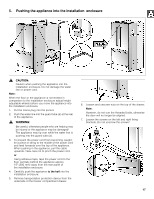
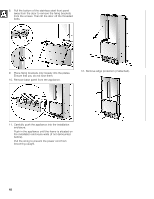
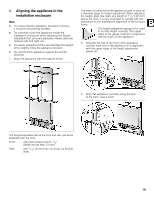
4. Remove the frame If the installation is desired without the frame parts, they can be removed after loosing the screws. These is a special installation step. Instructions are provided after section B. Connecting the water, see "Preparing to connect the water". It is also possible to attach the frame parts directly to the installation enclosure. Note: The frame parts have different hole shapes. Use the chamfering holes to attaching. 16
-
 1
1 -
2
-
3
-
4
-
5
-
6
-
7
-
8
-
9
-
10
-
 11
11 -
 12
12 -
 13
13 -
 14
14 -
 15
15 -
 16
16 -
 17
17 -
 18
18 -
 19
19 -
 20
20 -
 21
21 -
22
-
23
-
24
-
25
-
26
-
27
-
28
-
29
-
30
-
31
-
32
-
33
-
34
-
35
-
36
-
37
-
38
-
39
-
40
-
41
-
42
-
43
-
44
-
45
-
46
-
47
-
48
-
49
-
50
-
51
-
52
-
53
-
54
-
55
-
56
-
57
-
58
-
59
-
60
-
61
-
62
-
63
-
64
 |
 |
16
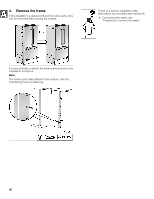
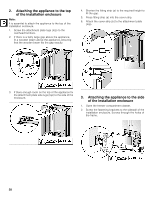
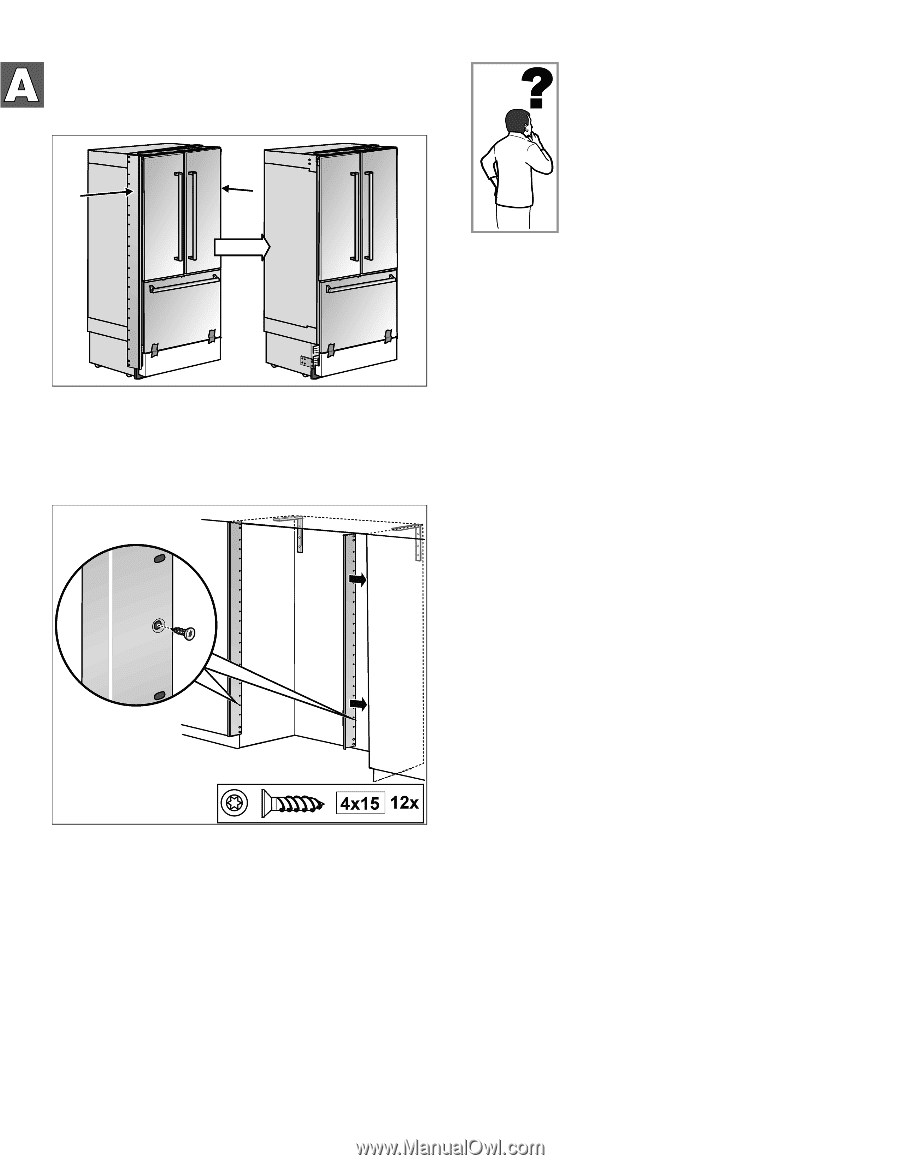
4.
Remove the frame
If the installation is desired without the frame parts, they
can be removed after loosing the screws.
It is also possible to attach the frame parts directly to the
installation enclosure.
Note:
The frame parts have different hole shapes. Use the
chamfering holes to attaching.
These is a special installation step.
Instructions are provided after section B.
Connecting the water, see
“Preparing to connect the water”.