Thermador T36BT820NS Installation Manual - Page 23
Special installation
 |
View all Thermador T36BT820NS manuals
Add to My Manuals
Save this manual to your list of manuals |
Page 23 highlights
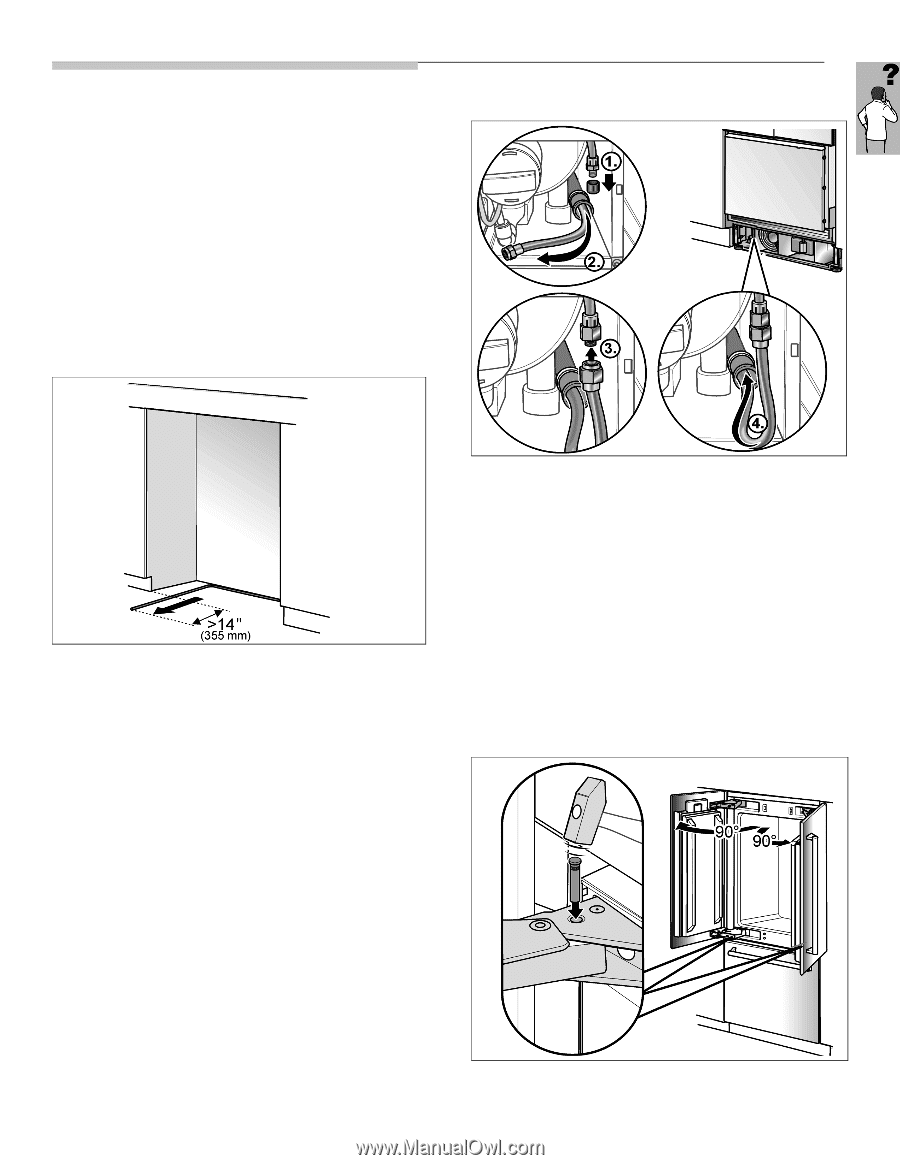
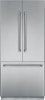
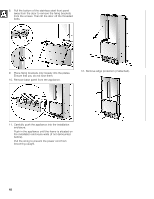
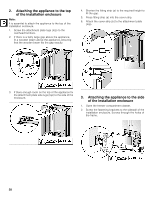
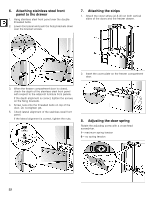
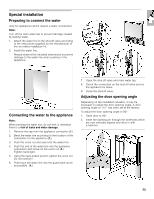
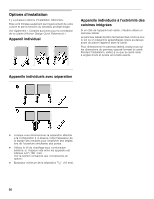
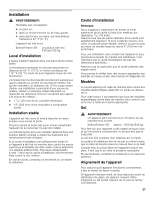
Special installation Preparing to connect the water (only for appliances which require a water connection) Note: Turn off the main water tap to prevent damage caused by leaking water. 1. Attach the water line to the shut-off valve according to the instructions supplied by the manufacturer of the ice maker installation kit. 2. Install the water line. Always observe the indicated dimensions to prevent damage to the water line when pushing in the appliance. Connecting the water to the appliance Note: When bending the water line, do not kink it, otherwise there is a risk of leaks and water damage. 1. Remove the cap from the appliance connection (1.). 2. Bend the water line according to the location of the connection on the appliance (2.). 3. Push the union nut and seal onto the water line. 4. Push the end of the water line into the appliance connection and screw on the union nut (3.). Tighten hand-tight. 5. Using the open-ended wrench, tighten the union nut. Do not overturn! 6. Push back the water line into the guard tube as far as possible (4.). 7. Open the shut-off valve and main water tap. 8. Check the connection on the shut-off valve and on the appliance for leaks. 9. Close the shut-off valve. Adjusting the door opening angle Depending on the installation situation, it may be necessary to adjust the door opening angle. A door opening angle of 115° has been set at the factory. To adjust the door opening angle to 90°: 1. Open door to 90°. 2. Insert the banking pin through the boreholes which are now vertically aligned and drive in with a hammer. 23
-
 1
1 -
2
-
3
-
4
-
5
-
6
-
7
-
8
-
9
-
10
-
11
-
12
-
13
-
14
-
15
-
16
-
17
-
 18
18 -
 19
19 -
 20
20 -
 21
21 -
 22
22 -
 23
23 -
 24
24 -
 25
25 -
 26
26 -
 27
27 -
 28
28 -
29
-
30
-
31
-
32
-
33
-
34
-
35
-
36
-
37
-
38
-
39
-
40
-
41
-
42
-
43
-
44
-
45
-
46
-
47
-
48
-
49
-
50
-
51
-
52
-
53
-
54
-
55
-
56
-
57
-
58
-
59
-
60
-
61
-
62
-
63
-
64
 |
 |