Toshiba 47TL515U Easy Start Guide - Page 20
Navigating, system, illid - problems
 |
View all Toshiba 47TL515U manuals
Add to My Manuals
Save this manual to your list of manuals |
Page 20 highlights
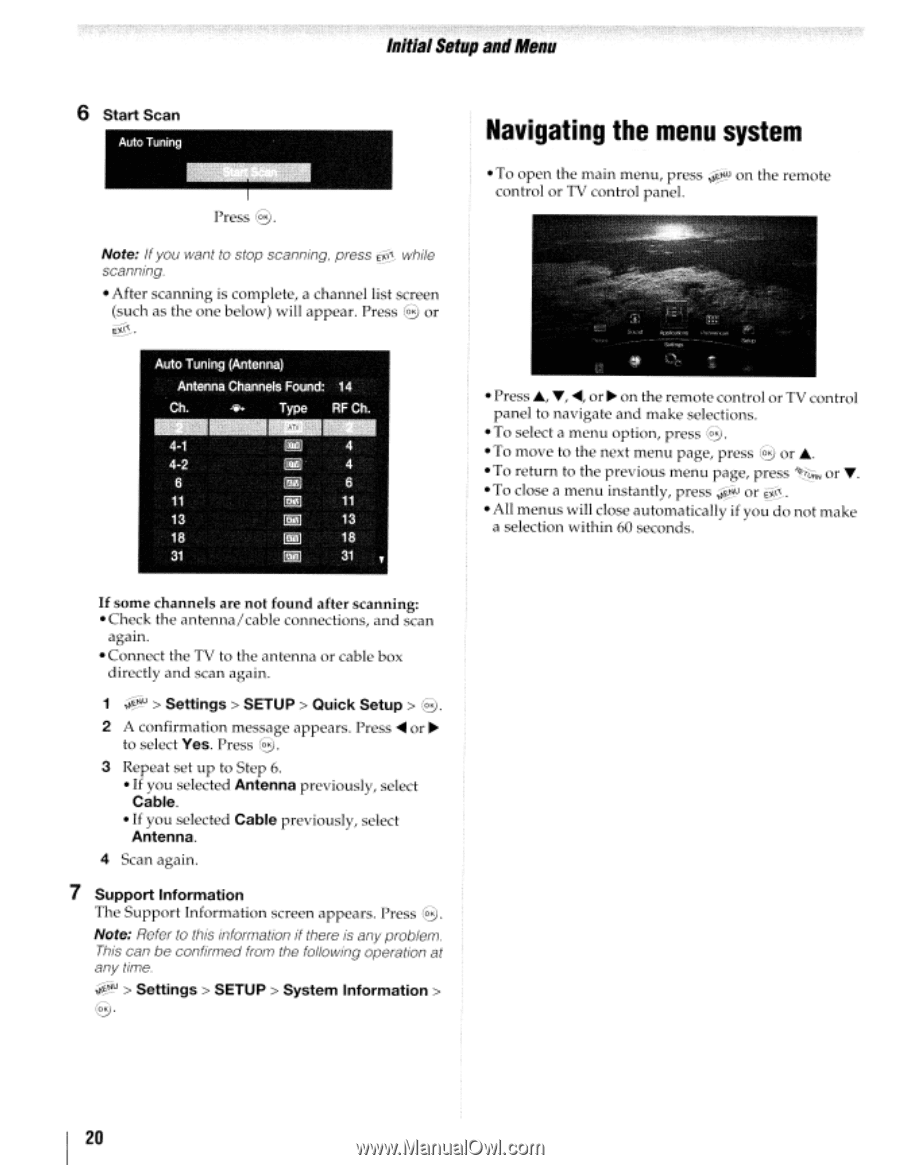
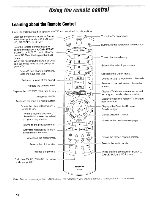
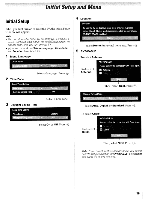
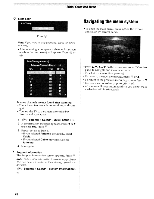
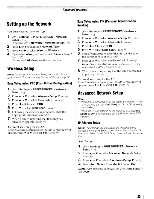
;I;.,,, ,. ;:j or!," :~~. ",L~ ~:;~f~-~~'~~'~3~~jJ i :'~ ;::;'~c·'E:-'~??H'~EfS rq;;~~·t ~..~H;~~'r!~ :t~·+z~~~~5~";'J 11";~",;T;,",::,7""-:;,;T""';:;~) .'. Initial Setup illid Menu 6 Start Scan -Auto Tuning Press 8. Note: If you want to stop scanning. press ~ while scanning, - After scanning is complete, a channel list screen (such as the one below) will appear. Press 8 or ~. Auto Tuning (Antenna) _IIIIIIDIIIIIII_ Antenna ChannelsFound: 14 Ch. .ti'o Type RF Ch. 4-1 ~ 4 4-2 m 4 6 ~ 6 11 ~ 11 13 ~ 13 18 31 ~ @l] , 18 31 If some channels are not found after scanning: -Check the antenna/cable connections, and scan agam. -Connect the TV to the antenna or cable box directly and scan again. 1 ~u > Settings> SETUP> Quick Setup> @. 2 A confirmation message appears. Press .... or ~ to select Yes. Press @. 3 Repeat set up to Step 6. - If you selected Antenna previously, select Cable. - If you selected Cable previously, select Antenna. 4 Scan again. 7 Support Information The Support Information screen appears. Press @. Note: Refer to this information if there is any problem. This can be confirmed from the following operation at any time, ~u > Settings> SETUP> System Information> 8· Navigating the menu system -To open the main menu, press ;i:0-u on the remote control or TV control panel. - Press"', "Y, ...., or ~ on the remote control or TV control panel to navigate and make selections. - To select a menu option, press @. - To move to the next menu page, press 8 or .... -To return to the previous menu page, press ~~N or "Y. -To close a menu instantly, press ~u or~. - All menus will close automatically if you do not make a selection within 60 seconds. 20
-
 1
1 -
2
-
3
-
4
-
5
-
6
-
7
-
8
-
9
-
10
-
11
-
12
-
13
-
14
-
 15
15 -
 16
16 -
 17
17 -
 18
18 -
 19
19 -
 20
20 -
 21
21 -
 22
22 -
 23
23 -
 24
24 -
 25
25 -
26
-
27
-
28
-
29
-
30
-
31
-
32
-
33
-
34
-
35
-
36
-
37
-
38
-
39
-
40
-
41
-
42
-
43
-
44
-
45
-
46
-
47
-
48
-
49
-
50
-
51
-
52
-
53
-
54
-
55
-
56
-
57
-
58
-
59
-
60
-
61
-
62
-
63
-
64
-
65
-
66
-
67
-
68
-
69
-
70
-
71
-
72
-
73
-
74
-
75
-
76
-
77
-
78
-
79
-
80
-
81
-
82
-
83
-
84
-
85
-
86
-
87
-
88
-
89
-
90
-
91
-
92
-
93
-
94
-
95
-
96
-
97
-
98
-
99
-
100
-
101
-
102
-
103
-
104
-
105
-
106
-
107
-
108
-
109
-
110
-
111
-
112
-
113
-
114
-
115
-
116
-
117
-
118
-
119
-
120
-
121
-
122
-
123
-
124
-
125
-
126
-
127
-
128
-
129
-
130
-
131
-
132
-
133
-
134
-
135
-
136
-
137
-
138
-
139
-
140
-
141
-
142
-
143
-
144
-
145
-
146
-
147
 |
 |