Toshiba D-R4 Installation Guide - English - Page 33
Time and date setting
 |
UPC - 022265411674
View all Toshiba D-R4 manuals
Add to My Manuals
Save this manual to your list of manuals |
Page 33 highlights
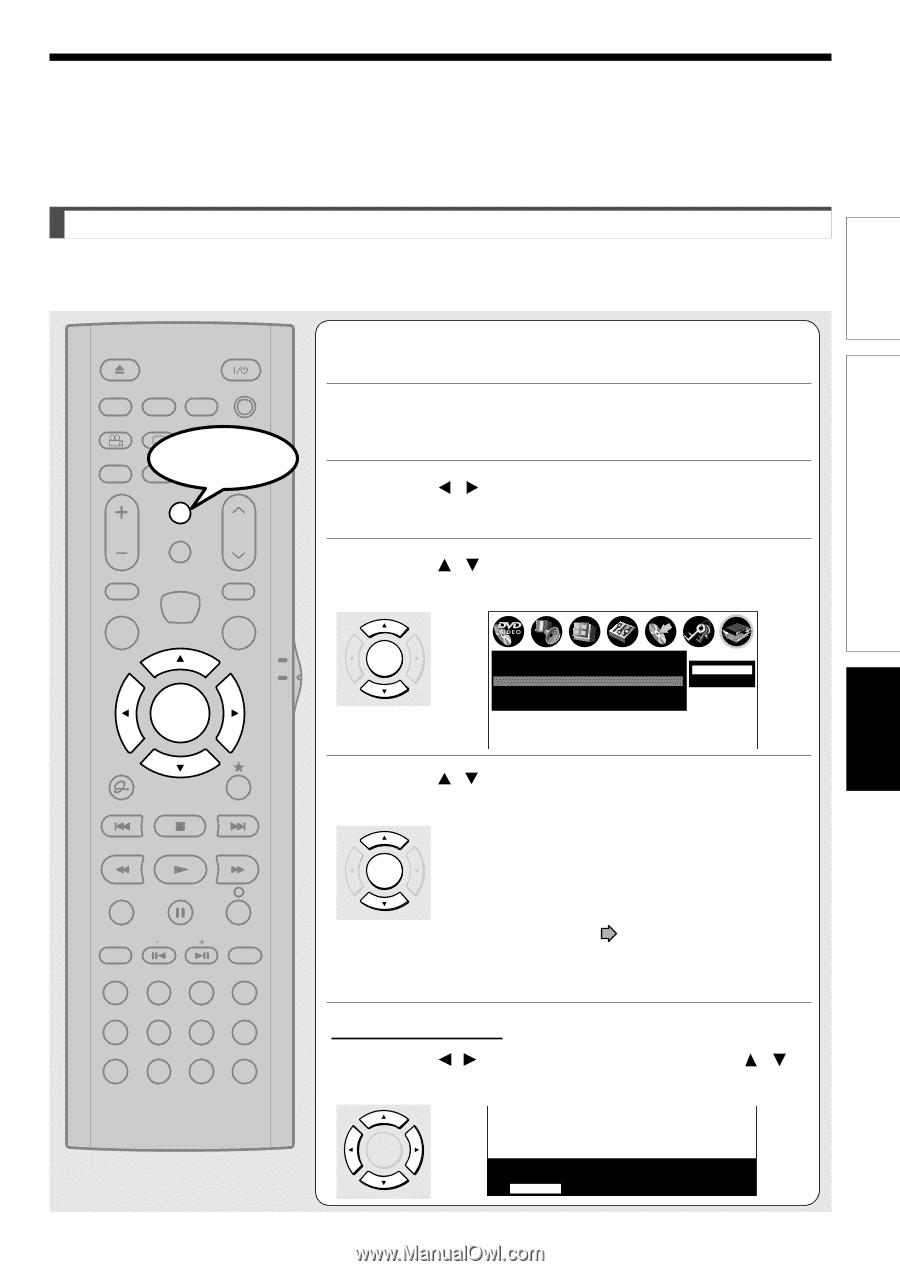
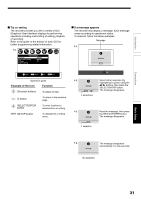
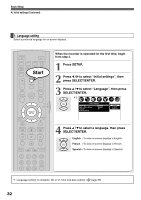
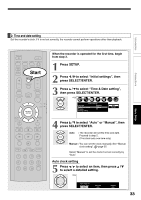
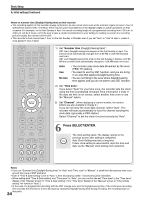
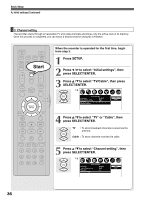
Introduction 2: Time and date setting Set the recorder's clock. If it is not set correctly, the recorder cannot perform operations other than playback. Connections Basic Setup OPEN/CLOSE DISPLAY FL SELECT DIMMER PROGRESSIVE ANGLE SUBTITLE AUDIO/SAP FREEZE Start REMAIN REC MODE EXTEND ZOOM SETUP VOL TIMESLIP CH MUTE INPUT SELECT TOP MENU EASY NAVI MENU SELECT/ ENTER INSTANT REPLAY QUICK MENU TV DVD INSTANT SKIP SKIP REV STOP SKIP FWD REV PLAY FWD REC SEARCH T ADJUST CHP DIVIDE 1 2 3 +10 4560 CLEAR 789 When the recorder is operated for the first time, begin from step 3. 1 Press SETUP. 2 Press / to select "Initial settings", then press SELECT/ENTER. 3 Press / to select "Time & Date setting", then press SELECT/ENTER. e.g. SELECT/ ENTER Initial settings Language English Time & Date setting Manual TV/Cable TV Channel setting Auto Manual 4 Press / to select "Auto" or "ManSEuTUP al", then press SELECT/ENTER. Auto : The recorder will set the time and date. Proceed to step 5. SELECT/ ENTER (This clock sets one time only.) Manual : You can set the clock manually. See "Manual clock setting". page 35 Select "Manual" to set the clock if not set correctly by "Auto". Auto clock setting 5 Press / to select an item, then press / to select a detailed setting. e.g. e.g. SELECT/ ENTER Auto clock set Summer time Use FRAME/ADJUST Time zone Auto Channel Auto 33
-
 1
1 -
2
-
3
-
4
-
5
-
6
-
7
-
8
-
9
-
10
-
11
-
12
-
13
-
14
-
15
-
16
-
17
-
18
-
19
-
20
-
21
-
22
-
23
-
24
-
25
-
26
-
27
-
 28
28 -
 29
29 -
 30
30 -
 31
31 -
 32
32 -
 33
33 -
 34
34 -
 35
35 -
 36
36 -
 37
37 -
 38
38 -
39
-
40
-
41
-
42
-
43
-
44
-
45
-
46
-
47
-
48
-
49
-
50
-
51
-
52
 |
 |