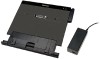
Toshiba PA3680U-1PRP User Guide - Page 25
Installing a printer (Windows® XP), Configuring audio ports - manual
 |
View all Toshiba PA3680U-1PRP manuals
Add to My Manuals
Save this manual to your list of manuals |
Page 25 highlights
Setting up and using the port replicator 25 Configuring audio ports Installing a printer (Windows® XP) 1 Connect your printer to the parallel port on the port replicator. 2 Dock your computer in the port replicator. 3 Click Start, Settings, and then Control Panel. 4 Double-click Printers and Faxes. 5 Click Add a printer. 6 In the Add Printer Wizard window, click Next. 7 Select Local printer attached to this computer. Make sure the "Automatically detect and install my Plug and Play printer" checkbox is not selected. 8 Click Next. 9 Select USB001 (Virtual printer port for USB) from the "Use the following port:" drop-down list. 10 Click Next. 11 Select the printer manufacturer and model. 12 If the printer came with an installation disk, click Have Disk.... Otherwise, click Next. 13 Follow the onscreen instructions to complete the installation. Configuring audio ports You can playback or record audio either through the port replicator's audio ports or the docked computer's audio ports. However, you cannot use the audio ports on the docked computer and on the port replicator at the same time. By default, the audio ports on the port replicator are automatically enabled each time you dock the computer. When you undock the computer, the audio ports on the computer are automatically reenabled. To change the default settings, you may need to manually adjust the audio settings in Windows®, as described in this section. NOTE If your media player is running when you undock or dock, you must close the application and wait approximately 10-15 seconds for the new settings to take effect before restarting the application.
-
 1
1 -
2
-
3
-
4
-
5
-
6
-
7
-
8
-
9
-
10
-
11
-
12
-
13
-
14
-
15
-
16
-
17
-
18
-
19
-
 20
20 -
 21
21 -
 22
22 -
 23
23 -
 24
24 -
 25
25 -
 26
26 -
 27
27 -
 28
28 -
 29
29 -
 30
30 -
31
-
32
-
33
-
34
-
35
-
36
-
37
-
38
-
39
-
40
-
41
-
42
-
43
-
44
-
45
-
46
-
47
-
48
-
49
-
50
-
51
-
52
-
53
-
54
-
55
-
56
-
57
-
58
-
59
-
60
-
61
-
62
-
63
-
64
-
65
-
66
-
67
-
68
-
69
-
70
-
71
-
72
-
73
-
74
-
75
-
76
-
77
-
78
-
79
-
80
-
81
-
82
-
83
-
84
-
85
-
86
-
87
-
88
-
89
-
90
-
91
-
92
-
93
-
94
-
95
-
96
-
97
-
98
-
99
-
100
-
101
-
102
-
103
-
104
-
105
-
106
-
107
-
108
-
109
-
110
-
111
-
112
-
113
-
114
-
115
-
116
-
117
-
118
-
119
-
120
-
121
-
122
 |
 |
