Toshiba Portege M750 PPM75A-09U010 Users Manual AU/NZ - Page 127
Web Camera, How to enable fingerprint boot authentication and Single, sign-on feature
 |
View all Toshiba Portege M750 PPM75A-09U010 manuals
Add to My Manuals
Save this manual to your list of manuals |
Page 127 highlights
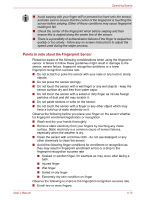
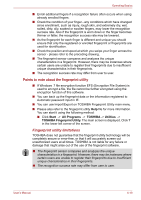
Operating Basics How to enable fingerprint boot authentication and Single sign-on feature It is necessary to first enroll your fingerprint with the TOSHIBA Fingerprint Utility prior to enabling and configuring the boot authentication and Single sign-on feature. You should check that your fingerprint is enrolled before configuring the settings. 1. Logon as Administrator (means a user has administrator privileges). 2. Click Start -> All Programs -> TOSHIBA -> Utilities -> TOSHIBA Fingerprint Utility. 3. Swipe your finger across the fingerprint sensor. 4. The TOSHIBA Fingerprint Utility main menu is displayed. Click Run As Administrator in lower left. 5. User Account Control window is displayed. Click Yes. 6. Swipe your finger across the fingerprint sensor. 7. Select Setting in the main menu to open the Setting window, you can ■ Select Boot authentication check box if you want to use the fingerprint boot authentication feature. ■ Select Boot authentication and Single sign-on check boxes if you want to use the Single sign-on feature. 8. Click Apply. 9. "Save succeeded" is displayed. Click OK. 10. Click Close. 11. "Are you sure you want to quit" is displayed. Click OK. It will be returned to the TOSHIBA Fingerprint Utility main menu. The modified configuration for fingerprint boot authentication and Single sign-on feature becomes effective the next time the system is booted up. Web Camera Some models are equipped with Web Camera, which is a device that allows you to record video or take photographs with your computer. You can use it for video chatting or video conferences using a communication tool such as Windows Live Messenger. TOSHIBA Web Camera Application will help you to add various video effects to your video or photograph. It enables the transmission of video and use of video chat via the internet using specialized applications. The effective pixel count for this web camera is 1.3 million. User's Manual 4-23
-
 1
1 -
2
-
3
-
4
-
5
-
6
-
7
-
8
-
9
-
10
-
11
-
12
-
13
-
14
-
15
-
16
-
17
-
18
-
19
-
20
-
21
-
22
-
23
-
24
-
25
-
26
-
27
-
28
-
29
-
30
-
31
-
32
-
33
-
34
-
35
-
36
-
37
-
38
-
39
-
40
-
41
-
42
-
43
-
44
-
45
-
46
-
47
-
48
-
49
-
50
-
51
-
52
-
53
-
54
-
55
-
56
-
57
-
58
-
59
-
60
-
61
-
62
-
63
-
64
-
65
-
66
-
67
-
68
-
69
-
70
-
71
-
72
-
73
-
74
-
75
-
76
-
77
-
78
-
79
-
80
-
81
-
82
-
83
-
84
-
85
-
86
-
87
-
88
-
89
-
90
-
91
-
92
-
93
-
94
-
95
-
96
-
97
-
98
-
99
-
100
-
101
-
102
-
103
-
104
-
105
-
106
-
107
-
108
-
109
-
110
-
111
-
112
-
113
-
114
-
115
-
116
-
117
-
118
-
119
-
120
-
121
-
 122
122 -
 123
123 -
 124
124 -
 125
125 -
 126
126 -
 127
127 -
 128
128 -
 129
129 -
 130
130 -
 131
131 -
 132
132 -
133
-
134
-
135
-
136
-
137
-
138
-
139
-
140
-
141
-
142
-
143
-
144
-
145
-
146
-
147
-
148
-
149
-
150
-
151
-
152
-
153
-
154
-
155
-
156
-
157
-
158
-
159
-
160
-
161
-
162
-
163
-
164
-
165
-
166
-
167
-
168
-
169
-
170
-
171
-
172
-
173
-
174
-
175
-
176
-
177
-
178
-
179
-
180
-
181
-
182
-
183
-
184
-
185
-
186
-
187
-
188
-
189
-
190
-
191
-
192
-
193
-
194
-
195
-
196
-
197
-
198
-
199
-
200
-
201
-
202
-
203
-
204
-
205
-
206
-
207
-
208
-
209
-
210
-
211
-
212
-
213
-
214
-
215
-
216
-
217
-
218
-
219
-
220
-
221
-
222
-
223
-
224
-
225
-
226
-
227
-
228
-
229
-
230
-
231
-
232
-
233
-
234
-
235
-
236
-
237
-
238
-
239
-
240
-
241
-
242
-
243
-
244
-
245
-
246
-
247
-
248
-
249
-
250
-
251
-
252
-
253
-
254
-
255
-
256
-
257
-
258
-
259
-
260
-
261
-
262
-
263
-
264
-
265
-
266
-
267
-
268
-
269
 |
 |
