Toshiba Portege M750 PPM75A-09U010 Users Manual AU/NZ - Page 195
HDD Priority Options, ENTER
 |
View all Toshiba Portege M750 PPM75A-09U010 manuals
Add to My Manuals
Save this manual to your list of manuals |
Page 195 highlights
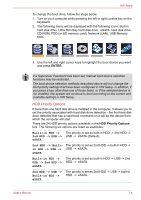
HW Setup To change the boot drive, follow the steps below. 1. Turn on your computer while pressing the left or right cursors key on the keyboard. 2. The following menu will be displayed with the following icons: Built-in hard disk drive, Ultra Slim Bay hard disk drive, eSATA hard disk drive, CD-ROM, FDD (or SD memory card), Network (LAN), USB Memory boot. 3. Use the left and right cursor keys to highlight the boot device you want and press ENTER. If a Supervisor Password has been set, manual boot device selection functions may be restricted. The boot device selection methods described above will not change the boot priority settings that have been configured in HW Setup. In addition, if you press a key other than one of those listed, or if the selected device is not installed, the system will continue to boot according to the current and available settings in HW Setup. HDD Priority Options If more than one hard disk drive is installed in the computer, it allows you to set the priority associated with hard disk drive detection - the first hard disk drive detected that has a valid boot command on it will be the device from which the computer will start. There are 24 HDD priority options available in the HDD Priority Options box. The following six options are listed as examples: Built-in HDD -> The priority is set as built-in HDD -> 2nd HDD -> 2nd HDD -> USB -> USB -> eSATA (Default). eSATA 2nd HDD -> Built- The priority is set as 2nd HDD -> built-in HDD -> in HDD -> USB -> USB -> eSATA. eSATA Built-in HDD -> USB -> 2nd HDD -> eSATA The priority is set as built-in HDD -> USB -> 2nd HDD -> eSATA. 2nd HDD -> USB -> The priority is set as 2nd HDD -> USB -> built-in Built-in HDD -> HDD -> eSATA. eSATA User's Manual 7-4
-
 1
1 -
2
-
3
-
4
-
5
-
6
-
7
-
8
-
9
-
10
-
11
-
12
-
13
-
14
-
15
-
16
-
17
-
18
-
19
-
20
-
21
-
22
-
23
-
24
-
25
-
26
-
27
-
28
-
29
-
30
-
31
-
32
-
33
-
34
-
35
-
36
-
37
-
38
-
39
-
40
-
41
-
42
-
43
-
44
-
45
-
46
-
47
-
48
-
49
-
50
-
51
-
52
-
53
-
54
-
55
-
56
-
57
-
58
-
59
-
60
-
61
-
62
-
63
-
64
-
65
-
66
-
67
-
68
-
69
-
70
-
71
-
72
-
73
-
74
-
75
-
76
-
77
-
78
-
79
-
80
-
81
-
82
-
83
-
84
-
85
-
86
-
87
-
88
-
89
-
90
-
91
-
92
-
93
-
94
-
95
-
96
-
97
-
98
-
99
-
100
-
101
-
102
-
103
-
104
-
105
-
106
-
107
-
108
-
109
-
110
-
111
-
112
-
113
-
114
-
115
-
116
-
117
-
118
-
119
-
120
-
121
-
122
-
123
-
124
-
125
-
126
-
127
-
128
-
129
-
130
-
131
-
132
-
133
-
134
-
135
-
136
-
137
-
138
-
139
-
140
-
141
-
142
-
143
-
144
-
145
-
146
-
147
-
148
-
149
-
150
-
151
-
152
-
153
-
154
-
155
-
156
-
157
-
158
-
159
-
160
-
161
-
162
-
163
-
164
-
165
-
166
-
167
-
168
-
169
-
170
-
171
-
172
-
173
-
174
-
175
-
176
-
177
-
178
-
179
-
180
-
181
-
182
-
183
-
184
-
185
-
186
-
187
-
188
-
189
-
 190
190 -
 191
191 -
 192
192 -
 193
193 -
 194
194 -
 195
195 -
 196
196 -
 197
197 -
 198
198 -
 199
199 -
 200
200 -
201
-
202
-
203
-
204
-
205
-
206
-
207
-
208
-
209
-
210
-
211
-
212
-
213
-
214
-
215
-
216
-
217
-
218
-
219
-
220
-
221
-
222
-
223
-
224
-
225
-
226
-
227
-
228
-
229
-
230
-
231
-
232
-
233
-
234
-
235
-
236
-
237
-
238
-
239
-
240
-
241
-
242
-
243
-
244
-
245
-
246
-
247
-
248
-
249
-
250
-
251
-
252
-
253
-
254
-
255
-
256
-
257
-
258
-
259
-
260
-
261
-
262
-
263
-
264
-
265
-
266
-
267
-
268
-
269
 |
 |
